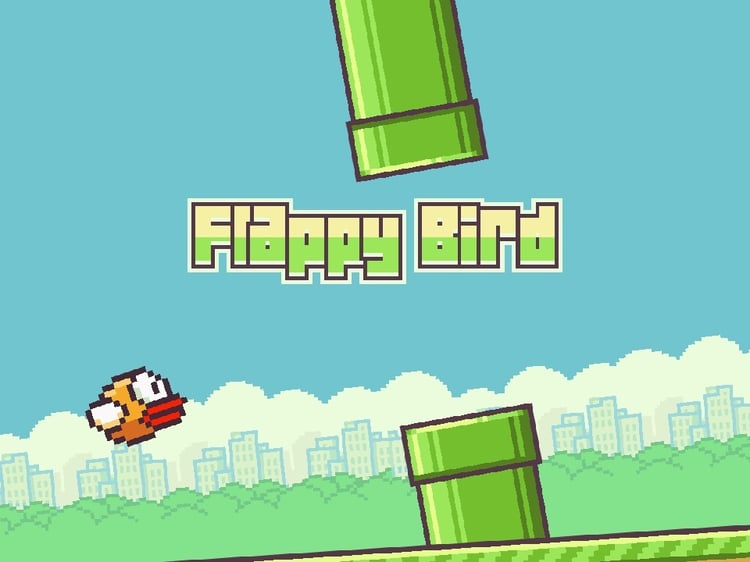
Have you ever wanted to create your very own version of Flappy Bird? You’re in luck! Today, we’re diving into the world of Scratch, a beginner-friendly coding platform that makes it easy for anyone to start programming. In this guide, you’ll learn step-by-step how to make Flappy Bird from scratch—pun intended! Whether you’re new to coding or just looking for a fun project, this tutorial will help you build a game that you can share with friends and family.
Flappy Bird is a simple yet addictive game where you control a bird trying to fly through gaps in pipes without hitting them. It’s a fantastic project to start with because it teaches you the basics of game design, motion, collision detection, and more. Plus, you’ll get to be creative with your graphics and sounds!
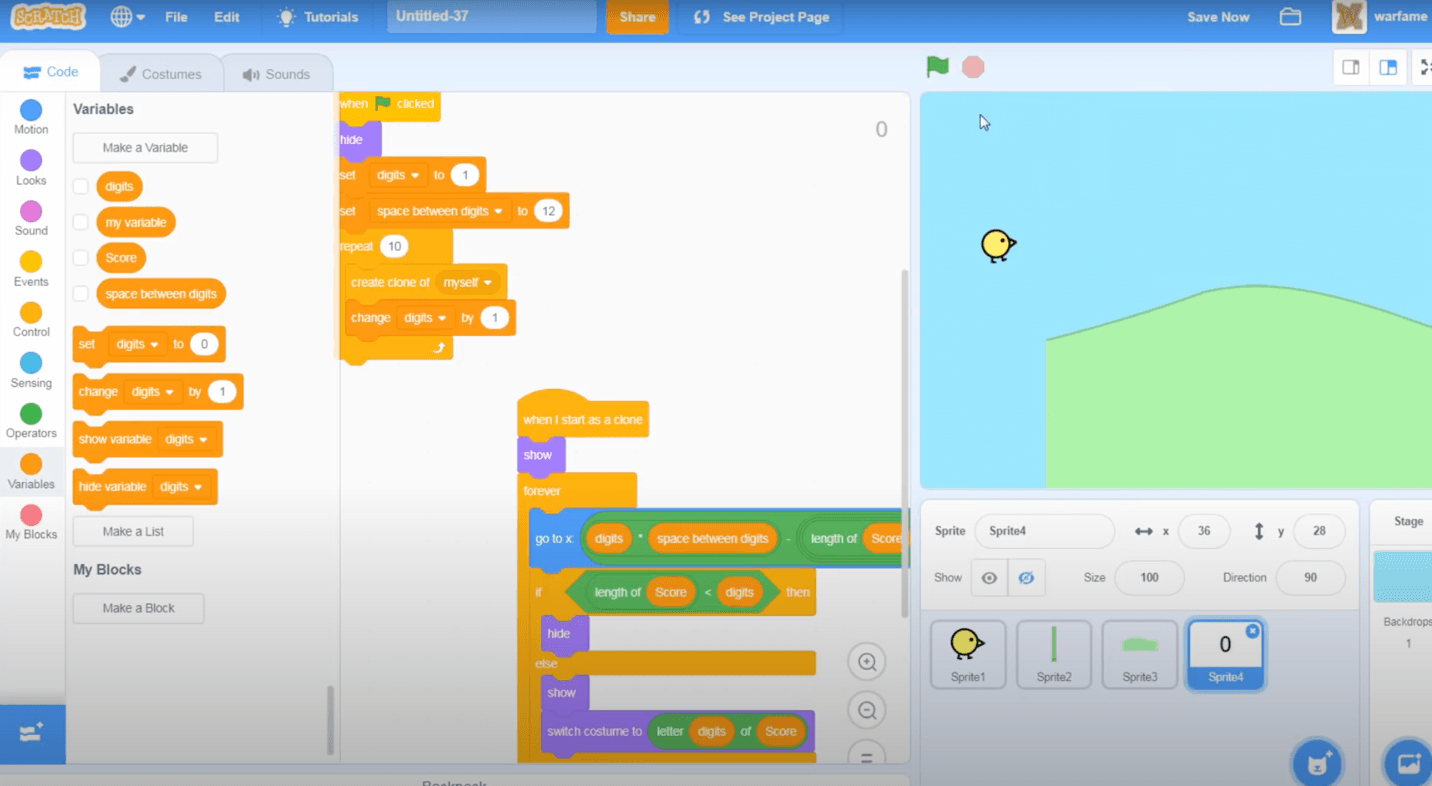
Before we dive into the steps, check out this helpful video tutorial that will give you a visual overview of the process:
Ready to get started? Let’s set up our project and bring Flappy Bird to life in Scratch!
Table of Contents
Step 1: Setting Up Your Project
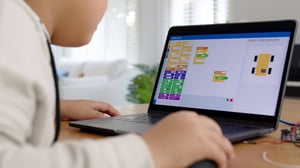
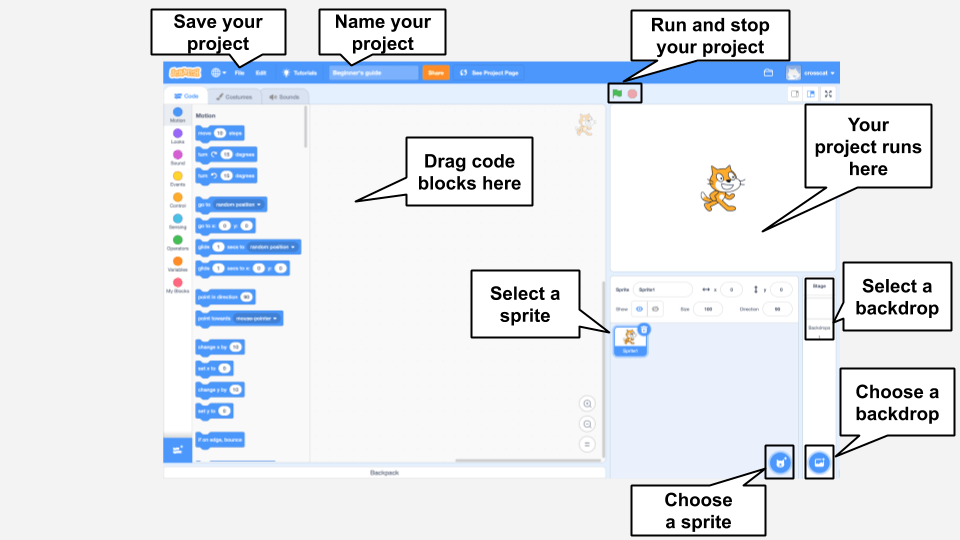
First things first, let’s get our project set up in Scratch. If you don’t already have a Scratch account, go ahead and sign up at scratch.mit.edu. Once you’re logged in, click on “Create” to start a new project. This will open the Scratch editor where you’ll bring your Flappy Bird game to life.
- Create a New Project: Name your project “Flappy Bird” to keep things organized.
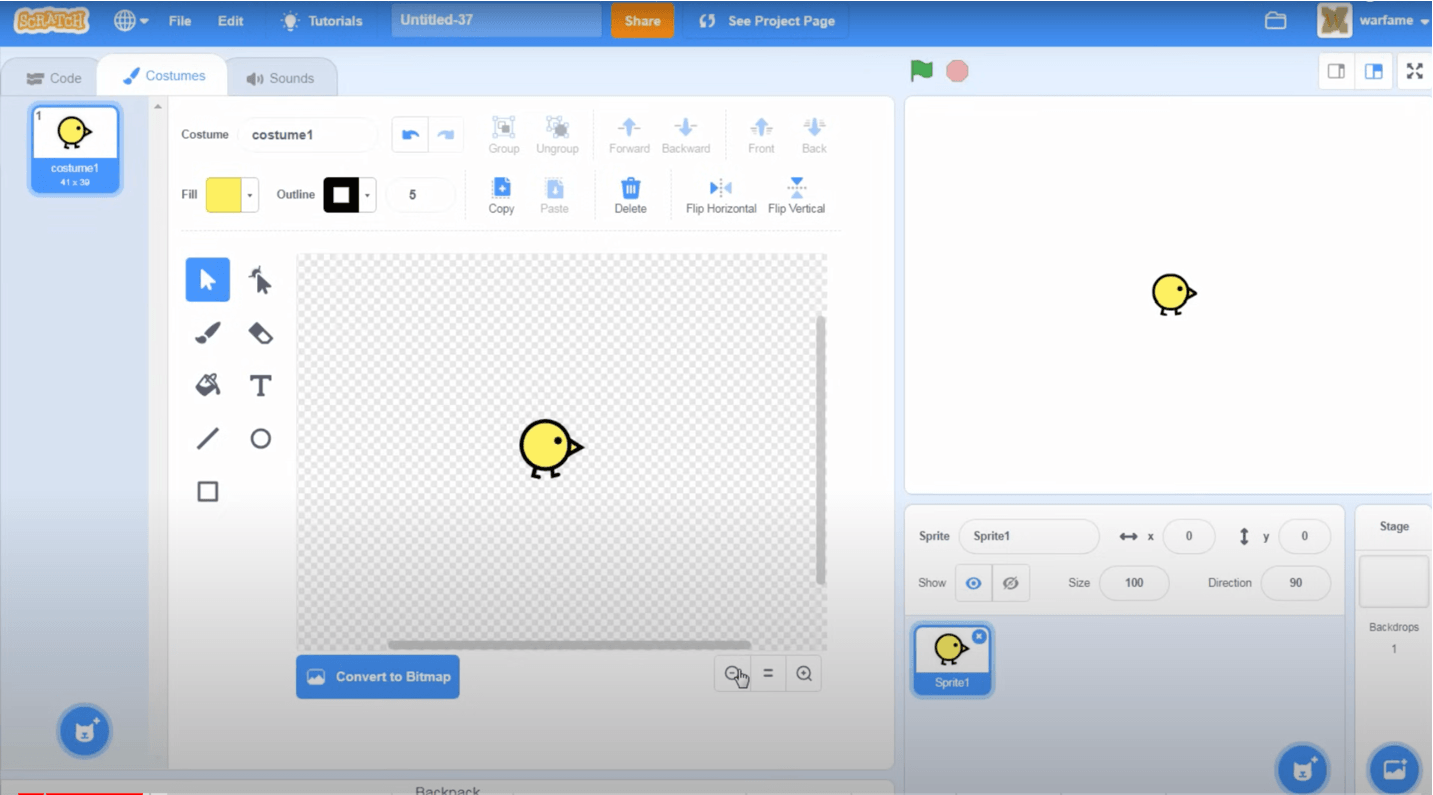
- Add a Sprite: Click on the “Choose a Sprite” button and either select a pre-made bird sprite or draw your own. This will be your main character.
- Choose a Backdrop: Click on the “Choose a Backdrop” button and pick a background that suits your game. You can use the built-in backdrops or upload your own.
Now that we have our main character and backdrop, we’re ready to start coding the game’s mechanics. This setup lays the foundation for everything we’ll do next.
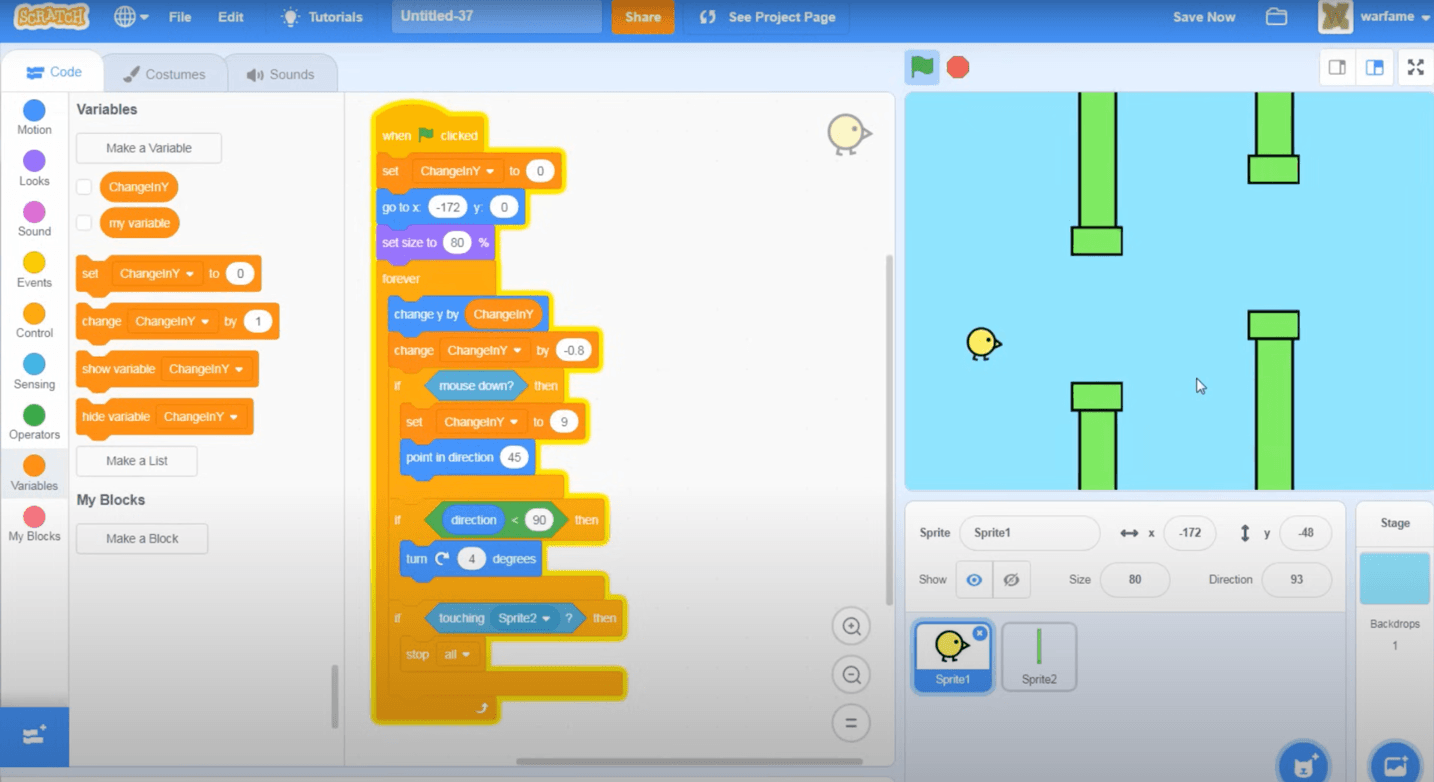
Step 2: Creating the Flappy Motion
Now that we have our project set up, it’s time to bring our bird to life with some flappy motion! The essence of the game lies in the bird’s ability to flap its wings and stay airborne, so this step is crucial.
Once you have your bird sprite, let’s add the code to make it flap.
Set the Initial Position and Gravity: We need to set the bird’s initial position and simulate gravity to make it fall.
- Go to the “Events” category and drag the when green flag clicked block.
- Place the bird at a starting position using the go to x: y: block from the “Motion” category.
- Create a variable named “Gravity” to control the bird’s downward motion. Set this variable to a negative value, like -5, using the set Gravity to block from the “Variables” category
Flap Mechanism: We need to make the bird flap when the space bar is pressed.
- Add the when space key pressed block from the “Events” category.
- Increase the bird’s vertical position by changing the “y” position. Use the change y by block and set it to a positive value, like 10 or 15.
Apply Gravity Continuously: To make the bird fall continuously, we need a loop that constantly decreases the bird’s “y” position.
- Use a forever block from the “Control” category.
- Inside the forever block, use a change y by block and set it to the Gravity variable to simulate falling.
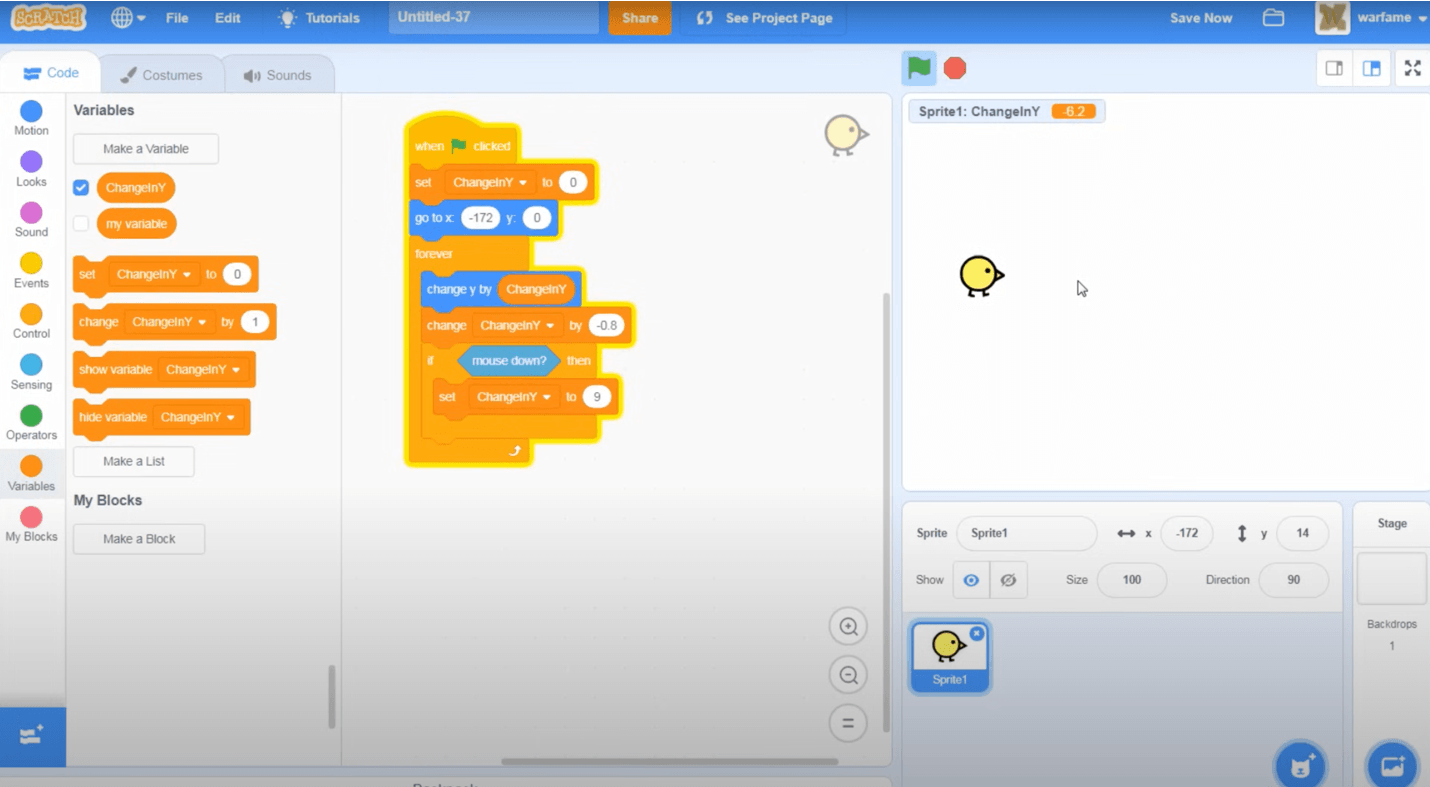
Here’s a basic example of what your code might look like:
when green flag clicked
go to x: -100 y: 0
set Gravity to -5
forever
change y by Gravity
when space key pressed
change y by 15
With this setup, your bird will now flap when you press the space bar and fall when you don’t. This flappy motion is what makes the game challenging and fun!
Step 3: Designing the Obstacles
The next step in our Flappy Bird game is to design the obstacles. These obstacles will be pipes that the bird has to navigate through. We’ll create pairs of pipes that move from right to left across the screen.
Creating the Pipe Sprites: Start by creating or selecting a pipe sprite. You can draw your own or find one in the Scratch library. You’ll need two costumes for your pipe sprite: one for the top pipe and one for the bottom pipe.
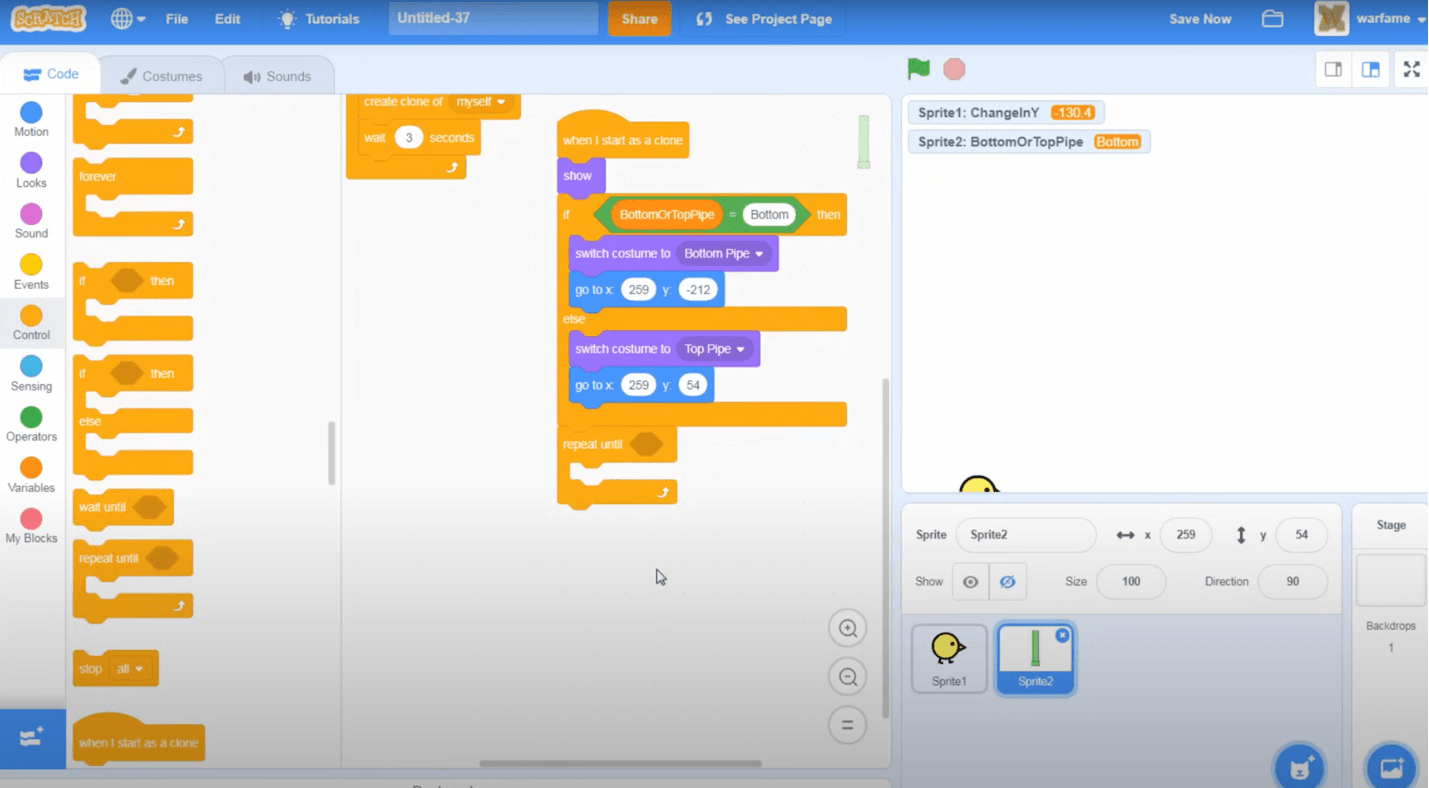
Setting Up the Pipe Movement: We want the pipes to continuously move across the screen and reset after they pass off the left edge.
- Use the when green flag clicked block to initialize the pipes’ positions.
- Set the pipes’ starting positions off the right edge of the screen using the go to x: y: block.
- Use a forever loop to move the pipes to the left. Inside the loop, use the change x by block and set it to a negative value to move the pipes leftward.
- Add an if on edge, bounce block to reset the pipes’ position after they go off-screen.
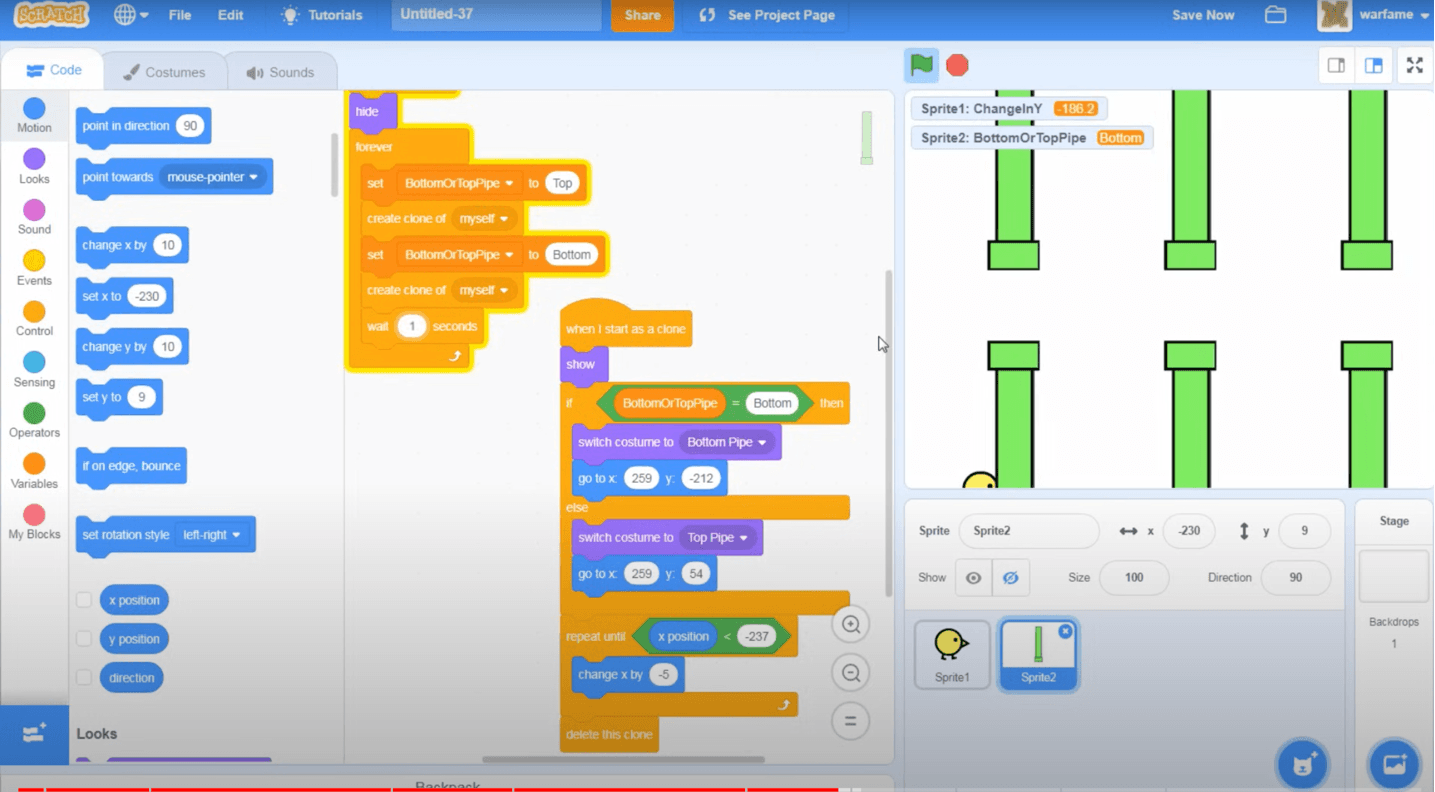
Randomizing Pipe Positions: To make the game more interesting, the gap between the top and bottom pipes should vary each time they reset.
- Use the pick random block from the “Operators” category to set different heights for the pipes.
- Create two variables, “Top Pipe Y” and “Bottom Pipe Y“, to control the vertical positions of the pipes.
- Inside the forever loop, set the y positions of the pipes to these variables, randomized each time they reset.
Here’s an example of how you can set up the code for the pipes:
when green flag clicked
go to x: 240 y: (pick random -100 to 100)
forever
change x by -5
if <touching edge> then
go to x: 240 y: (pick random -100 to 100)
With these steps, you now have pipes moving across the screen at random heights, creating the obstacles your bird needs to fly through. The challenge is starting to take shape, and the fun is just beginning!
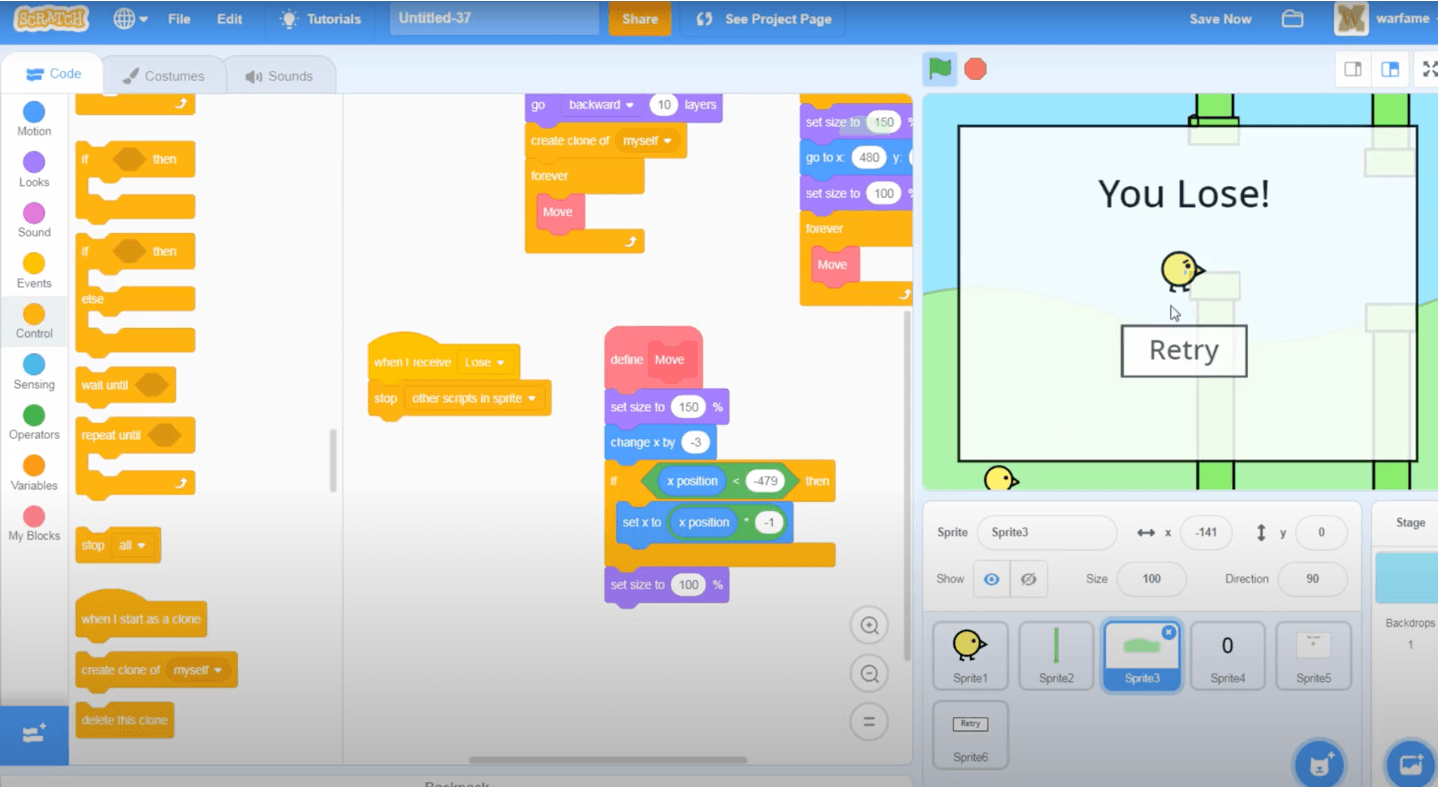
Step 4: Adding Backgrounds and Visual Elements
A visually appealing game is more fun to play, so let’s enhance our Flappy Bird game by adding backgrounds and visual elements. This step will involve setting a background that complements your game and ensuring that all visual elements look cohesive.
- Start by selecting or creating a background that fits the theme of your game. Scratch provides a variety of backgrounds, or you can upload your own.
- Go to the “Backdrops” tab and choose or create a backdrop. Popular choices for Flappy Bird include sky scenes with clouds or other outdoor environments.
- Apart from the bird and pipes, you might want to add other visual elements like clouds, trees, or the ground to make the game more engaging.
- Create sprites for these elements and position them accordingly on the stage.
- For static elements like trees or ground, you can set their position and leave them there. For moving elements like clouds, you can use a forever loop to make them move slowly to the left to create a sense of motion.
- Ensure that the visual elements are layered correctly so that the bird and pipes remain the focus.
- Use the go to front layer and go to back layer blocks from the “Looks” category to arrange the layers of your sprites. For instance, you might want the bird to be in the front layer and the background in the back layer.
Here’s an example of how to set up a moving cloud:
when green flag clicked
go to x: 240 y: (pick random -100 to 100)
forever
change x by -1
if <touching edge> then
go to x: 240 y: (pick random -100 to 100)
Adding these visual elements will make your game look more professional and enjoyable for players.
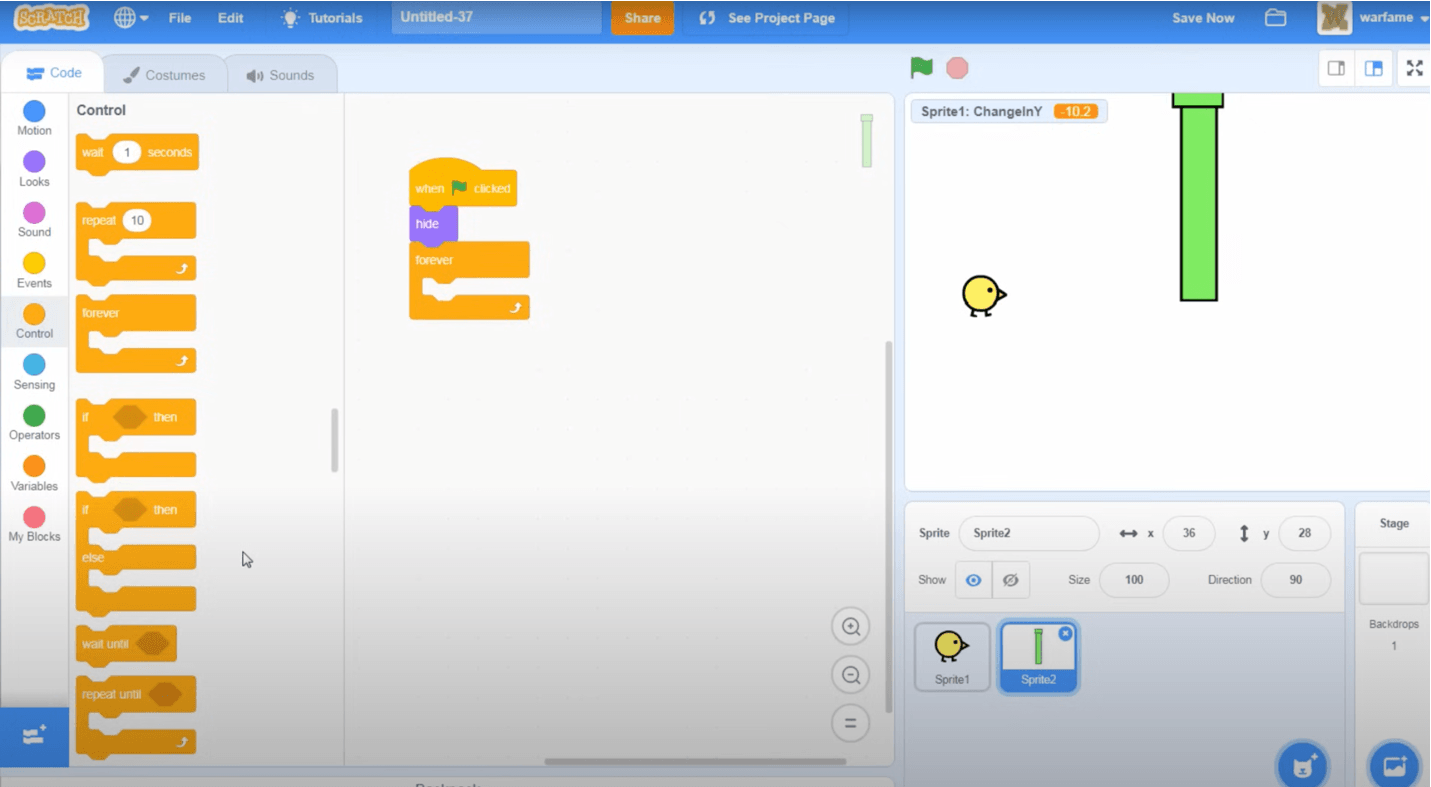
Step 5: Coding the Game Over Condition
A crucial part of any game is determining when it ends. For Flappy Bird, the game should end when the bird collides with a pipe or falls to the ground. This step involves detecting these collisions and creating a game over sequence.
- We need to detect when the bird touches a pipe or the ground.
- Use the if statement to check for collisions. Inside the forever loop of your bird’s script, add conditions to detect touching pipes or the edge (representing the ground).
- When a collision is detected, we need to stop the game.
- Use the stop all block from the “Control” category to halt all scripts when a collision occurs.
- To make it clear that the game is over, you can display a “Game Over” message on the screen.
- Create a new sprite for the “You Lose” message and position it in the center of the screen. Make sure it’s hidden when the game starts and only shows when the game ends.
- Use the show and hide blocks from the “Looks” category to control the visibility of the “You Lose” message.
Here’s an example of how to set up the game over condition:
when green flag clicked
hide
forever
if <touching [pipe v] or touching [edge v]> then
broadcast [you lose v]
stop all
when I receive [you lose v]
show
go to x: 0 y: 0
In this setup, when the bird touches a pipe or the ground, the game broadcasts a “you lose” message, stops all scripts, and shows the “Game Over” message in the center of the screen. This clear indication helps players understand that they need to restart the game.
Step 6: Keeping Score
To make your Flappy Bird game more engaging and competitive, it’s essential to add a scoring system. Keeping track of the score gives players a sense of achievement and encourages them to improve their performance.
- First, we need to create a variable to keep track of the score.
- Go to the “Variables” category and click “Make a Variable.” Name it “Score.”
- The score should increase each time the bird successfully passes through a pair of pipes.
- In the script controlling the pipes, add a condition to increase the score whenever a pipe moves past the bird. This can be done by checking the bird’s position relative to the pipes.
- We want the score to be visible to the player at all times.
- Use the show variable [Score v] block to display the score on the screen. Position it in a clear and visible area, usually at the top center of the screen.
Here’s an example of how to update and display the score:
when green flag clicked
set [Score v] to 0
forever
if <touching [bird v]> then
change [Score v] by 1
wait until <not <touching [bird v]>>
In this setup, the score increases by 1 each time the bird successfully navigates through the pipes. The score variable is displayed on the screen, providing instant feedback to the player.
Step 7: Adding Sound Effects
Sound effects can greatly enhance the gaming experience by making it more immersive and enjoyable. In Flappy Bird, we can add sounds for flapping, passing through pipes, and game over events.
- Choosing Sound Effects: Start by selecting or uploading sound effects for your game. You can find suitable sounds in Scratch’s library or use your own.
- Go to the “Sounds” tab of your bird sprite and choose or upload a flapping sound.
- Do the same for the pipes and the game over event.
- Adding Flapping Sound: We want a sound to play each time the bird flaps its wings.
- In the script where the bird flaps, add a start sound [flap v] block from the “Sound” category.
- Adding Passing Sound: When the bird successfully passes through a pipe, we can play a sound to celebrate the achievement.
- In the script where the score increases, add a start sound [score v] block.
- Adding Game Over Sound: Finally, we want a sound to play when the game ends.
- In the script where the game over condition is set, add a start sound [game over v] block.
Here’s an example of how to add sound effects:
when green flag clicked
forever
if <key [space v] pressed?> then
start sound [flap v]
change y by 15
if <touching [pipe v]> then
start sound [score v]
if <touching [edge v]> then
start sound [game over v]
stop all
With these sound effects in place, each action in your game will be accompanied by an appropriate sound, making the game more dynamic and fun to play. The flapping sound adds to the realism, the scoring sound enhances the sense of accomplishment, and the game over sound provides a clear indication of the end of the game.
Step 8: Testing and Debugging
Now that we’ve built our Flappy Bird game in Scratch, it’s time for one of the most important steps: testing and debugging. This process ensures that the game runs smoothly and that any issues are identified and fixed before players start enjoying your creation.
- Playing the Game: Begin by playing the game yourself. Try to go through several rounds to see if everything works as expected.
- Pay attention to the bird’s movement, the pipe’s motion, collision detection, score updates, and sound effects. Ensure that all elements are functioning as intended.
- Identifying Bugs: While playing, you might encounter bugs or unexpected behavior. These could include issues like the bird not flapping properly, pipes not resetting, or the game over condition not triggering correctly.
- Make a note of any problems you find. It’s helpful to write down what happened and under what circumstances the bug occurred.
- Debugging: Use Scratch’s built-in tools to debug your game. This involves reviewing your code to find and fix errors.
- Check the scripts for each sprite to ensure that all blocks are connected correctly and that there are no logical errors.
- Use the say block temporarily to display variable values and debug messages on the screen. This can help you understand what’s going wrong at any point in your code.
- Refining the Game: After identifying and fixing bugs, consider ways to refine and enhance your game.
- Adjust the difficulty level by tweaking variables like the bird’s flap height or the speed of the pipes.
- Add more visual elements or sounds to make the game more engaging.
- Test different scenarios to ensure the game remains challenging and fun.
Here’s a simple example of using the say block for debugging:
when green flag clicked
forever
if <touching [pipe v]> then
say [Game Over!] for 2 seconds
stop all
Testing and debugging might take some time, but it’s crucial for creating a polished and enjoyable game. Take your time and don’t rush through this step.
Read Also:
Create Flappy Bird and More in Scratch!
Congratulations! You’ve just created your very own Flappy Bird game in Scratch. By following these steps, you’ve learned how to set up a project, create motion, design obstacles, add visual elements, implement a scoring system, incorporate sound effects, and thoroughly test and debug your game.
This project not only introduces you to the basics of game design but also enhances your problem-solving skills and creativity. Whether you’re a beginner or have some coding experience, building a game like this is a fantastic way to develop your programming knowledge.
Remember, the possibilities in Scratch are endless. You can continue to improve your Flappy Bird game by adding new features, changing the design, or even creating new levels. The skills you’ve learned here can also be applied to other coding projects.
Keep experimenting, keep coding, and most importantly, have fun! If you enjoyed this project, be sure to explore other tutorials and challenges on our blog. For more exciting coding adventures and expert guidance, check out our online coding courses at CodaKid!
Happy coding!