Table of Contents
Exploring the Creative Landscape: Best Bridge Ideas and Designs in Minecraft
Minecraft, a ubiquitous 3D sandbox game, has transcended its gaming origins to become a canvas for artistic expression and architectural marvels. In this academic exploration, we delve into the realm of Minecraft’s bridges – intricate structures that not only serve functional purposes but also showcase the imaginative prowess of players. From rustic wooden footbridges to grandiose suspension spans, the Minecraft universe boasts an array of captivating designs that merge aesthetics with functionality.
The best Minecraft bridge designs and ideas for 2024
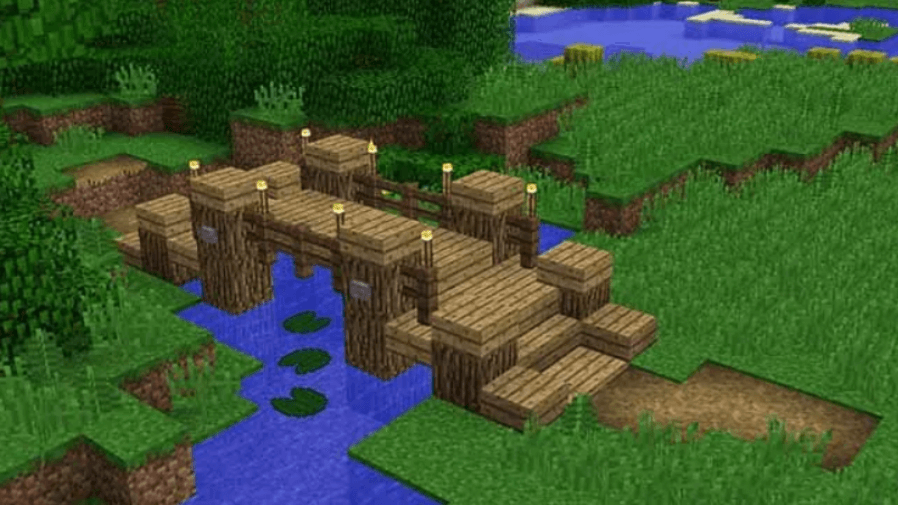
Simple Wooden Bridge in Minecraft
Building a simple wooden bridge in Minecraft is a great way to connect two points across a river or a ravine. Here’s a step-by-step guide to creating a basic yet charming wooden bridge:
Materials Needed:
- Wooden planks (any type)
- Wooden slabs
- Fences (matching the wood type)
- Torches (optional, for lighting).
Steps to Build the Bridge:
1. Foundation and Length:
- Start by deciding the location and length of your bridge. Place wooden planks to span the gap you want to bridge. This will be your bridge’s walking surface.
2. Supports:
- At both ends of your bridge, and possibly in the middle if it’s a long bridge, build vertical supports using wooden planks. These should reach down to the ground or water level.
3. Rails:
- Along both sides of your bridge, place fences for safety. This creates a railing and adds to the aesthetic appeal.
4. Details and Aesthetics:
- To make your bridge look more interesting, you can add details like wooden slabs for a smoother walking path, or use stairs for a sloped effect at the ends.
- If your bridge is quite long, consider adding supports underneath at regular intervals for a more realistic look.
5. Lighting:
- Place torches along the railing at regular intervals. This provides lighting for safety at night and adds a warm, welcoming glow.
6. Customization:
- Feel free to customize your bridge with different types of wood or by adding decorations like banners, signs, or potted plants.
Tips:
- Symmetry is Key: For a visually pleasing bridge, try to keep your design symmetrical.
- Environment Blending: Choose wood types and designs that blend well with the surrounding environment.
- Functionality: Ensure your bridge is wide enough for comfortable use, especially if you’ll be using it frequently or with animals.
By following these steps, you can create a simple yet effective wooden bridge in Minecraft that is not only functional but also adds to the beauty of your build. Remember, Minecraft is all about creativity, so feel free to modify and personalize your bridge as you see fit!
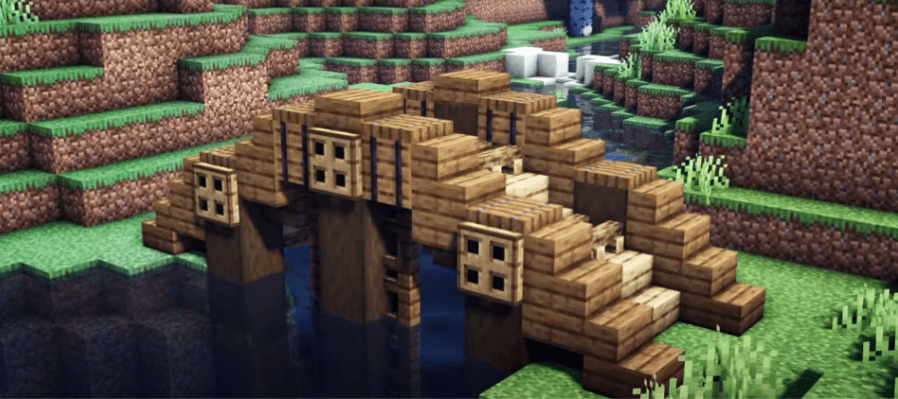
Curved Wooden Minecraft Bridge
Creating a curved wooden bridge in Minecraft involves both planning and construction techniques to achieve an aesthetically pleasing and functional design. Here’s a guide to capture the essence and steps for building such a bridge:
Essence of a Curved Wooden Minecraft Bridge
- Visual Appeal: The curve adds a natural, flowing look, contrasting the typically blocky Minecraft world.
- Functionality: It serves to connect two points over obstacles like rivers or ravines.
- Materials: Primarily uses wooden blocks, planks, slabs, and fences, offering a rustic and organic feel.
- Integration with Surroundings: The wooden texture blends well with most natural landscapes in Minecraft.
Steps to Create the Bridge
1. Design Planning:
- Location Selection: Choose a spot where the bridge will span, ideally over a river or a gap.
- Curve Sketching: Outline the curve’s path. You can use dirt or a similar placeholder block to mark the curve.
2. Foundation Building:
- Pillars: Erect wooden pillars at regular intervals along the curve to support the bridge.
- Height Variation: Adjust the height of the pillars to match the bridge’s curvature.
3. Deck Construction:
- Framework: Start laying wooden planks along the marked curve.
- Curvature: Achieve the curved effect by incrementally adjusting the direction of the planks.
- Slabs and Stairs: Use wooden slabs and stairs for smoother transitions and a more rounded appearance.
4. Railing and Details:
- Safety Rails: Add wooden fences or walls along the edges for safety and aesthetics.
- Decorative Elements: Incorporate lanterns, signs, or banners for added detail.
5. Finishing Touches:
- Integration: Ensure the bridge’s ends seamlessly connect with the terrain.
- Landscaping: Modify the surrounding area with trees, bushes, or terraforming for a natural look.
6. Testing and Adjustment:
- Usability Check: Walk across the bridge to ensure it’s functional and comfortable to use.
- Visual Inspection: Make adjustments to improve the bridge’s overall look and integration with the environment.
Remember, in Minecraft, creativity is key. Feel free to experiment with different types of wood and decorative elements to make your bridge unique.
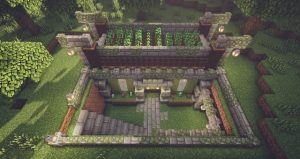
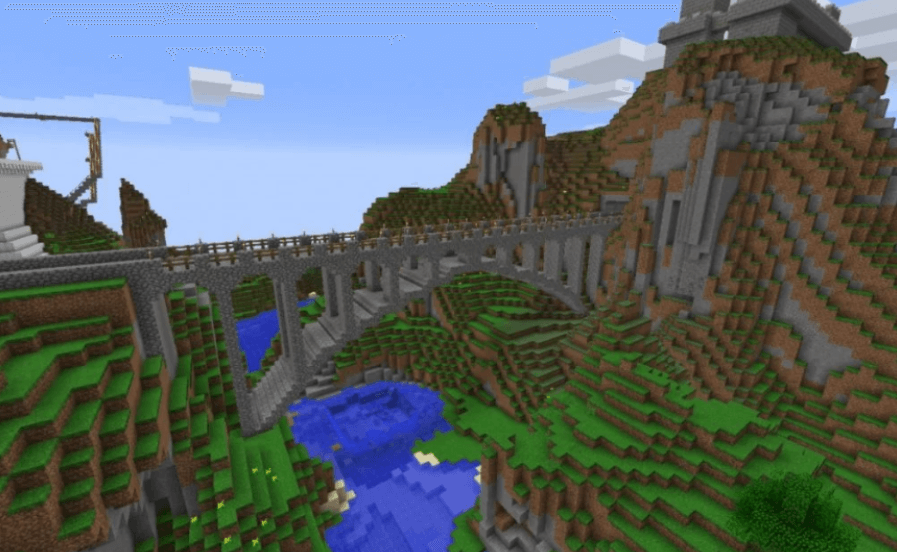
Large Stone Minecraft Bridge
Creating a large stone bridge in Minecraft is a blend of architectural design and in-game construction skills. The essence of such a bridge lies in its grandeur, durability, and harmonious integration with the Minecraft environment. Here’s a detailed guide on the essence and steps to build a large stone bridge in Minecraft:
Essence of a Large Stone Minecraft Bridge
- Grandeur and Scale: The bridge should be imposing and significant in size, making a statement in the landscape.
- Durability and Strength: Stone materials convey a sense of sturdiness and permanence.
- Aesthetic Appeal: Architectural details such as arches, columns, and decorative elements add to the visual impact.
- Functionality: It should serve a practical purpose, like connecting two distant terrains or spanning over a large body of water or a deep chasm.
- Materials: Primarily constructed from stone blocks, stone bricks, cobblestone, and possibly accents with materials like iron bars or lanterns for lighting.
Steps to Create the Bridge
1. Initial Planning:
- Site Selection: Choose a location that demands a large bridge, like a wide river, canyon, or valley.
- Design Drafting: Sketch a rough design, considering the length, width, and height of the bridge.
2. Foundation and Pillars:
- Solid Base: Start by creating a strong foundation, especially if the bridge spans a considerable distance.
- Pillar Construction: Erect large pillars at regular intervals for support. These can include arches for aesthetic appeal.
3. Building the Deck:
- Main Pathway: Lay down a flat pathway made of stone blocks or slabs across the pillars.
- Arches and Supports: Construct arches beneath the bridge for additional structural integrity and visual appeal.
4. Side Railings and Details:
- Safety Rails: Build side railings or parapets for safety, using stone walls, iron bars, or fences.
- Decorative Elements: Add details like carved stone, statues, or lanterns for lighting and decoration.
5. Integration with Environment:
- Landscape Blending: Ensure the bridge ends blend seamlessly with the surrounding terrain.
- Additional Landscaping: Consider adding elements like trees, vines, or water features to complement the bridge.
6. Finishing Touches:
- Texture Variation: Use a mix of stone types and designs to add texture and prevent a monotonous look.
- Inspection and Adjustment: Walk through and inspect the bridge, making any necessary adjustments to improve its functionality and appearance.
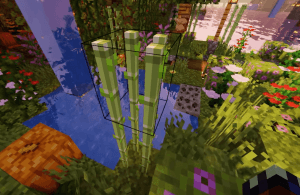
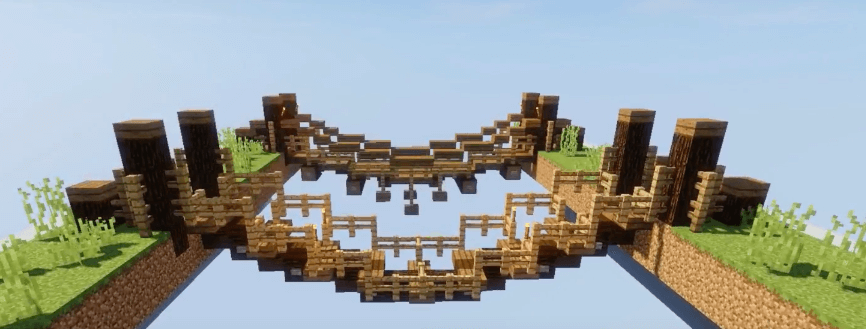
Drooped Rope Bridge in Minecraft
Creating a drooped rope bridge in Minecraft captures the essence of a rustic, adventurous pathway, often found in natural or jungle settings. Such bridges are characterized by their suspended, sagging design, which creates a sense of adventure and precariousness. Here’s how to capture the essence and steps to build a drooped rope bridge in Minecraft:
Essence of a Drooped Rope Bridge
- Rustic Charm: The bridge has a simple, handmade look, often found in remote or natural areas.
- Suspended Design: Characterized by its sagging middle, the bridge appears to hang loosely between two points.
- Adventure Feel: Walking across it evokes a sense of adventure and a little thrill, as it sways or bounces slightly.
- Materials: Primarily constructed with wood (planks, slabs, fences) and ropes (represented by leads or strings).
- Integration with the Environment: Often blends with a forest, jungle, or mountainous landscape, adding to the natural aesthetic.
Steps to Create the Bridge
1. Location and Design Planning:
- Choose the Span: Select a location, such as between two cliffs or over a river, where a drooped bridge would be fitting.
- Visualize the Sag: Plan the degree of droop or sag the bridge will have.
2. Building the Supports:
- Anchor Points: Create two sturdy anchor points on either side of the span, like wooden platforms or natural landings.
- Vertical Supports: Erect tall supports (like wooden posts) on these anchor points to simulate where the ropes will hang.
3. Constructing the Rope Lines:
- Creating the Droop: Use strings or leads to create the drooping lines from one support to the other. You might need to use blocks to simulate the droop and then replace them with strings.
- Horizontal Lines: Connect the top of the supports with a straight line for added realism.
4. Building the Walkway:
- Placing the Planks: Attach wooden planks or slabs along the drooped lines, following the curve.
- Gaps and Irregularities: Leave small gaps or use different wood types for a more rustic appearance.
5. Side Rails and Additional Supports:
- Rope Rails: Add side railings using fences or more strings to simulate rope rails.
- Additional Supports: If needed, add extra strings or slabs beneath the bridge for more support.
6. Final Touches:
- Integration with Surroundings: Add vines, leaves, or other natural elements to blend the bridge into the landscape.
- Testing and Adjustment: Walk across the bridge to ensure it’s functional and adjust the aesthetic as needed.
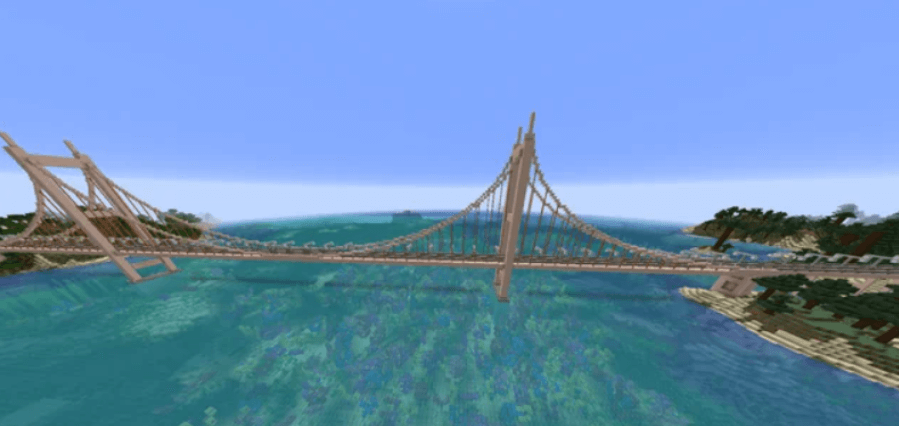
Large Suspension Bridge in Minecraft
Creating a large suspension bridge in Minecraft is a task that combines engineering ingenuity with creative design. Such bridges are characterized by their impressive scale and the use of suspension cables or chains to support the roadway. Here’s a guide to capture the essence and steps for building a large suspension bridge in Minecraft:
Essence of a Large Suspension Bridge
- Engineering Marvel: These bridges are a testament to structural design, showcasing long spans supported by towers and cables.
- Iconic Aesthetics: They often become landmarks due to their size and distinctive appearance.
- Materials: Primarily uses materials like stone or concrete for the towers and road deck, and iron bars or chains for the suspension cables.
- Functionality: Designed to span large distances, such as wide rivers or valleys, allowing safe and efficient passage.
- Visual Impact: The towering structures and sweeping cables create a dramatic visual effect in the landscape.
Steps to Create the Bridge
1. Planning and Design:
- Location Selection: Choose a wide span to build the bridge, like a large river or a deep chasm.
- Scale Determination: Decide on the length, width, and height of the bridge.
2. Building the Towers:
- Foundation: Start with a strong base for each tower on either side of the span.
- Tower Construction: Build tall, sturdy towers using stone or concrete blocks. The height should be proportional to the length of the span.
3. Creating the Road Deck:
- Framework: Begin constructing the road deck from one end, using slabs or blocks. It should extend from one tower to the other.
- Support: Ensure the road deck is well-supported as it extends towards the middle of the span.
4. Installing Suspension Cables:
- Cable Design: Use iron bars or chains to create the suspension cables. They should extend from the top of the towers and curve down to connect to the road deck.
- Symmetry: Make sure the cables are symmetrical and evenly spaced for both aesthetics and stability.
5. Adding Railings and Details:
- Safety Features: Install railings along the edges of the road deck for safety.
- Decorative Elements: Add lighting, such as lanterns, for functionality and to enhance the bridge’s appearance at night.
6. Finishing Touches:
- Integration with Terrain: Ensure the ends of the bridge blend seamlessly with the surrounding terrain.
- Detailing: Add extra details like walkways, observation points, or decorative elements on the towers.
7. Testing and Adjustment:
- Structural Integrity: Walk or drive a vehicle (if available in your Minecraft mod/version) across the bridge to test its stability.
- Visual Inspection: Make any necessary adjustments to improve the bridge’s appearance and functionality.
Building a large suspension bridge in Minecraft requires patience and attention to detail, but the result can be a spectacular addition to your Minecraft world. Remember to experiment and adapt the design to fit your vision and the specific characteristics of your game’s landscape.
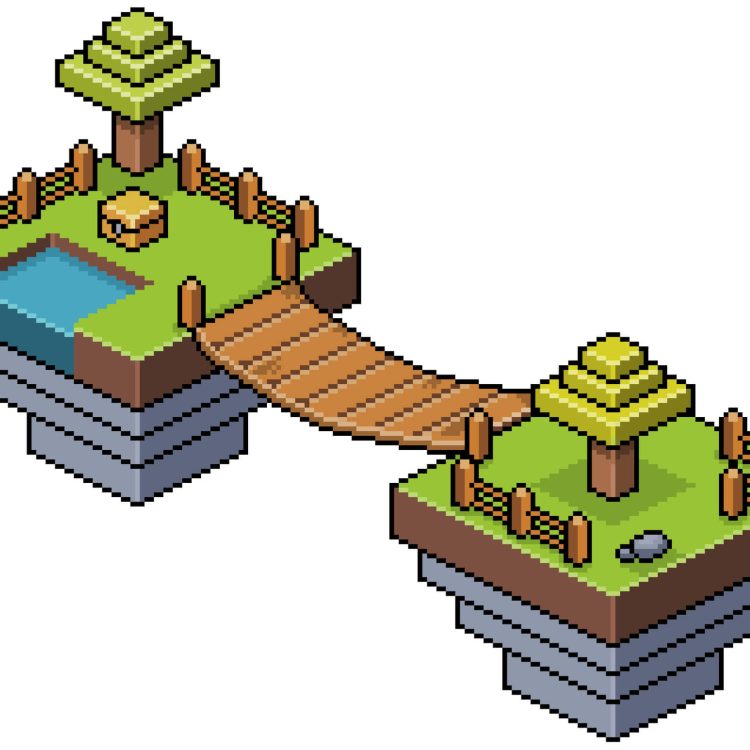
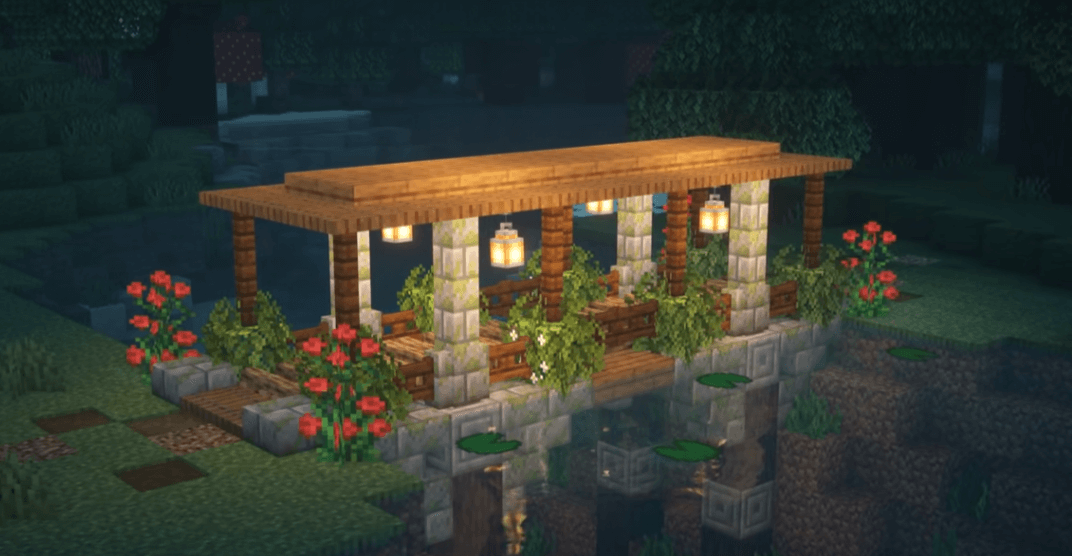
Cute Bridge in Minecraft
Building a “Cute Bridge” in Minecraft is a fun and creative project that can add charm to your virtual landscape. Here’s a step-by-step guide to help you build one:
The Cute Bridge in Minecraft is designed to be quaint and picturesque, perfect for crossing small rivers or decorating a garden area. It typically features:
- Size: Not too large; spans a small to medium-sized gap.
- Materials: Primarily uses wood (like oak or birch), along with some cobblestone and lanterns for decoration.
- Design Elements: Includes elements like handrails, decorative arches, and perhaps some hanging lanterns or flowers for added charm.
Steps to Build the Cute Bridge:
1. Choose a Location
- Find a suitable spot over a river or a gap you wish to span with the bridge.
2. Lay the Foundation:
- Place two rows of cobblestone blocks (or any sturdy block) across the gap. These will serve as the base supports for your bridge.
- Ensure there’s enough space between the rows for a comfortable walkway.
3. Construct the Walkway:
- Use wooden planks (like oak or birch) to create the walkway. Place them on top of the cobblestone base.
- For a curved look, make the middle part of the bridge slightly elevated.
4. Add the Handrails:
- Build handrails on each side of the bridge using wooden fences. This adds safety and a decorative touch.
- Optionally, connect the top of the handrails with wooden slabs for a more enclosed feel.
5. Create the Arches:
- Under the bridge, add arches using the same wood as your walkway for a cohesive look.
- Start from one end and create a gentle arch that meets in the middle of the bridge, and then descends back down.
6. Decorate the Bridge:
- Place lanterns on the sides for lighting, especially if the bridge is in a dimly lit area.
- Optionally, add flower pots or leaf blocks on the sides or hang vines from the handrails for a more nature-inspired look.
7. Finishing Touches:
- Review your bridge and add any additional decorative elements you feel necessary.
- You can add details like signs, banners, or more elaborate railings.
Tips:
- Experiment with Materials: Feel free to experiment with different materials to match the surrounding environment.
- Scale to Fit: Adjust the size and length of your bridge to fit the location where you are building it.
- Detailing: Small details can make a big difference in the overall look of your bridge, so take your time with the decoration part.

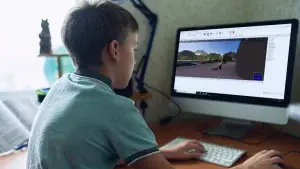
Motivating aspects of teaching coding and game design in Minecraft with CodaKid
Teaching kids coding in Minecraft through CodaKid offers several motivational aspects:
Fun and Engaging Learning: Minecraft is a game kids love. By integrating coding lessons with Minecraft, learning becomes fun and engaging. Kids are more motivated to learn when they’re enjoying the process.
Creativity and Imagination: Minecraft is all about building and creating. When kids learn to code within this game, they can bring their imaginative ideas to life. This not only motivates them but also helps develop their creative skills.
Problem-Solving Skills: Coding in Minecraft presents kids with challenges that require problem-solving. This encourages critical thinking and logical reasoning, which are essential skills in today’s world.
Real-World Applications: By learning to code early, children understand how technology works in the real world. They see the practical applications of their skills, which motivates them to learn more.

Boosts Confidence: Successfully coding something in Minecraft gives kids a sense of achievement. This boost in confidence can encourage them to take on more challenging projects.
Future Opportunities: Coding is a vital skill in the modern job market. Introducing kids to coding through Minecraft can open up future career opportunities in technology and beyond.
Collaboration and Teamwork: Minecraft often involves playing and building with others. Coding in this environment can teach kids the importance of teamwork and collaboration.
Customized Learning Pace: With CodaKid and Minecraft, kids can learn at their own pace. This individualized approach ensures that each child remains motivated and doesn’t feel overwhelmed.
Safe and Controlled Environment: Minecraft provides a safe digital environment for kids to learn coding. Parents and educators can feel confident about the content and the learning process.
Long-Term Engagement: Minecraft’s ever-evolving nature means there’s always something new to learn and explore. This keeps kids engaged and continuously motivated in their coding journey.
We hope that you’ve enjoyed our Minecraft Bridge Ideas Guide! If you have any comments or questions please feel free to leave a comment below.