One of the reasons we encourage coding for kids so much is because it can help kids practice and refine their creativity in a safe and entertaining way. The same could be said for Minecraft, a popular sandbox game that allows players to build virtually anything they can think of.
It’s true! With just the elements readily available in the game, Minecraft players can build some in-game devices that are nothing short of astonishing. One player even managed to make a fully functional graphing calculator in-game. Once they did that, a lot of people picked up on what they did and tried to replicate it.
The main ingredient of this calculator? Redstone.
In this article, we’re going to go over Minecraft Redstone; what it is, how you use it, and why it’s just so darn cool!
Related Reading:
- Minecraft – A Parent’s Survival Guide
- Hey, Parents! Did You Know that Minecraft Can Teach Your Kids Java Coding?
- 12 Surprising Things Your Child Can Learn From Minecraft
Table of Contents
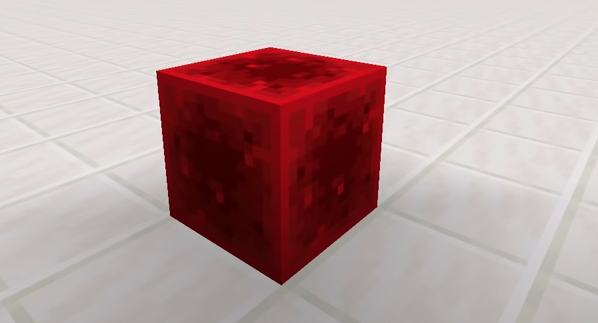
What is Redstone?
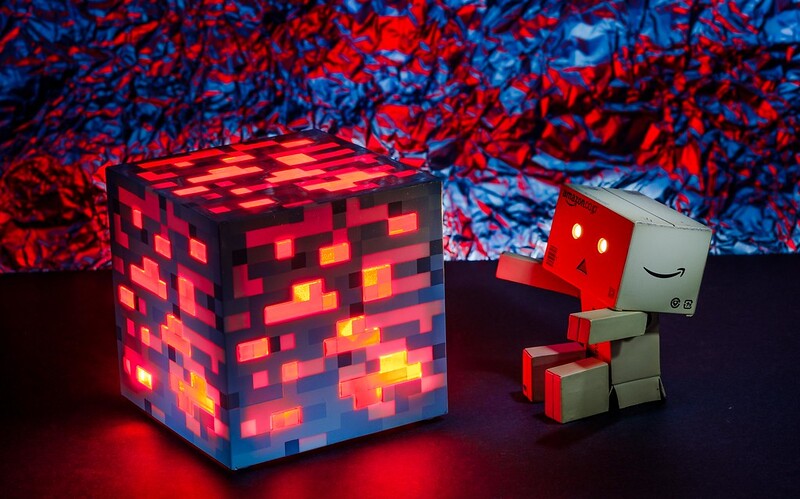
Photo by: yostD7000
Redstone is formally defined as an ore or element that is vital for most Minecraft mechanisms to operate. It is typically found at the bottom of mines.
When mined, it yields Redstone Dust, which is what is needed to make Redstone Circuits. To keep the definition simple, think of redstone as Minecraft’s version of electricity. It’s a power source. Redstone Components (like levers and circuits) are switches. Redstone Dust is electrical wiring. If you don’t have any form of redstone, the machine won’t function.
Redstone can be a bit confusing and intimidating at first. However, once you understand the basics perfectly, you can create some pretty incredible builds—like a Flying Machine or a Piston Door!
(P.S. Stick around; we’ll show you how you can create those builds in Minecraft, too).
Redstone Basics: Breaking It Down
To keep things simple, we recommend continuously comparing Minecraft Redstone to electricity as we go through the related concepts. Again; redstone is a power source. It has an energy that can be transmitted to other devices in order to trigger a response. Just try to keep all that in mind as we dive into the details—starting with the most basic element of redstone; redstone itself.
There are three common sources of redstone (and redstone power) that are often accidentally interchanged. These are Redstone Ore, Redstone Dust, and a Block of Redstone. Let’s start with the Redstone ore.
Redstone Ore
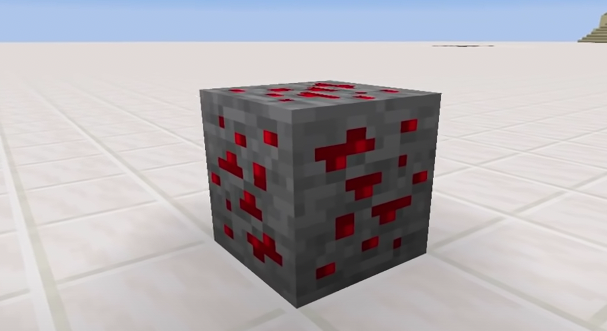
The redstone ore – or the redstone ore block in Minecraft – is the purest source of redstone. You can mine this block with an iron pickaxe or higher to obtain redstone dust.
If you’ve ever walked over unmined redstone ore, you’ve probably noticed how it lights up. This indicates redstone ore’s two different states: powered and unpowered.
Unmined redstone ore is typically in its unpowered state until it’s interacted with, whether by clicking on it or walking on it. It can also only provide energy (or electricity) when it’s in its powered state.
Powered redstone ore provides constant power, which can be used in devices like Redstone Torches.
Unpowered redstone provides conditional power, and can only power up a mechanism when activated. Common devices to activate redstone include pressure plates, levers, and daylight sensors.
Redstone Dust
Redstone dust, as we mentioned earlier, is obtained by mining a redstone ore block using an Iron Pickaxe (or higher). It basically has the same properties as pure redstone, which basically means it’s a working energy source. When placed on a block, it turns that block into a source of redstone power as long as it remains in contact with the Minecraft block.
Aside from powering redstone components and blocks to create redstone circuits, redstone dust can be placed on the ground to create redstone wire.
Block of Redstone
It’s fairly common to confuse a redstone ore block with a block of redstone. We can assure you; the two are completely different.
As we mentioned earlier, you can mine a redstone ore block to obtain redstone dust. With powerful tools plus enchantments, a Minecraft player can average five to six (5-6) redstone dust blocks per redstone ore block.
A block of redstone is a mineral block equivalent to nine (9) redstone dust. It also happens to be a permanently powered block that can be activated using pistons.
Unlike redstone ore, you can mine a block of redstone using any pickaxe.
A block of redstone is useful to have if you want the power equivalent of nine redstone dust compressed in just one inventory square. Saves you a lot of time and space!
Powered Blocks
Almost all Minecraft blocks can be powered, either by containing a power source or connecting to a power source—which, in this case, is redstone. Even a Slime block can be powered, so long as it’s connected to a powered redstone ore block.
However, the Slime block cannot power its neighbor. It can only be powered. That’s what sets redstone apart; it can be powered and power other blocks connected to it (so long as they’re set up correctly).
Some Notes on Powered Blocks
Although simple, the concept of “powered” and “unpowered” blocks is actually quite extensive. Understanding them a little more can help you better understand redstone circuits and redstone devices.
Earlier, we mentioned that redstone ore had two different states, which was ‘powered’ and ‘unpowered.’ Other Minecraft blocks can adopt those states as well when redstone is involved. Think of powered blocks as charged blocks; they’re electrified and capable of transmitting power to other blocks, so long as those blocks are directly adjacent and in contact with them (maximum of six possible blocks at one time).
In order to transmit power, the Minecraft block must:
- Be an active consistent power source, like a redstone torch
- Be a block above a redstone torch
- Be an active power conductor aka a redstone wire block immediately adjacent to a powered redstone ore block or block of redstone
- Have a switch attached to it (pressure plates, levers, and buttons all count as switches)
- Have a switch in it (i.e., pressure plates, levers, buttons, etc.)
Any actively-powered Minecraft block is capable of transmitting redstone power in several directions, depending on the contents of the block. For example, a redstone torch block powers itself and the block directly above it (unless that block is air). That’s a total of two actively powered blocks.
Other parameters for powered blocks are the following:
- A redstone torch block can activate adjacent redstone wires (max of six at one time)
- A switch – i.e., pressure plate, button, or level – activates both the block it is located in and the block it is placed on (total of two actively powered blocks)
- A redstone wire block powers itself and block below it
- A redstone wire block also powers either the block it is pointing to or the block below that
Devices
In Minecraft, a device refers to anything that moves, turns on, turns off, or otherwise reacts when powered by a Redstone Signal. A good example of this would be dispensers. When connected to an active power source (aka a powered redstone block), dispensers react by dispensing items.
Redstone Signal
A redstone signal basically refers to the effective energy range of a powered redstone. Minecraft blocks within range of that signal will be activated and react accordingly to the energy coming off of the redstone. This, of course, means that there is a limit to the basic redstone signal. A single block of Redstone Dust gives off a signal that spans no more than 15 blocks. Mechanisms or devices outside a 15-block range from the redstone power source will not be activated.
A good way to tell how far a redstone signal is travelling is by looking at the redstone dust. If it’s glowing, the redstone dust is powered. If not, it’s out of the redstone signal range.
There are several ways to extend the redstone signal – especially for bigger builds – beyond 15 blocks, but the best way is to use a Redstone Repeater.
Redstone Wire
Redstone wires are the components you need to transmit redstone power. Think of them like the cable of your phone charger. You need a way to connect the adaptor to your phone in order for your phone to charge. Likewise, you need a way to connect the pieces of your device or machine to the redstone power source in order for your device to function.
Crafting redstone wires is very easy. Just place a block of redstone dust on the ground. Then, right-click on the surface of a block while redstone dust is selected in the hud. This redstone wire will connect with other blocks of redstone dust—and regular Minecraft blocks, too.
Redstone Repeaters
A redstone repeater is formally defined as a “block used in redstone circuits to repeat redstone signals back to full strength, delay [redstone] signals, prevent signals moving backward, or to lock signals in one state.”
What does this all mean?
Basically, a redstone repeater helps one manipulate the redstone signal. This is a crucial aspect in building a mechanism, as it can practically dictate the activation of certain elements. That being said, many Minecraft players agree that it’s the second-most important component in building Minecraft mechanisms and devices (second only to redstone dust, of course).
When used correctly, redstone repeaters can help one achieve three things in their build:
- Extend the Signal. Redstone repeaters can extend the redstone signal range of redstone dust wires by an extra 15 blocks. This means that if you put down 15 redstone dust blocks and place a redstone repeater at the end of the line, you can power another 15 redstone dust blocks. This opens the possibility of virtually limitless redstone signal range for incredibly large builds.
- Redirect the Signal. Redstone repeaters can also direct, redirect, and manipulate the flow of redstone power by limiting the direction they can travel in. Think of them as a one-way gate, in this sense. The redstone signal can only go this way or that way, depending on the programming. This is useful for when you have two parallel redstone wires and you need the energy to go in different directions so that they don’t clash.
- Delay the Signal. Redstone repeaters can also delay redstone signals for a certain amount of time (specifically 0.1 to 0.4 seconds). Players can set the delay length by right-clicking on the repeater and selecting one of the four levels: 0.1, 0.2, 0.3, 0.4. This can be extremely useful in creating interactive design builds (think spiraling piston doors, carnival rides, or working arcade games).
Redstone Circuit
A redstone circuit is the Minecraft version of an electric circuit.
Initially introduced during the Alpha development phase of Minecraft, redstone circuits allow Minecraft players to create intricate mechanisms and devices powered by redstone.
Aside from basic traps, hidden doors, and simple vehicles, more imaginative players have thought to use redstone circuits to build planes, automatic weapons, teleporters, and near-futuristic machines.
“Redstone circuit” is the general term for any Minecraft build that 1) uses redstone, and 2) activates or controls mechanisms. It can respond to player interference, non-player interference (i.e., mob movement, item drops, etc.), or it can stay continuously on a loop.
To help you understand what a redstone circuit is, it would also be best to know the difference between a redstone circuit and a mechanism. A redstone circuit performs operations that manipulate mechanisms using redstone signals.
A mechanism manipulates the environment around it based on the redstone circuit it’s connected to.
Redstone circuits generate, modify, combine, trigger, etc. Mechanisms move blocks, open doors, move panels, change lights, and so on.
Redstone Comparator
A redstone comparator is often confused with a redstone repeater. The two look similar, are made of similar components and have nearly identical functions. There are only a few minor distinctions between the two. However, these minor distinctions are what define the crucial difference between them.
Redstone comparators are redstone components that can either (1) maintain, (2) compare, or (3) subtract redstone signal strength. They can also be used to measure block states, like the fullness of a container. Like a repeater, comparators can dictate the direction of the redstone current i.e., they act like a one-way gate. Unlike a repeater, comparators can neither delay nor amplify a redstone current.
Here’s a breakdown of what redstone comparators can do:
- Compare Redstone Signal Strength. A redstone comparator can compare the main redstone signal that it receives against a secondary redstone signal. Its output would be the results of the comparison.
- Comparison: Normal Mode. This basically means that the main redstone signal (i.e., the signal that will be passed out through the front) is greater than the secondary signal (i.e., the signal coming through the side). In this case, the repeater uses whichever signal is stronger and ignores the weaker one. The main redstone signal’s strength will not be amplified or altered.
- Comparison: Subtraction Mode. You can put the redstone comparator in subtraction mode by right-clicking on it. You’ll know it’s in subtraction mode when the front of the three redstone torches on the comparator light up.
In subtraction mode, the comparator once again receives and compares the main signal with the secondary signal. The only difference is that the strength of the main redstone signal will be reduced by the strength of the secondary or side signal.
- Comparison: Reporting. Placing a comparator against a container – like a chest, hopper, dropper, dispenser, or brewing stand – will give you an output signal whose strength depends on the fullness of the container. This is a good way to test whether or not a container is empty or to compare the current storage status of two containers.
Minecraft Redstone Tutorials
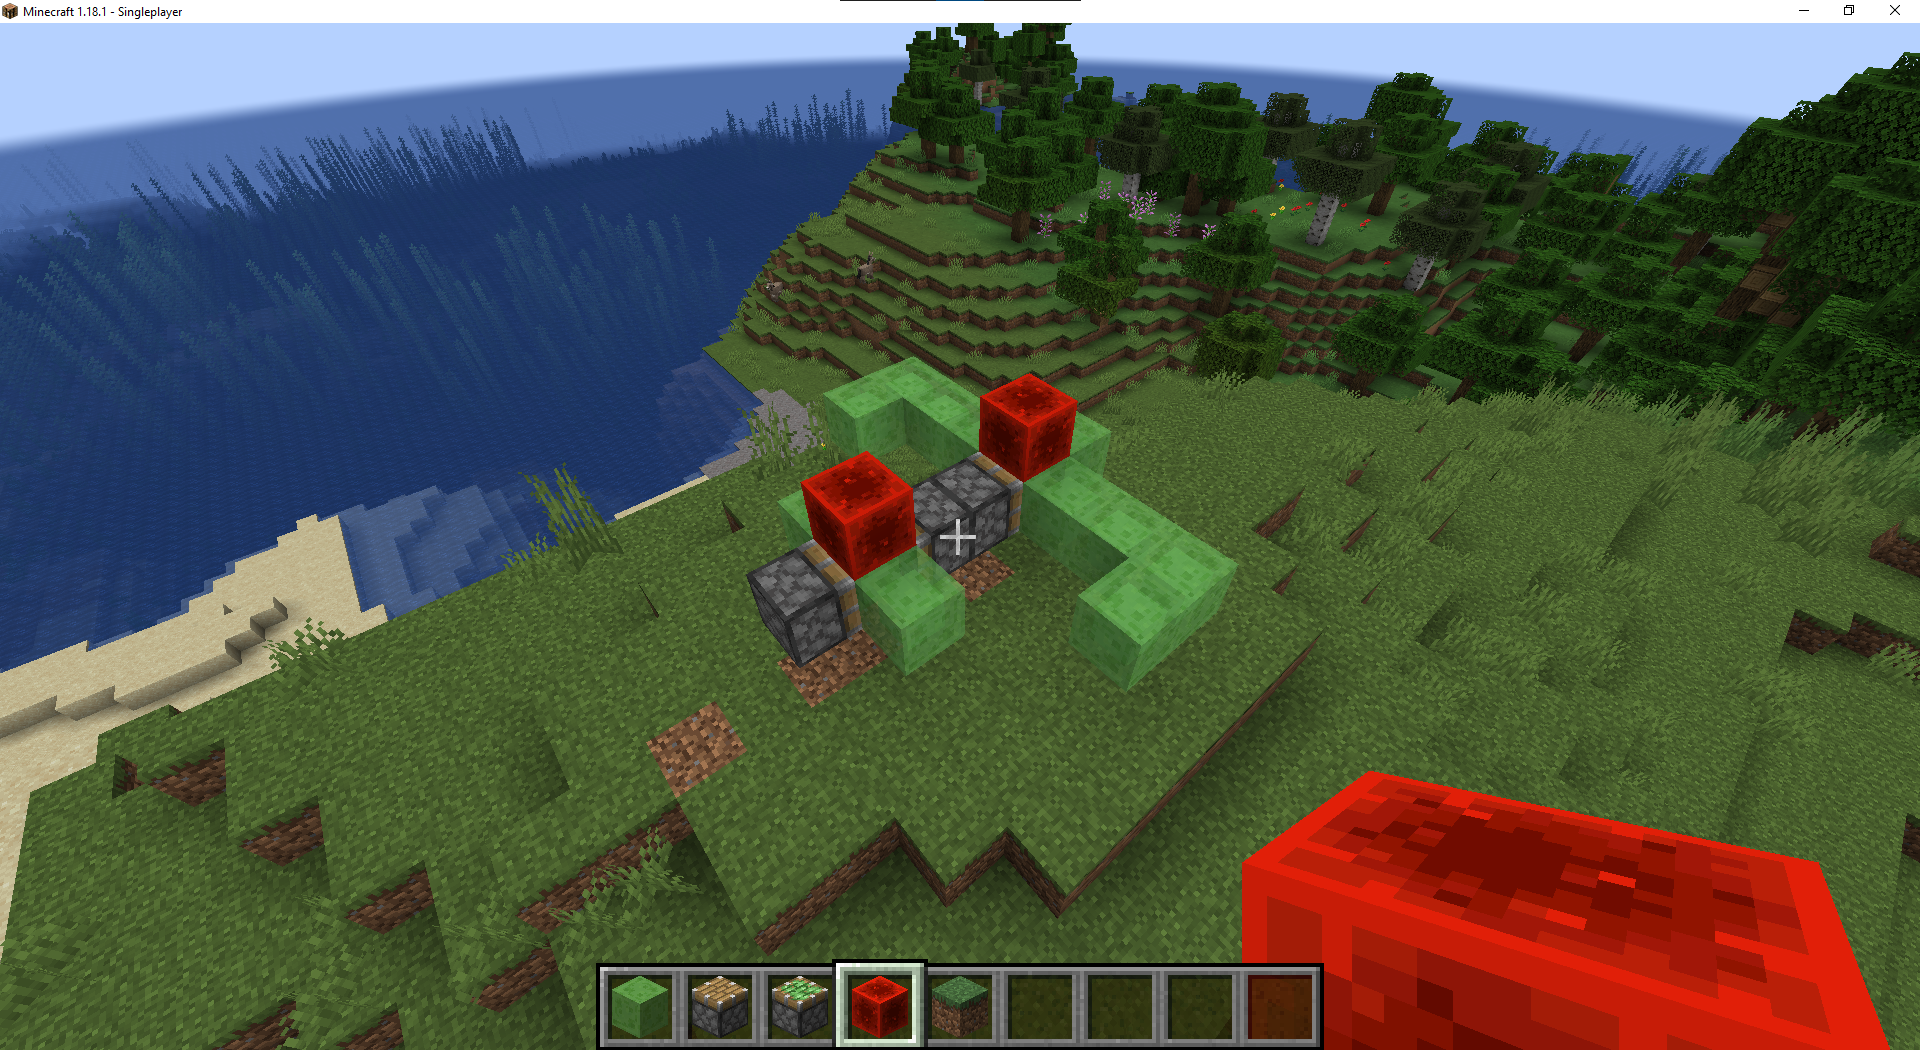
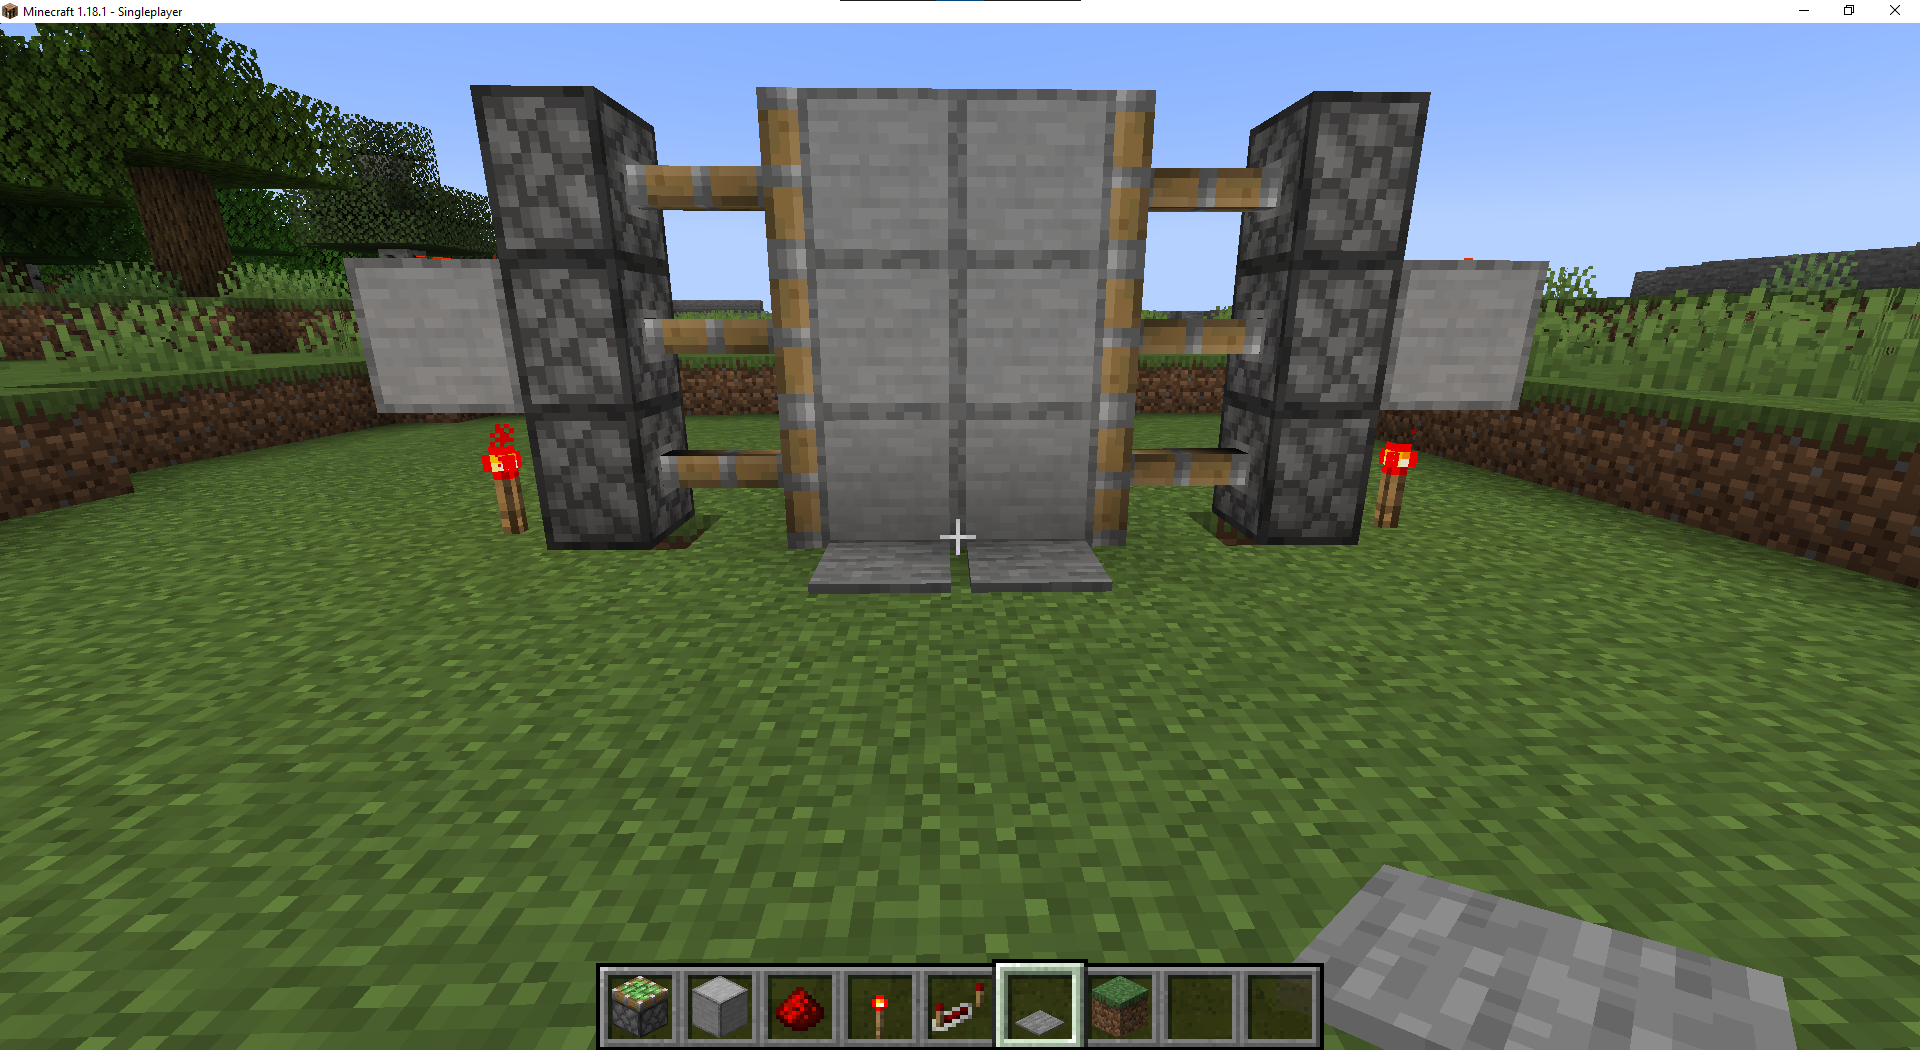
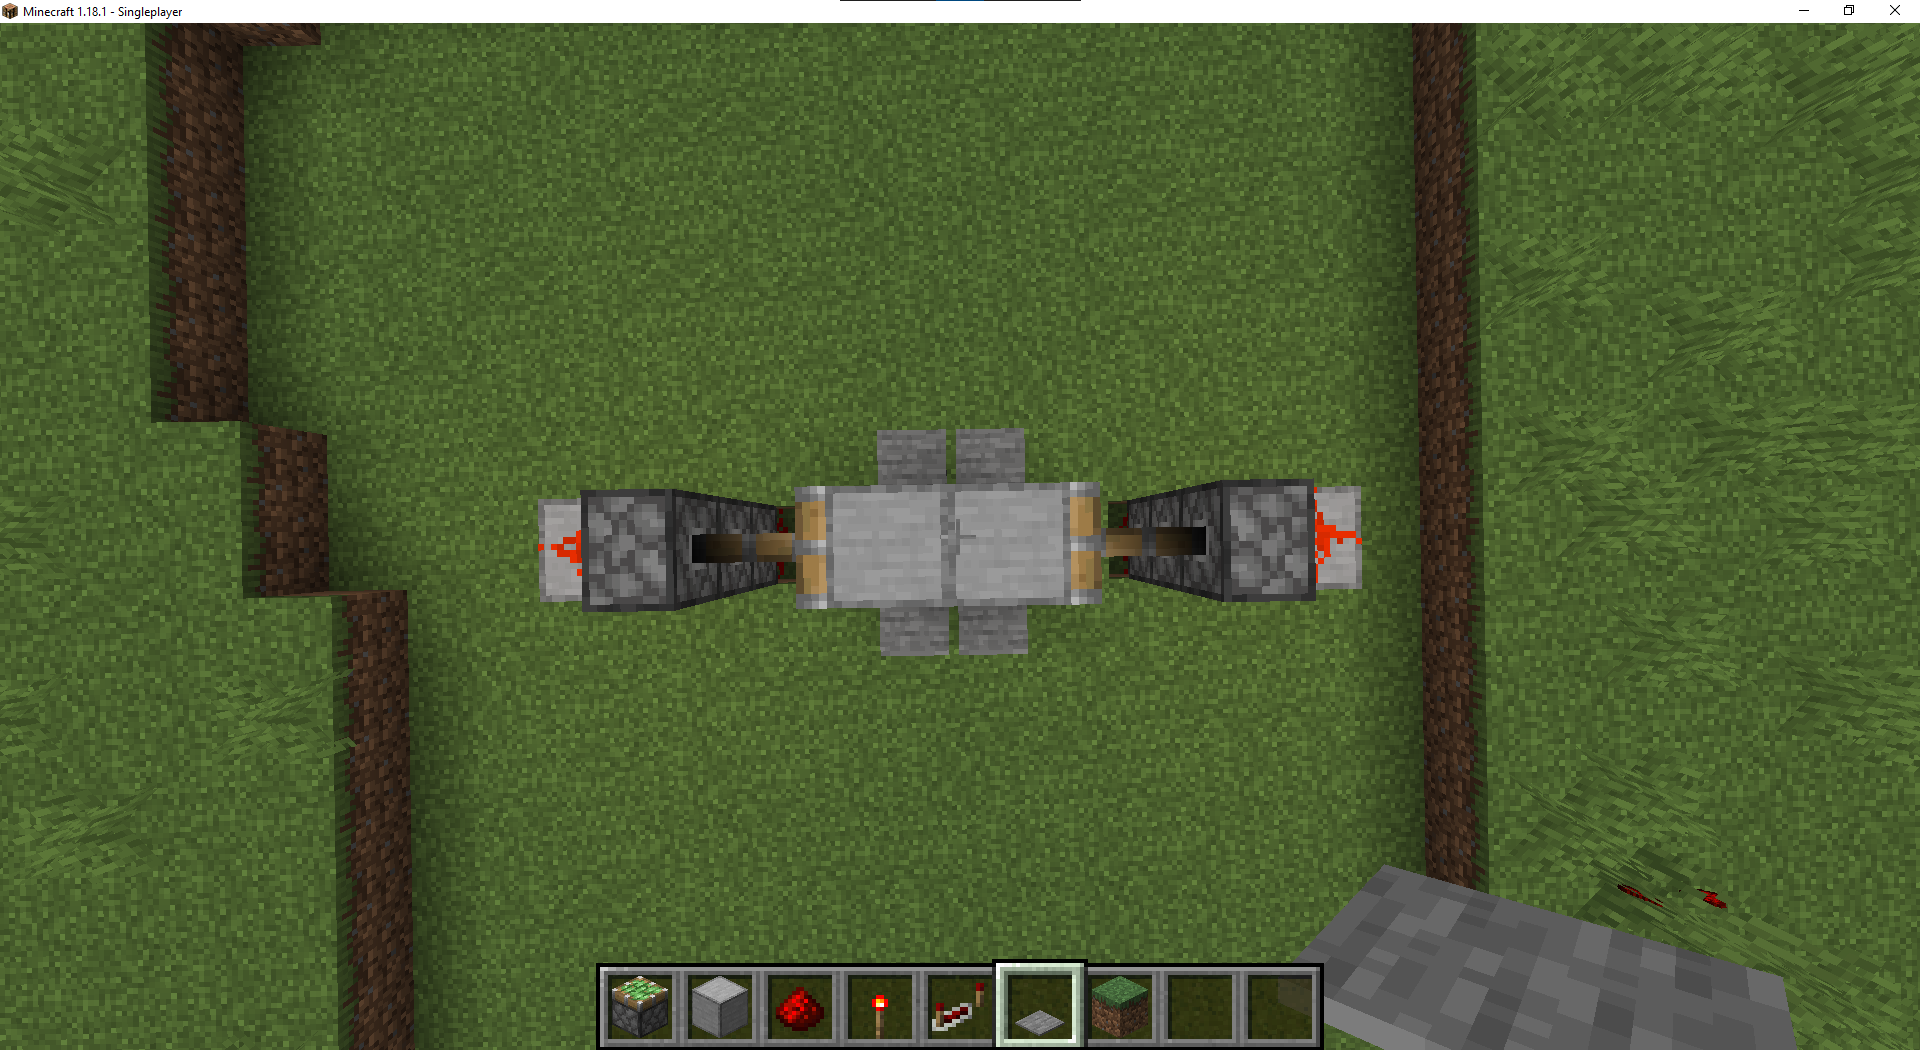
Redstone Flying Machine
Here’s a step-by-step guide to creating a redstone flying machine:
- The first thing you’ll need is a high place to create your flying machine. Remember that it will only stop when you break a piece off of it or when it hits something. For that reason, the higher you make it the better.
- Make sure you have the following materials:
- 2 Regular Pistons
- 1 Sticky Piston
- 2 Slime Blocks
- 3 Blocks of Redstone
- Start by laying out 5 blocks in a row. It doesn’t matter what blocks you use, but note that you’re going to break them in a few steps, so I’d use an easy-to-find block like a grass block.
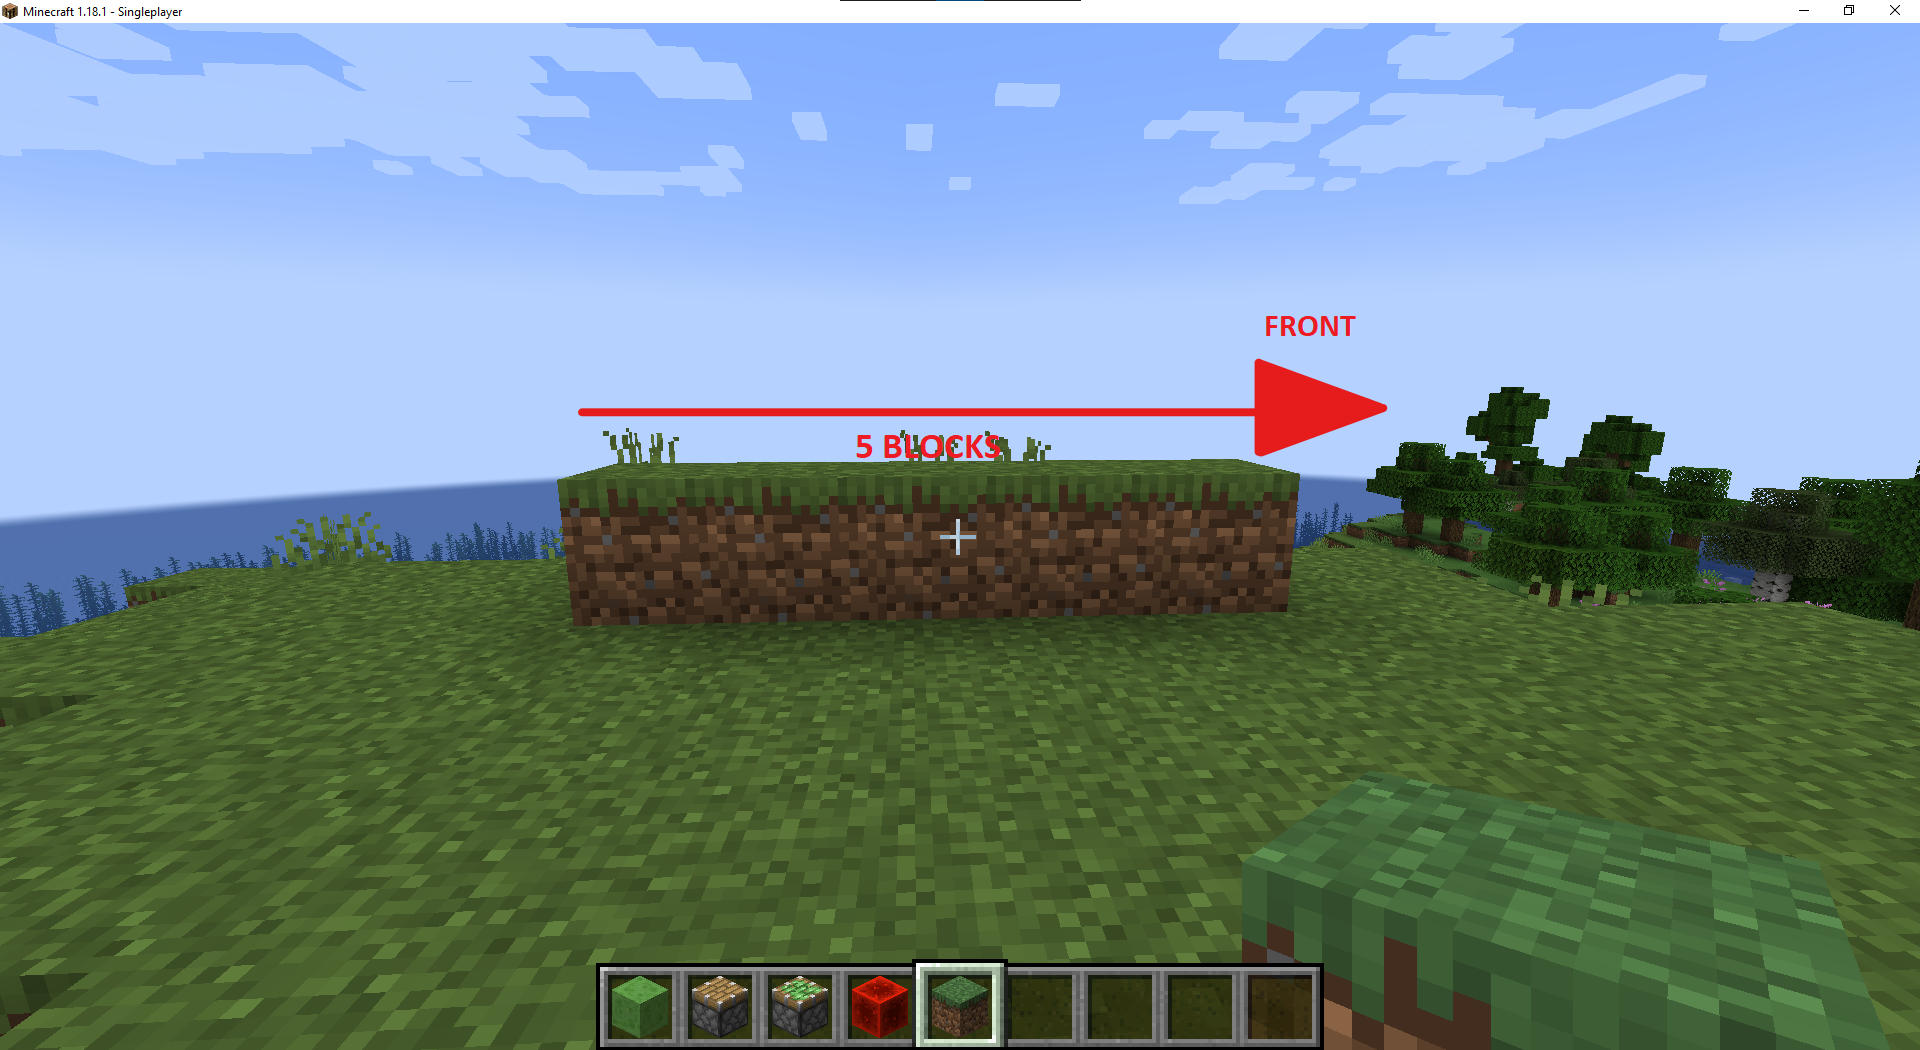
- Next, take a normal piston and place it on the back of the 5 blocks you placed with the piston pointing towards the front.
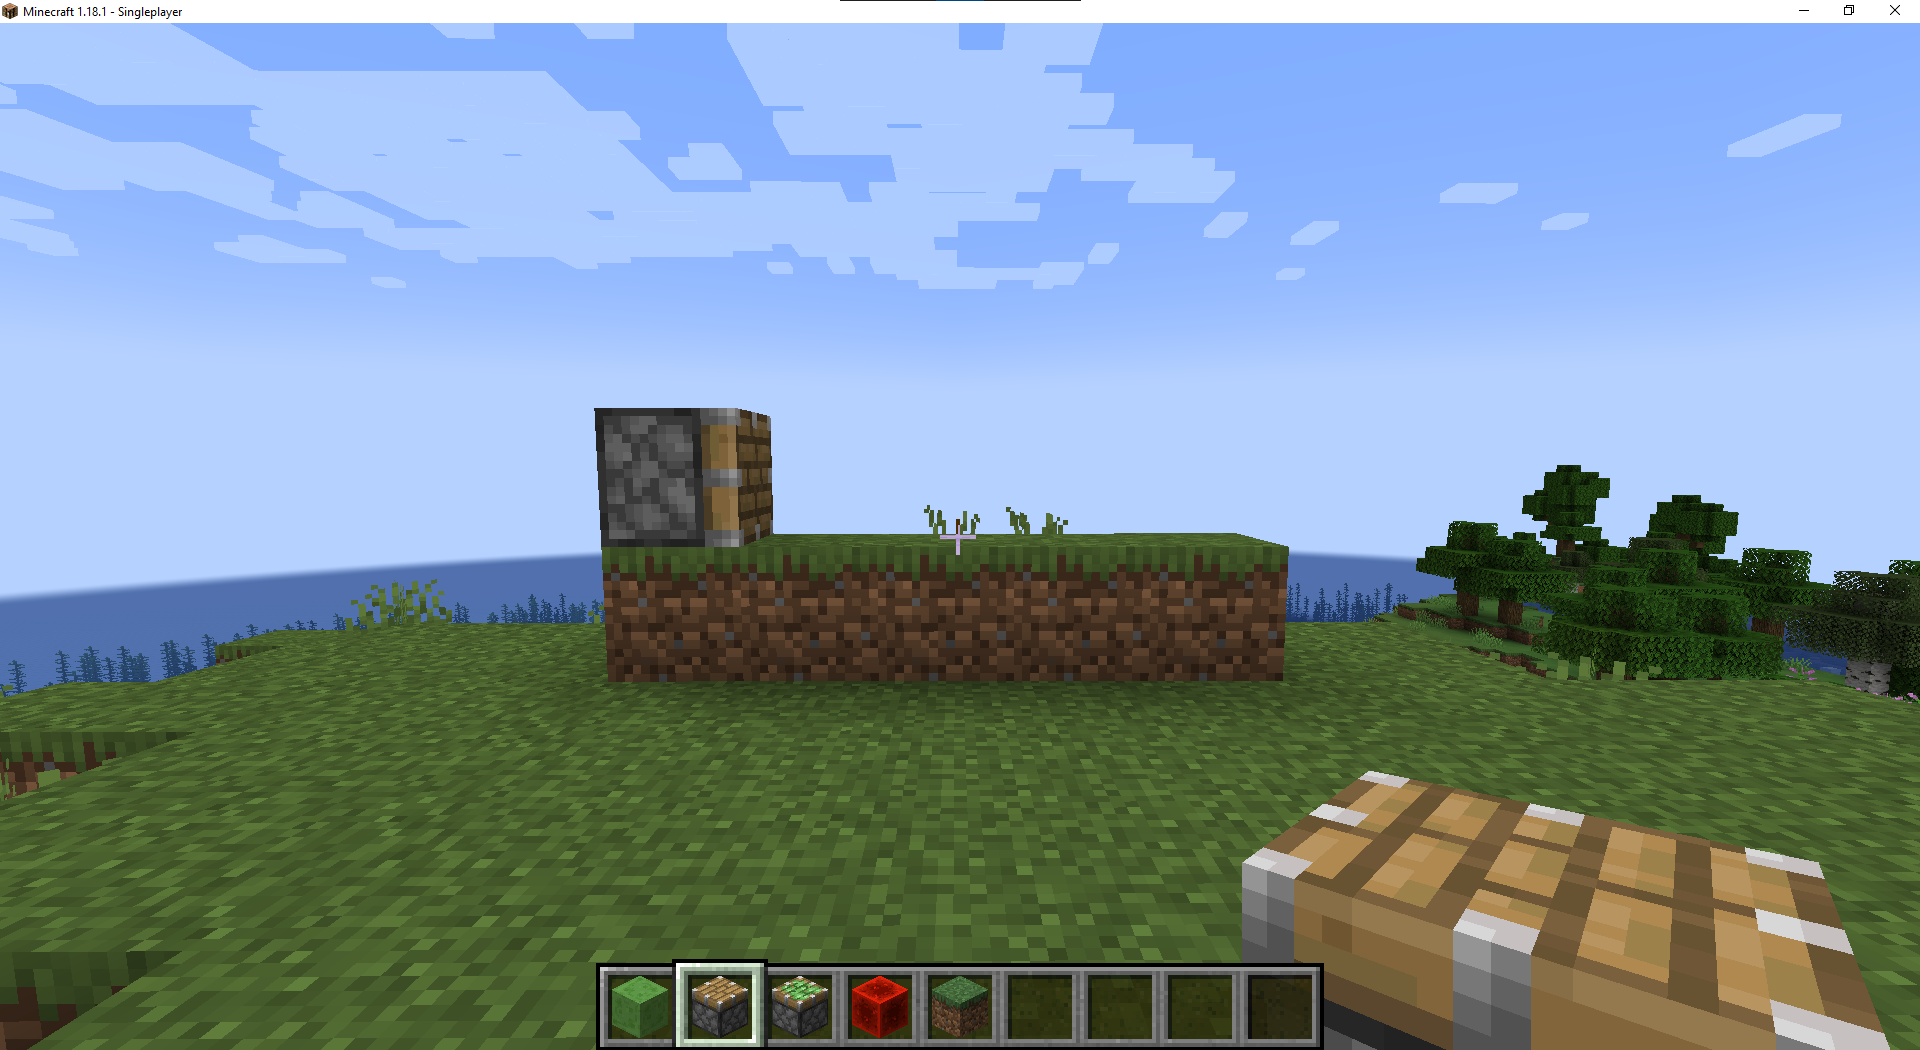
- Now place a slime block on that piston.
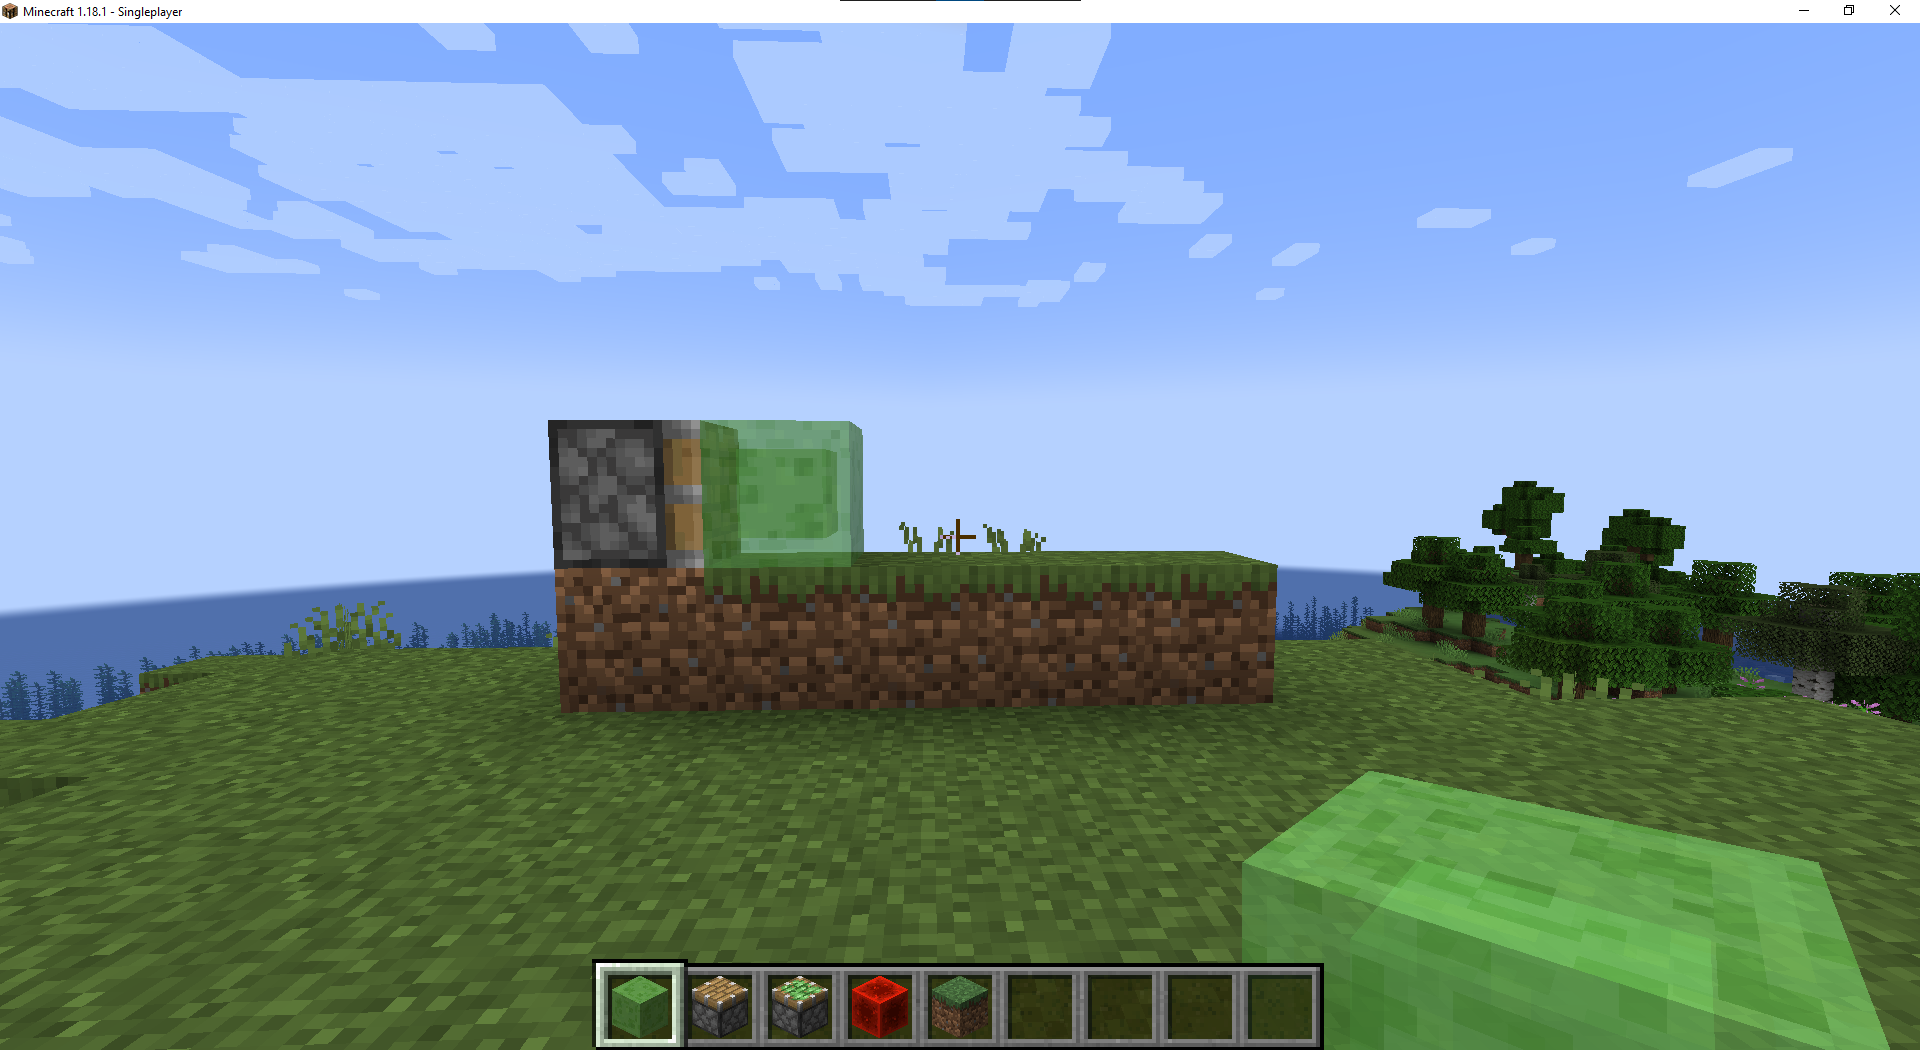
- Take a sticky piston, and add it to the right of the slime block facing towards the slime block.
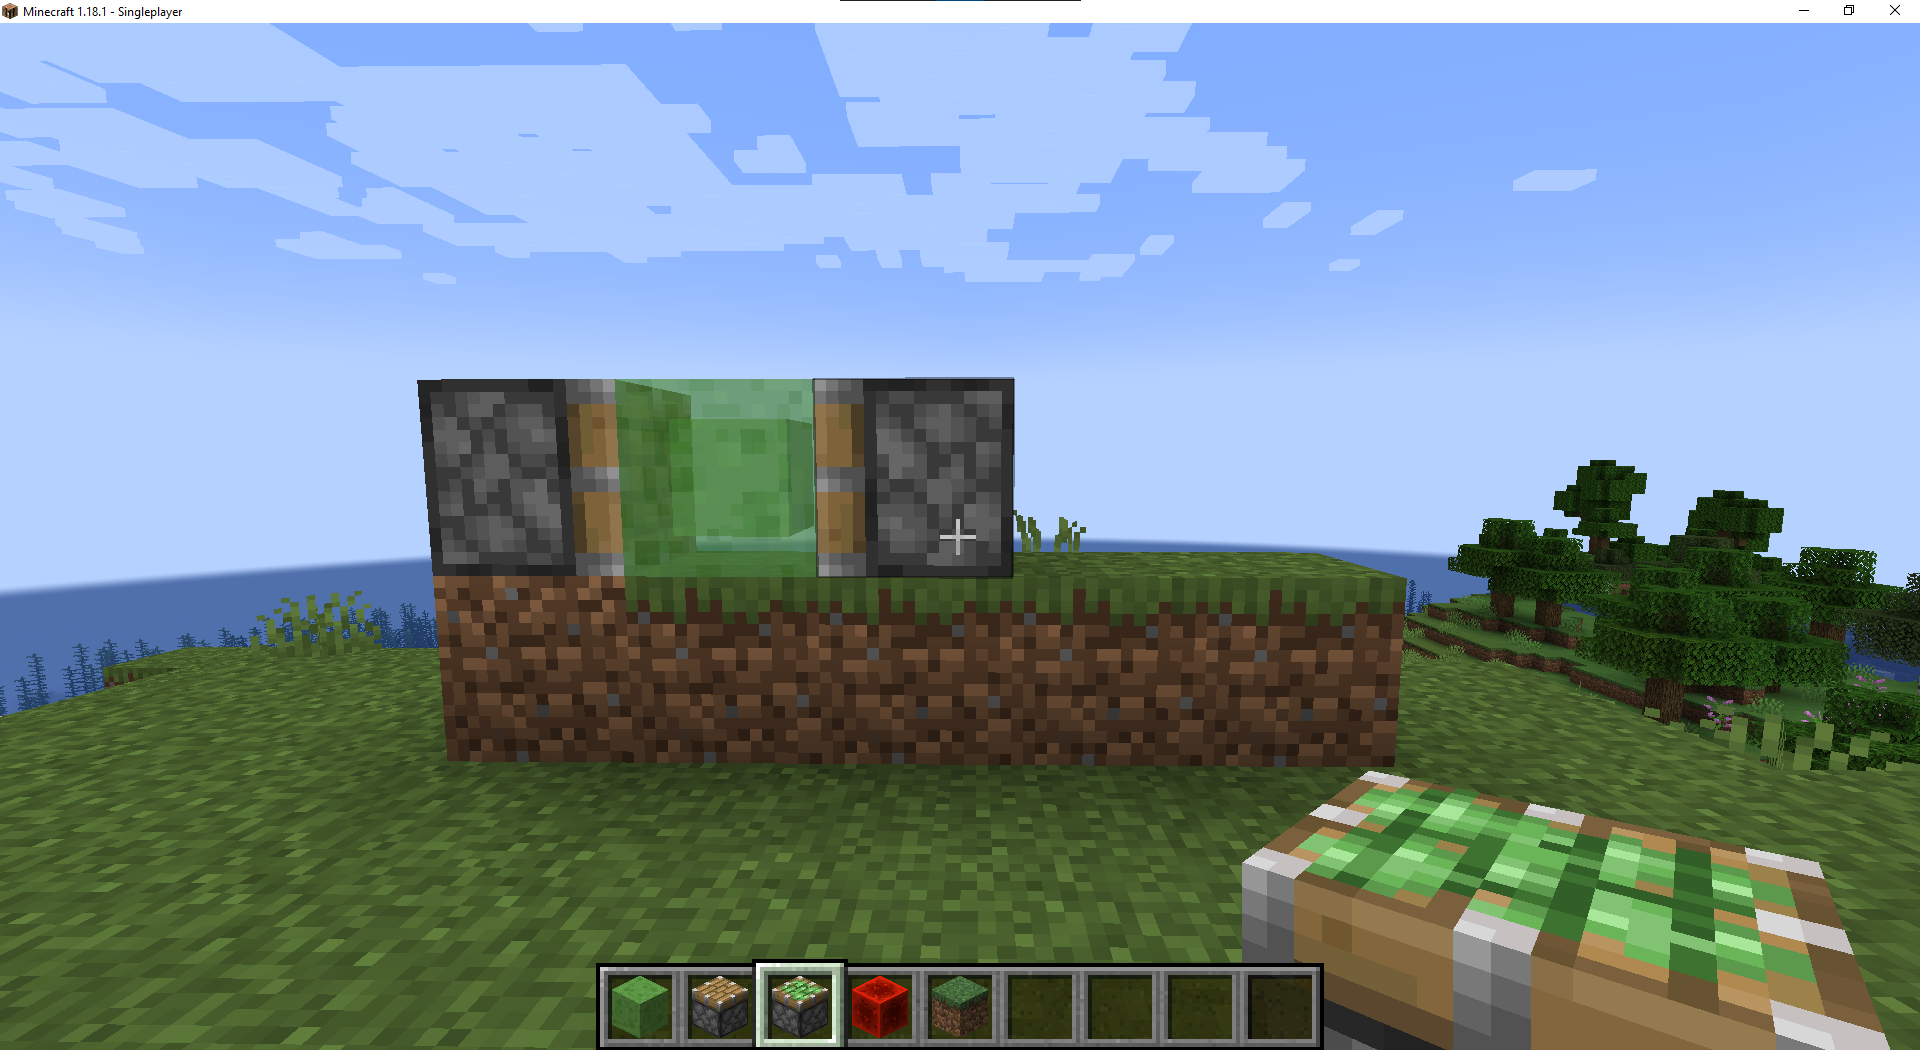
- Place your last regular piston facing opposite the sticky piston, towards the front of the machine.
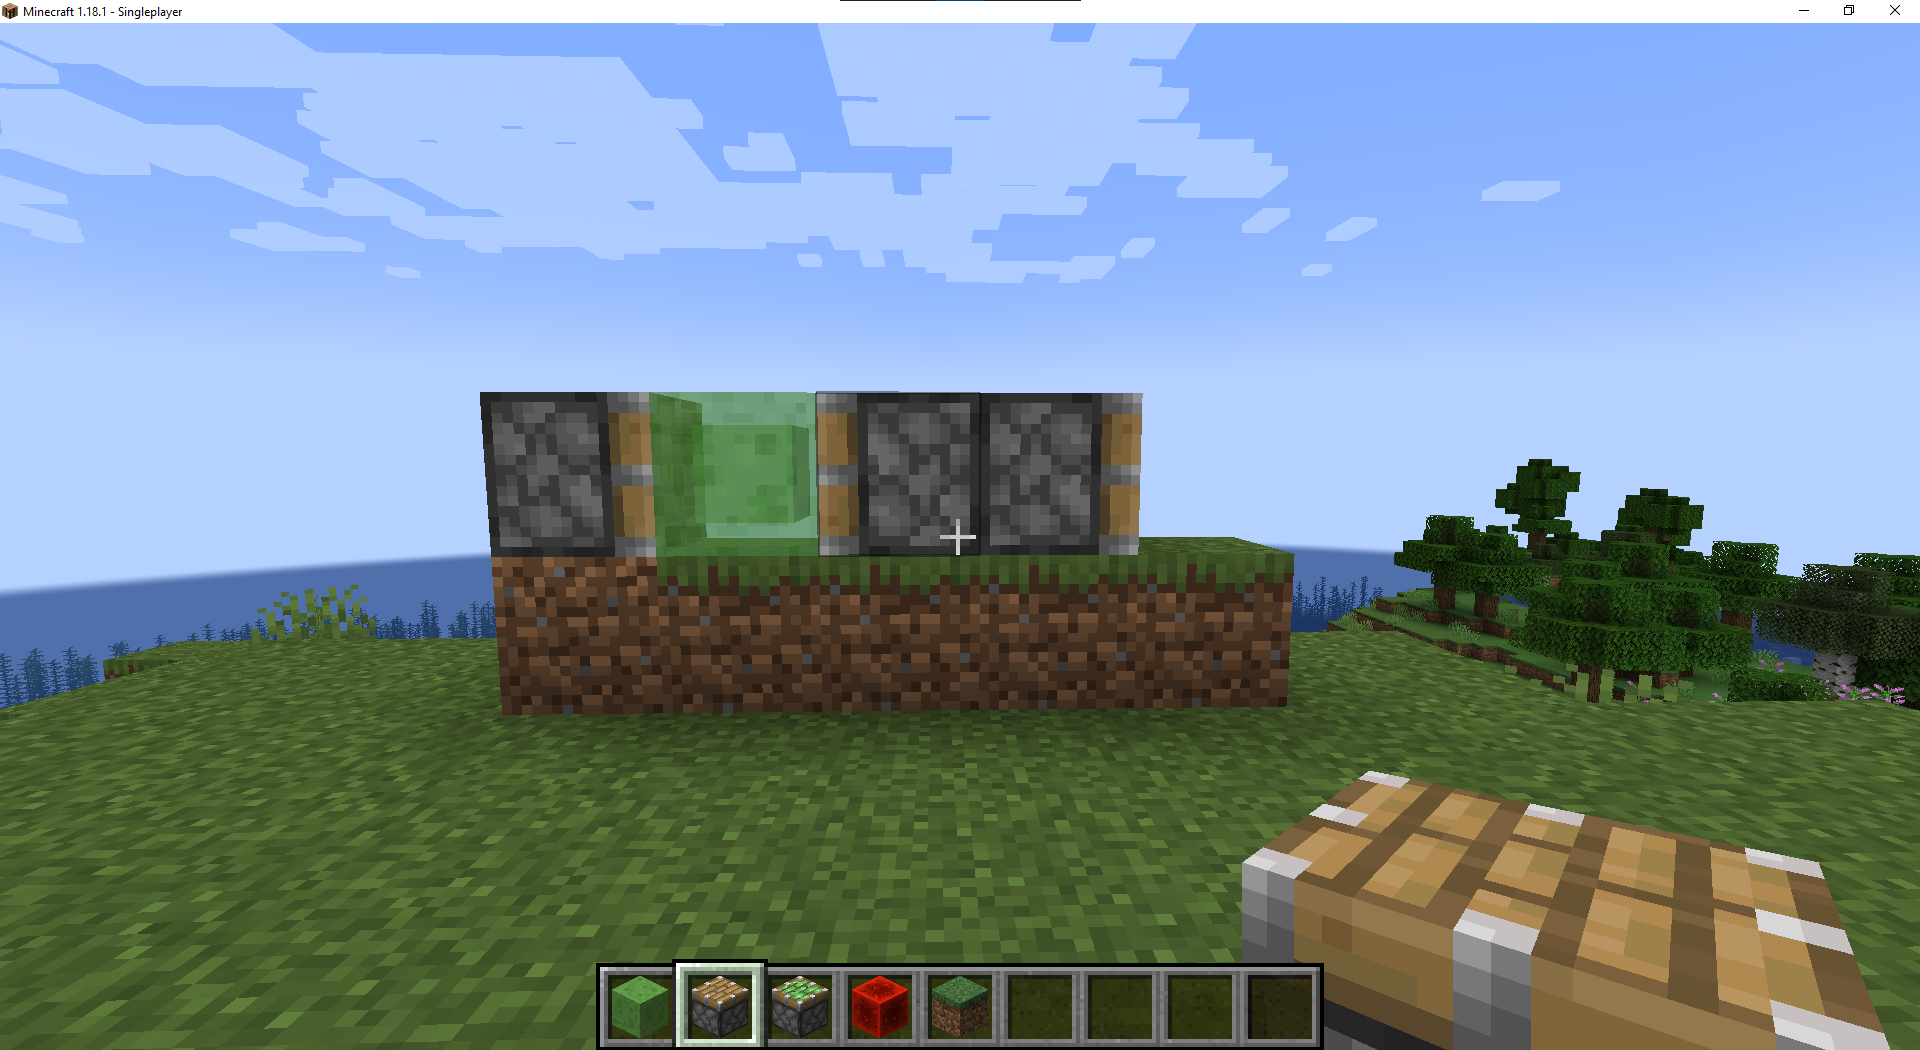
- Now place a slime block at the front of the machine connected to the final piston.
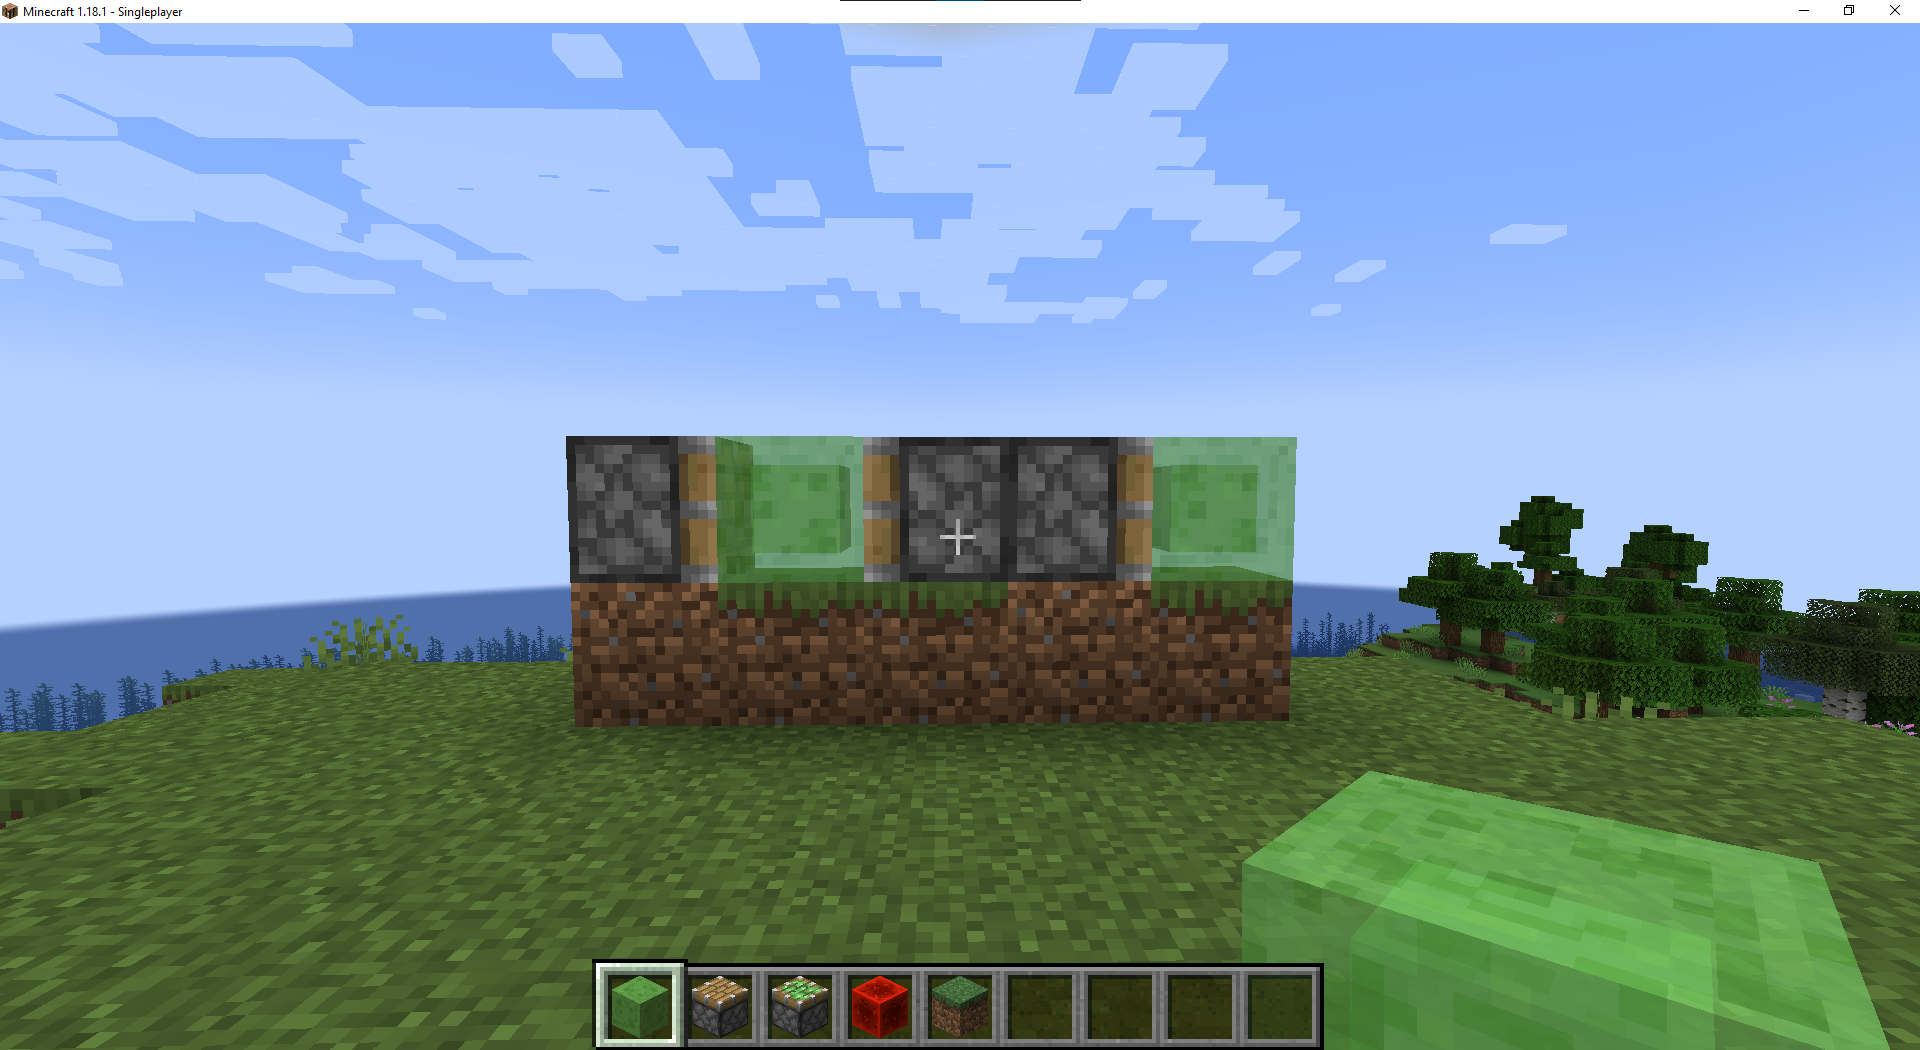
- Destroy all of the blocks that you placed below the machine.
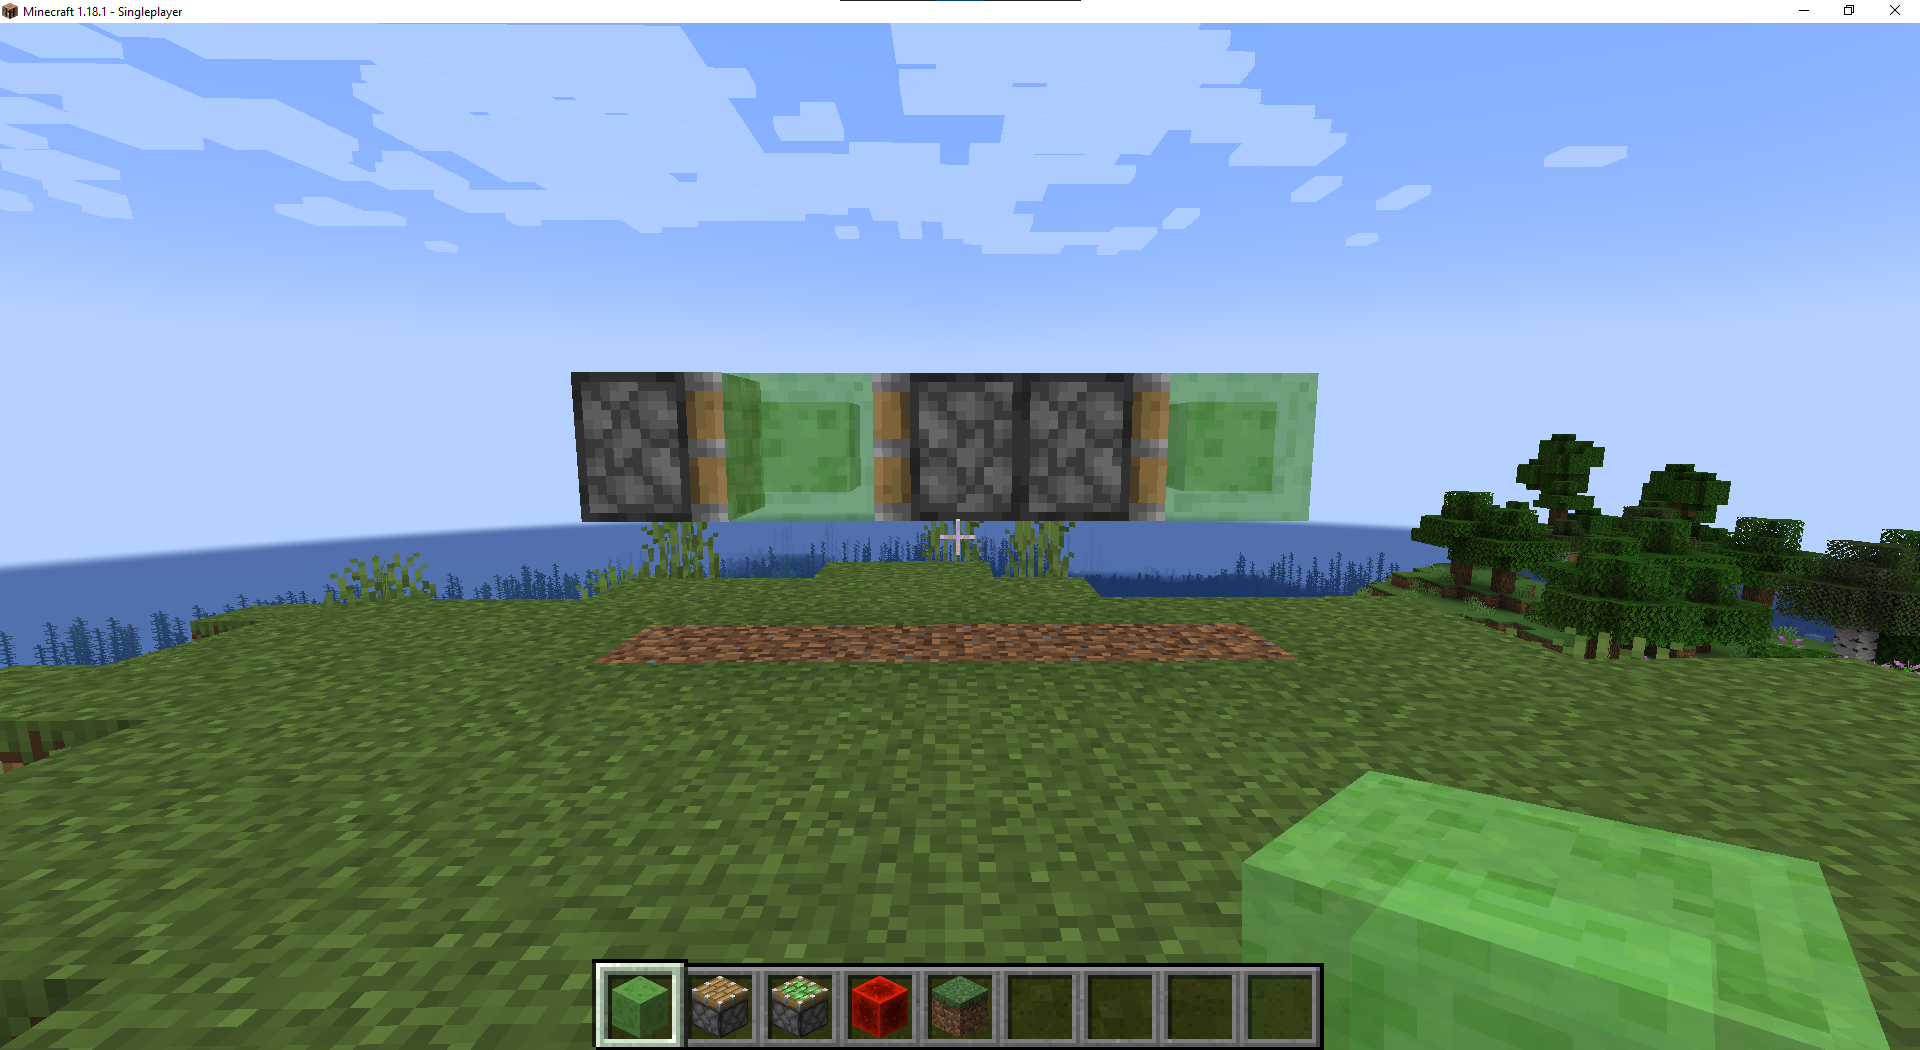
- Jump on top of the machine.
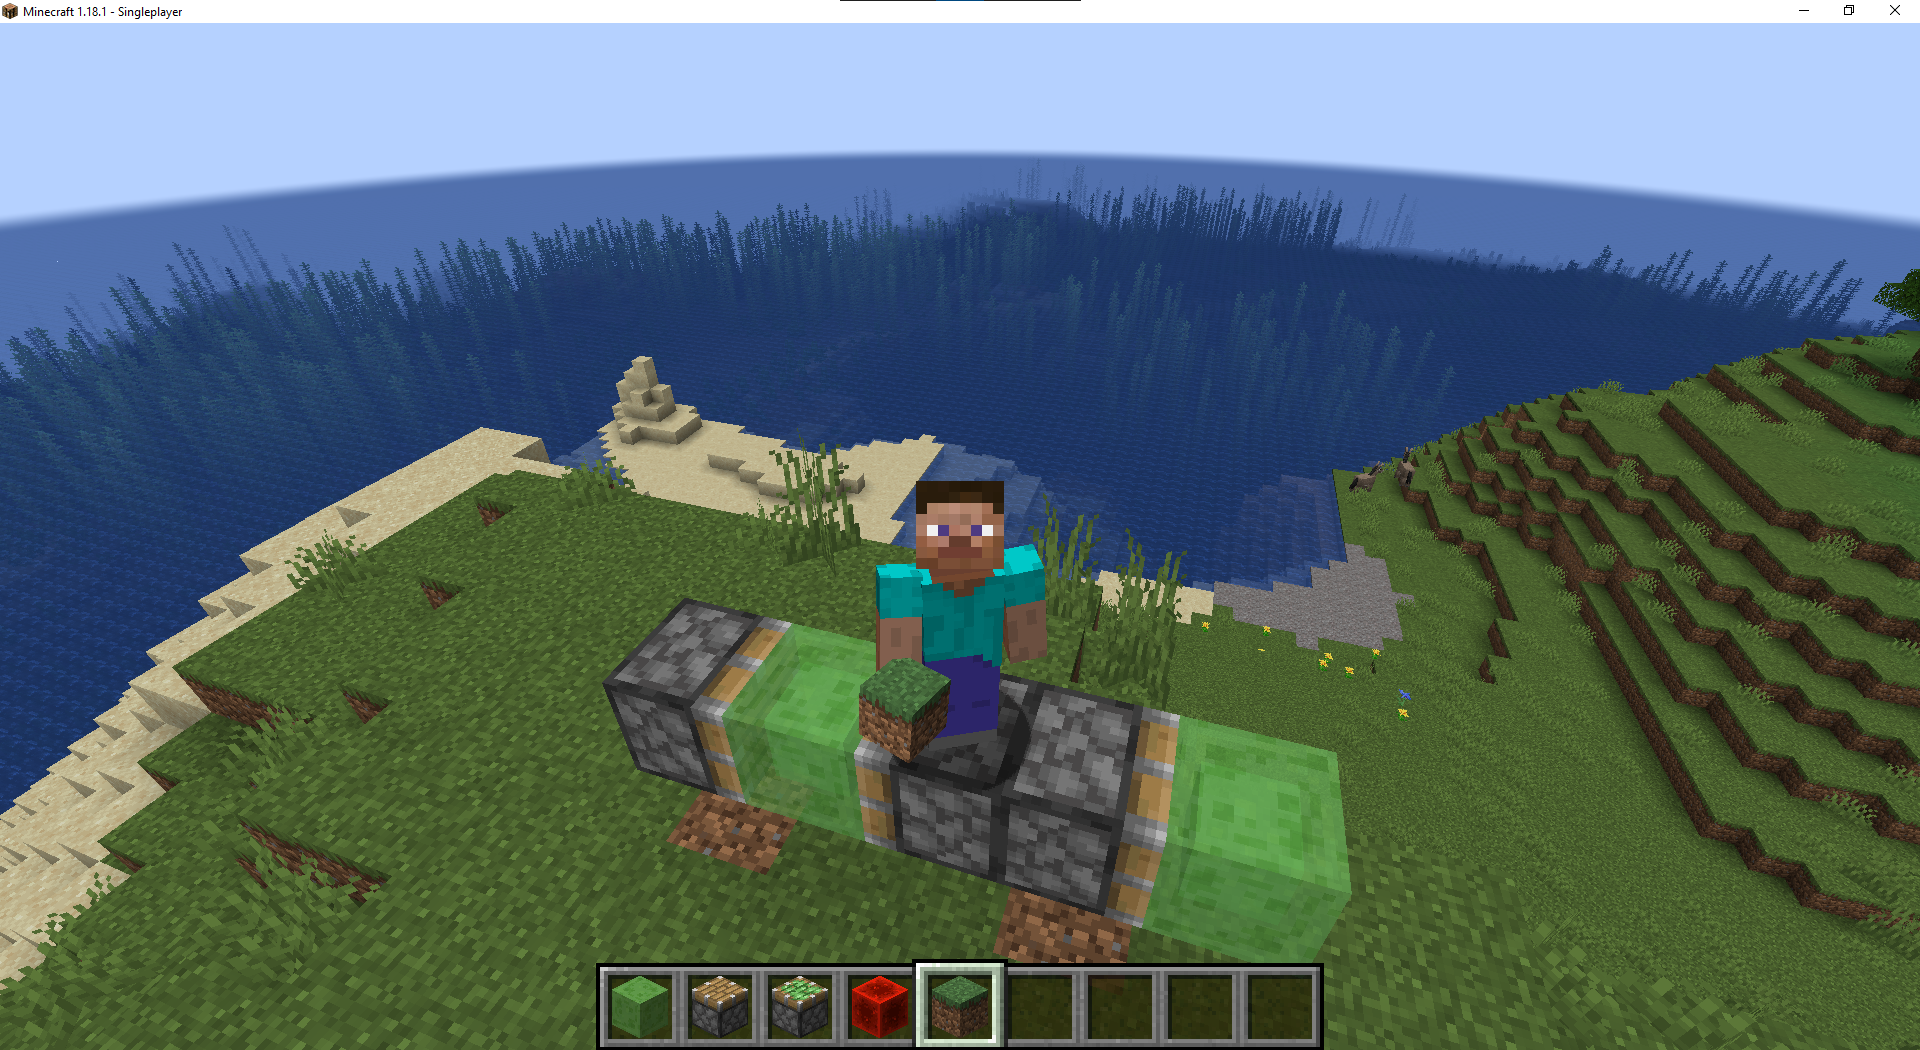
- Add a block of redstone on top of each of the slime blocks.

- Now your flying machine is ready to go! All you need to do is activate it! The easiest way to do it is to add a redstone block to the piston in front of you and break it when you’re ready to start flying!
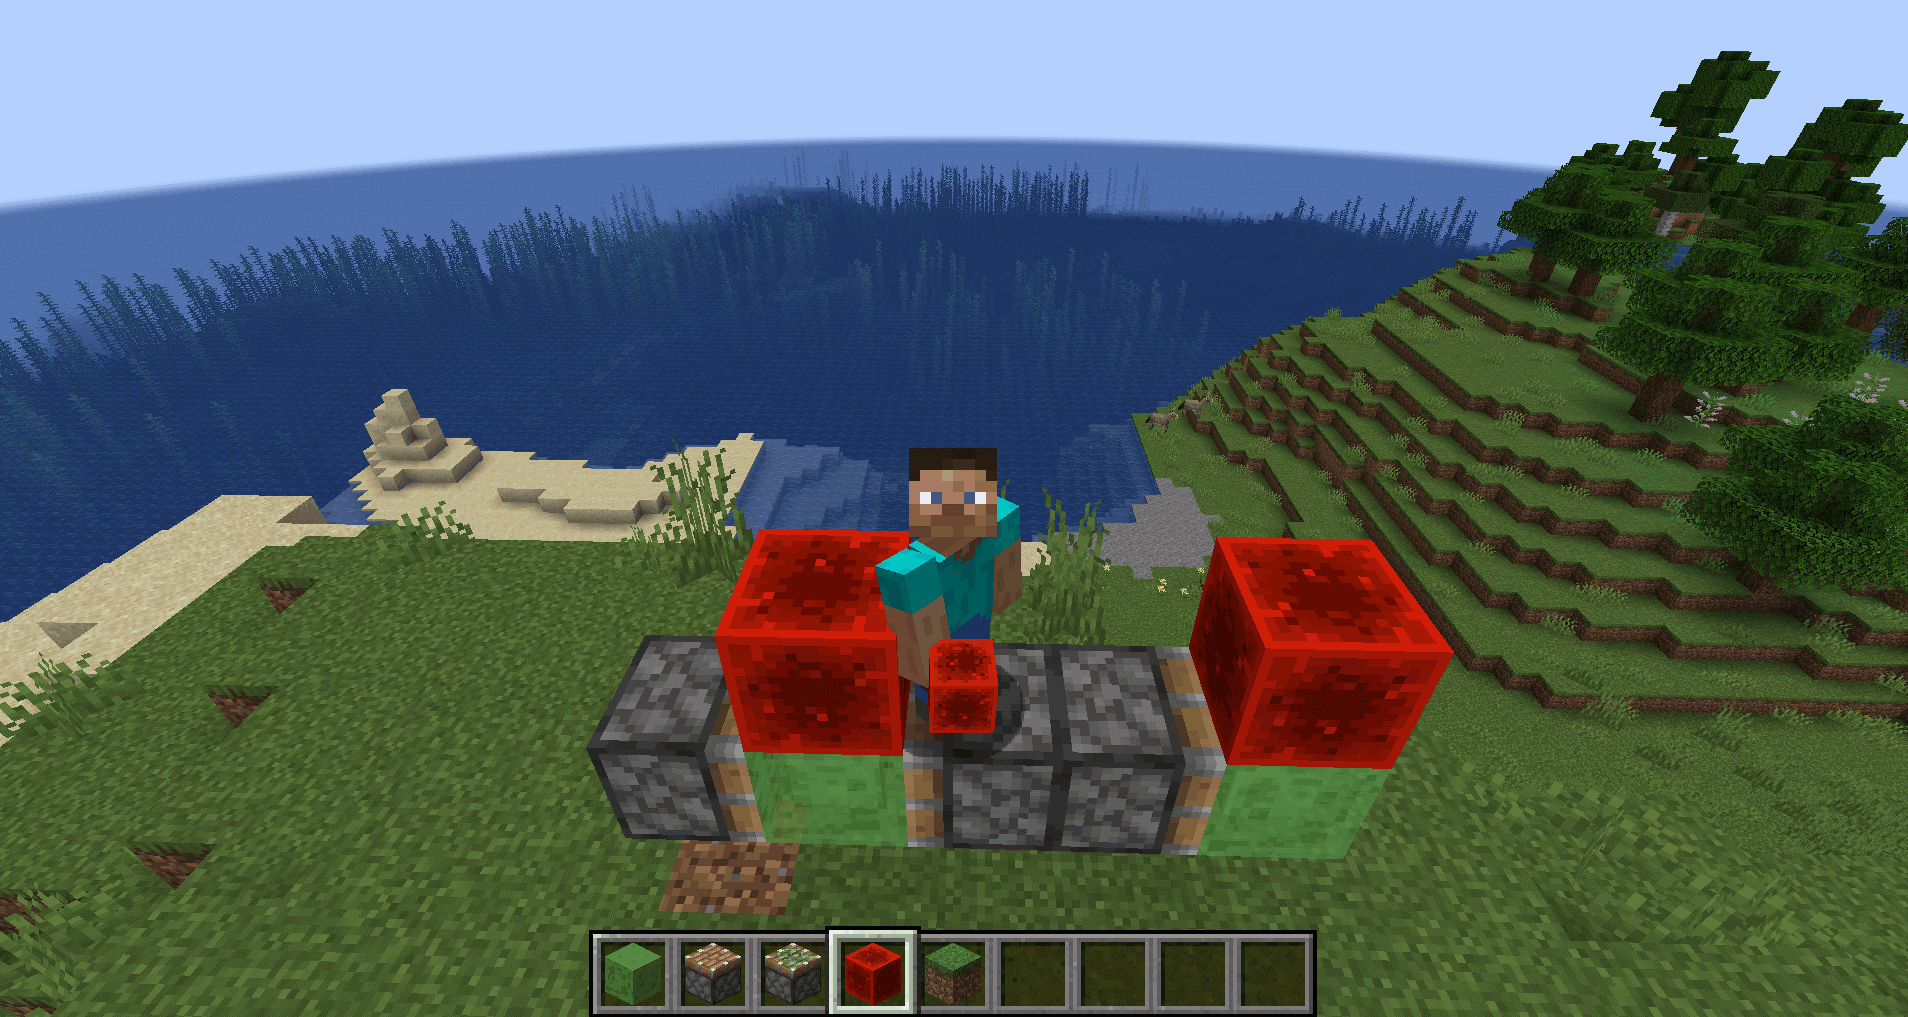
- Now you can edit the machine to make it look like a plane! Just note that if you want your designs to stick, you’ll need to use slime blocks as your pieces. Also, keep in mind that a piston can only push 12 blocks at a time. If you use more than that, your flying machine won’t be going anywhere.
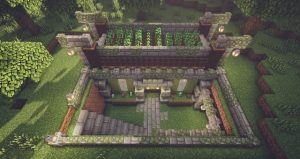
Self-Harvesting Farms
Did you know that Minecraft farms can be built to be self-harvesting? Yes, it does exactly what the name implies: a farm that produces and harvests items for you with virtually no player intervention necessary. This may be tricky to build at first but trust us; the resource payoff is incredible.
Here’s a helpful auto wheat farm tutorial from YouTube creator quinnybagz if you want to create your own!
Related Reading:
Dungeon Farm
If you can preserve the spawner at the center of a dungeon, you can nag yourself an infinite supply of mobs and monsters. While this doesn’t sound like something you’d want, ideally, an endless supply of monsters also means an endless supply of item drops.
It’s for this reason that a dungeon farm machine actually exists!
A lot of players use it to automatically destroy mobs and salvage their items. Using redstone – and some clever Minecraft building techniques – you can instantly destroy mobs without actually physically fighting them. Moving them near lava, for instance, or submerging them in water can destroy them with little to no intervention on your part.
Follow Shulkercraft’s video tutorial here for more info!
Related Reading:
X-ray Machine
In Minecraft, an X-ray machine allows the player to see through the ground. This can be useful for mining. However, it would definitely be considered something of a cheat, so use it with caution. It’s actually quite simple to build and needs – at its core – some redstone, a piston, and a composter. Here’s a more detailed video tutorial from YouTube content creator Shulkercraft.
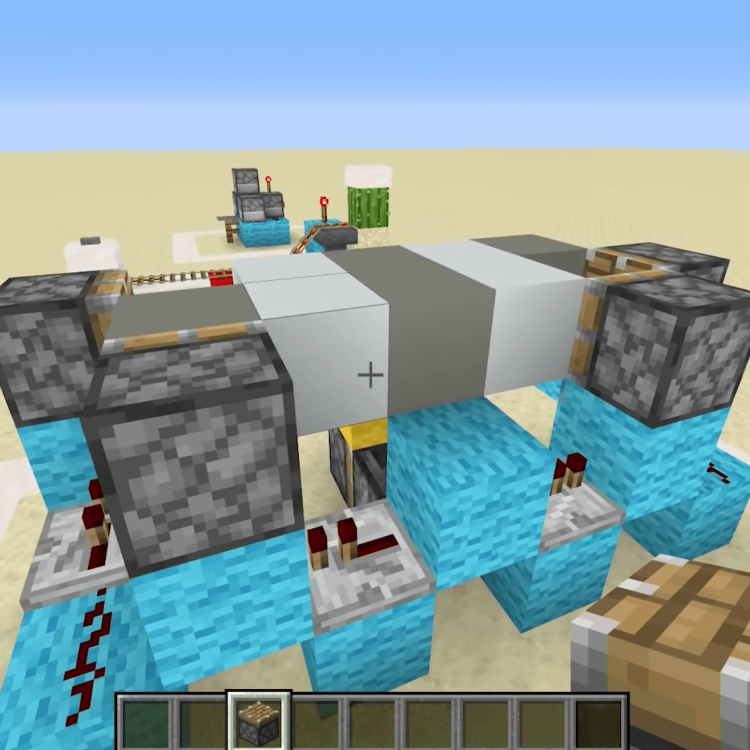
Redstone Piston Door
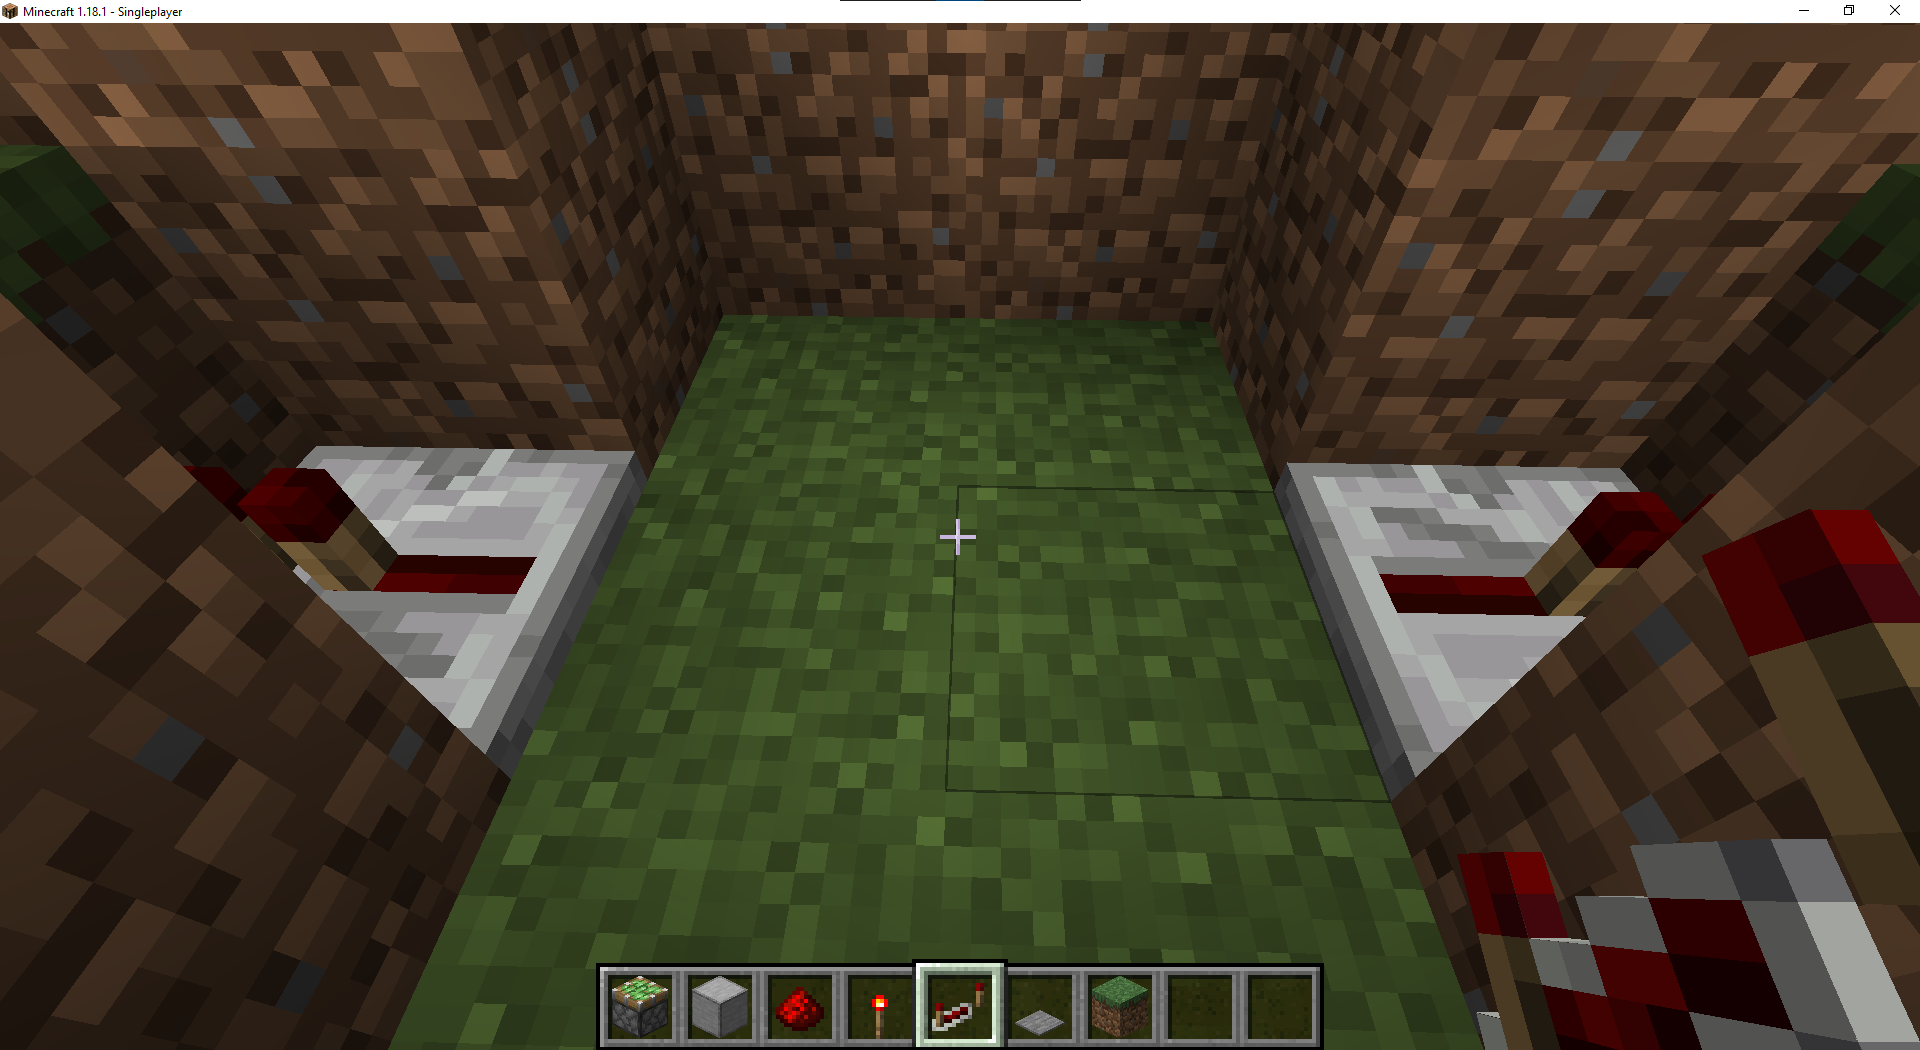
Here’s a step-by-step guide to creating a redstone piston door:
- First thing you’ll need is a great location for your door. You’ll need an 8×3 area for this build, so make sure you give yourself plenty of room for both the door and everything you want to build around it.
- You’ll need the following materials to create your door. Obviously you won’t have to worry about materials if you’re building in creative mode, but if you’re trying this build in survival, you’ll want to make sure you have everything in this list before we get started.
- 6 sticky pistons. A piston is a block that is capable of pushing things when given a redstone pulse. The sticky piston holds onto the block on its sticky side instead of pushing it and leaving it like a regular piston.
- 8 smooth stone blocks (or whatever kind of block you would like to make your door out of)
- 2 redstone torches
- 2 redstone repeaters
- 10 redstone dust. Remember; redstone dust works like electrical wiring, allowing us to create redstone circuits.
- 2 pressure plates. Pressure plates give a redstone signal and will allow us to operate our door.
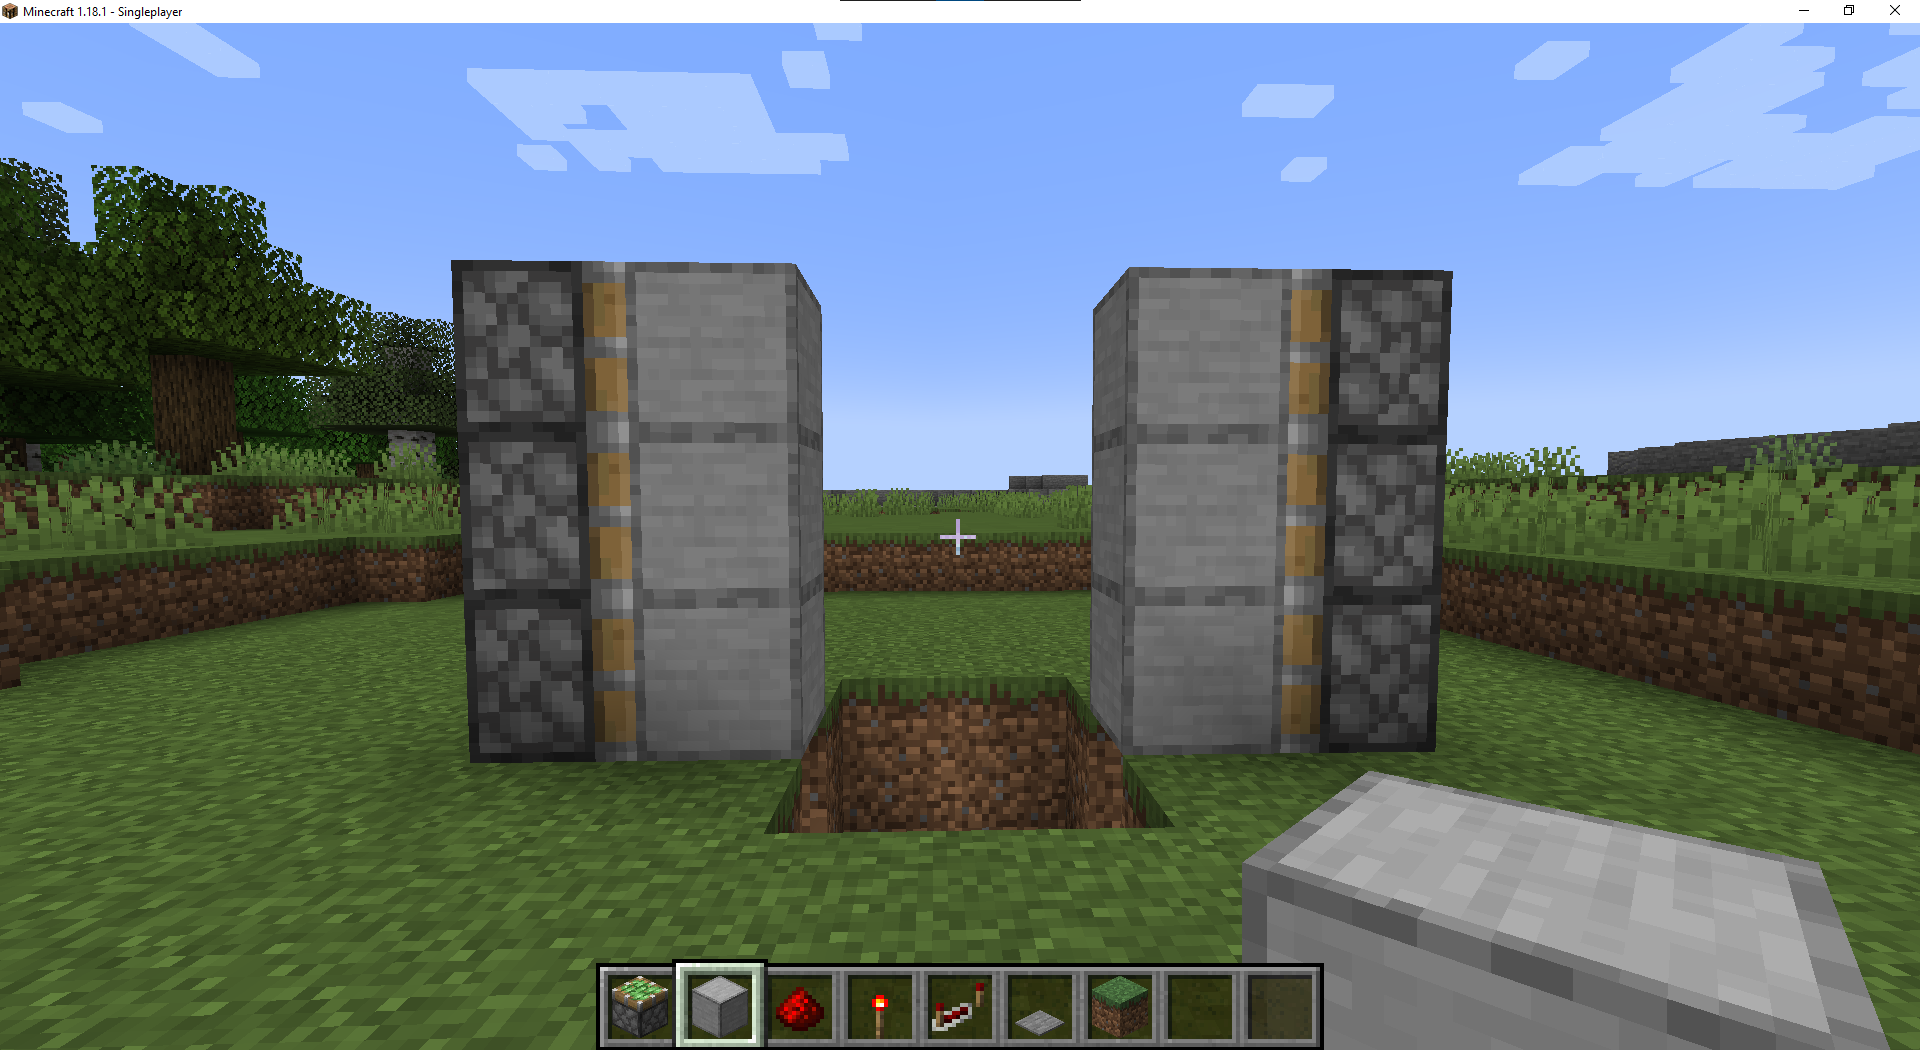
- Start by stacking 3 sticky pistons on top of each other. They should be facing in the direction you want your door to be.
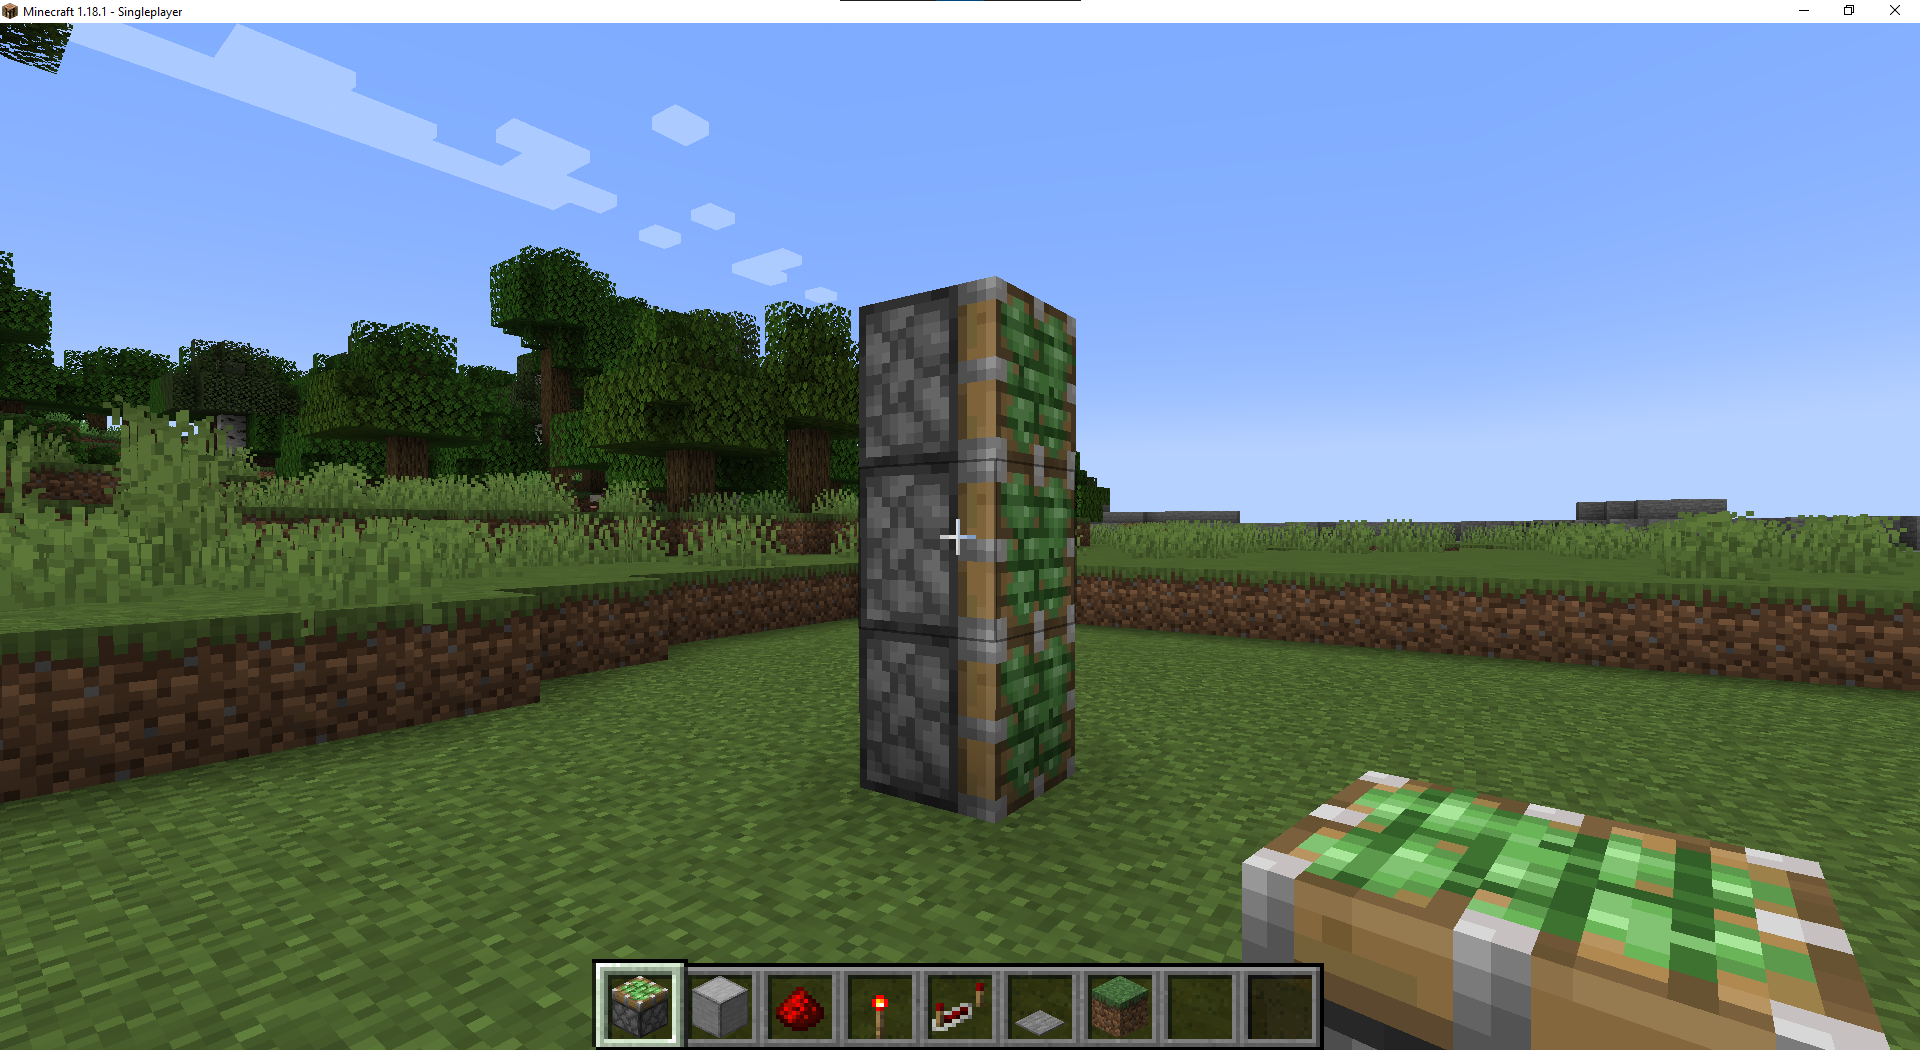
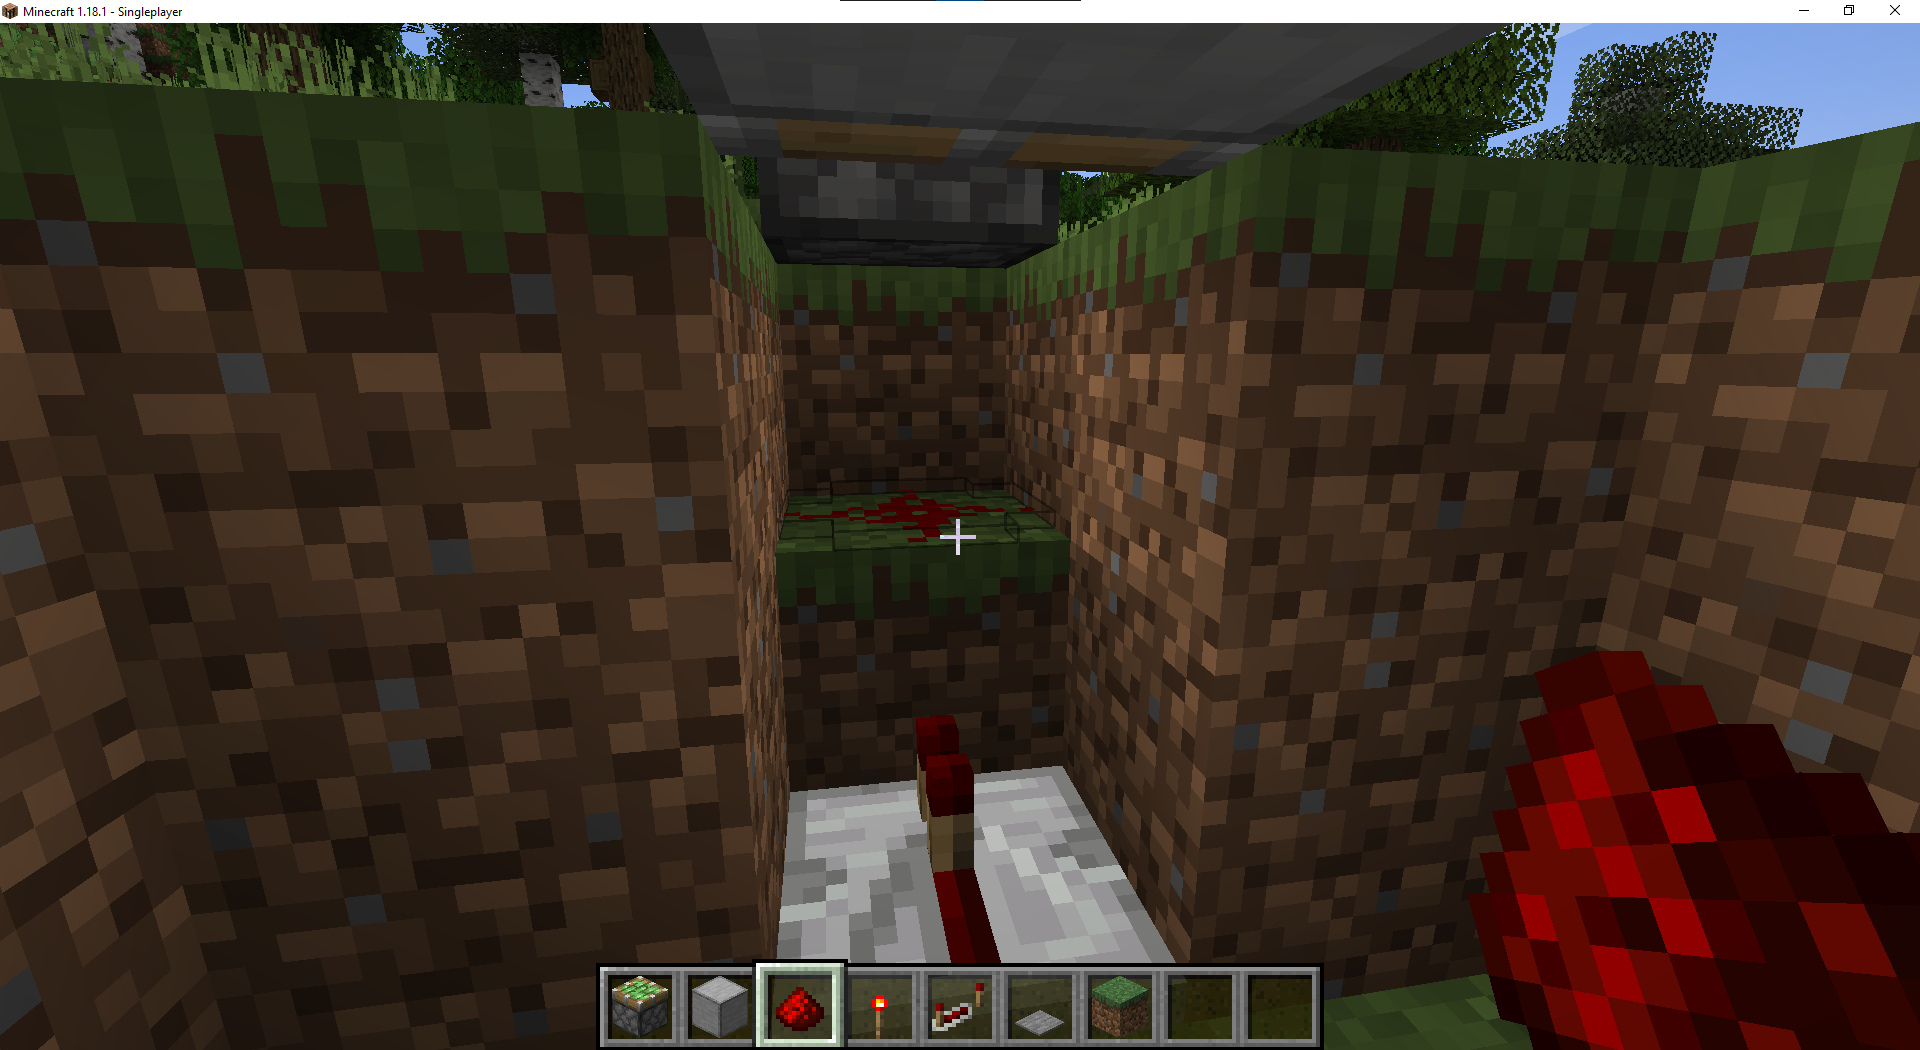
- Add 3 more sticky pistons stacked facing the pistons we just placed. Leave 4 blocks of space between them. This space in between is where the door will open/close. We’ll dig below it to create our redstone circuit and connect the piston doors to our pressure plates.

- Dig down 2 blocks deep and 4 blocks wide between the pistons.
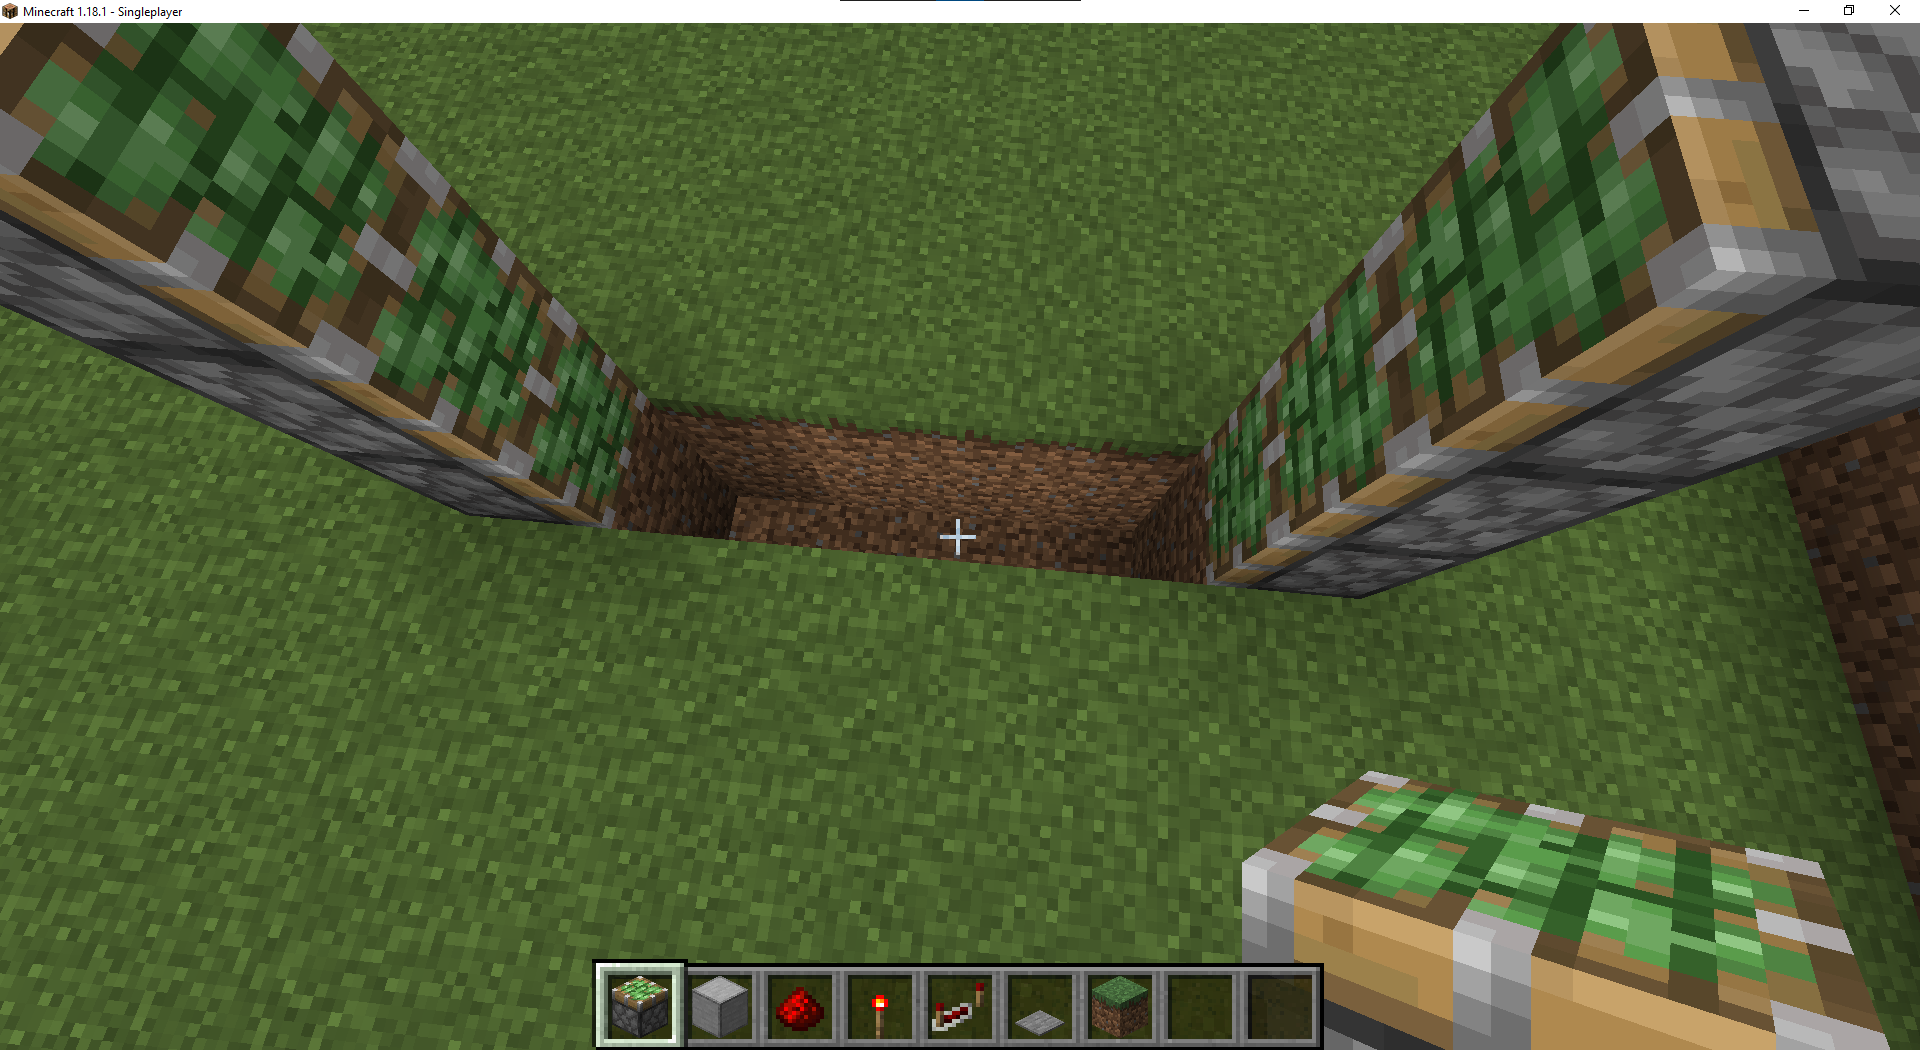
- Expand the two outer blocks by digging another 2 deep.

- Lastly, dig a hole 1 block deep below each stack of pistons you created.
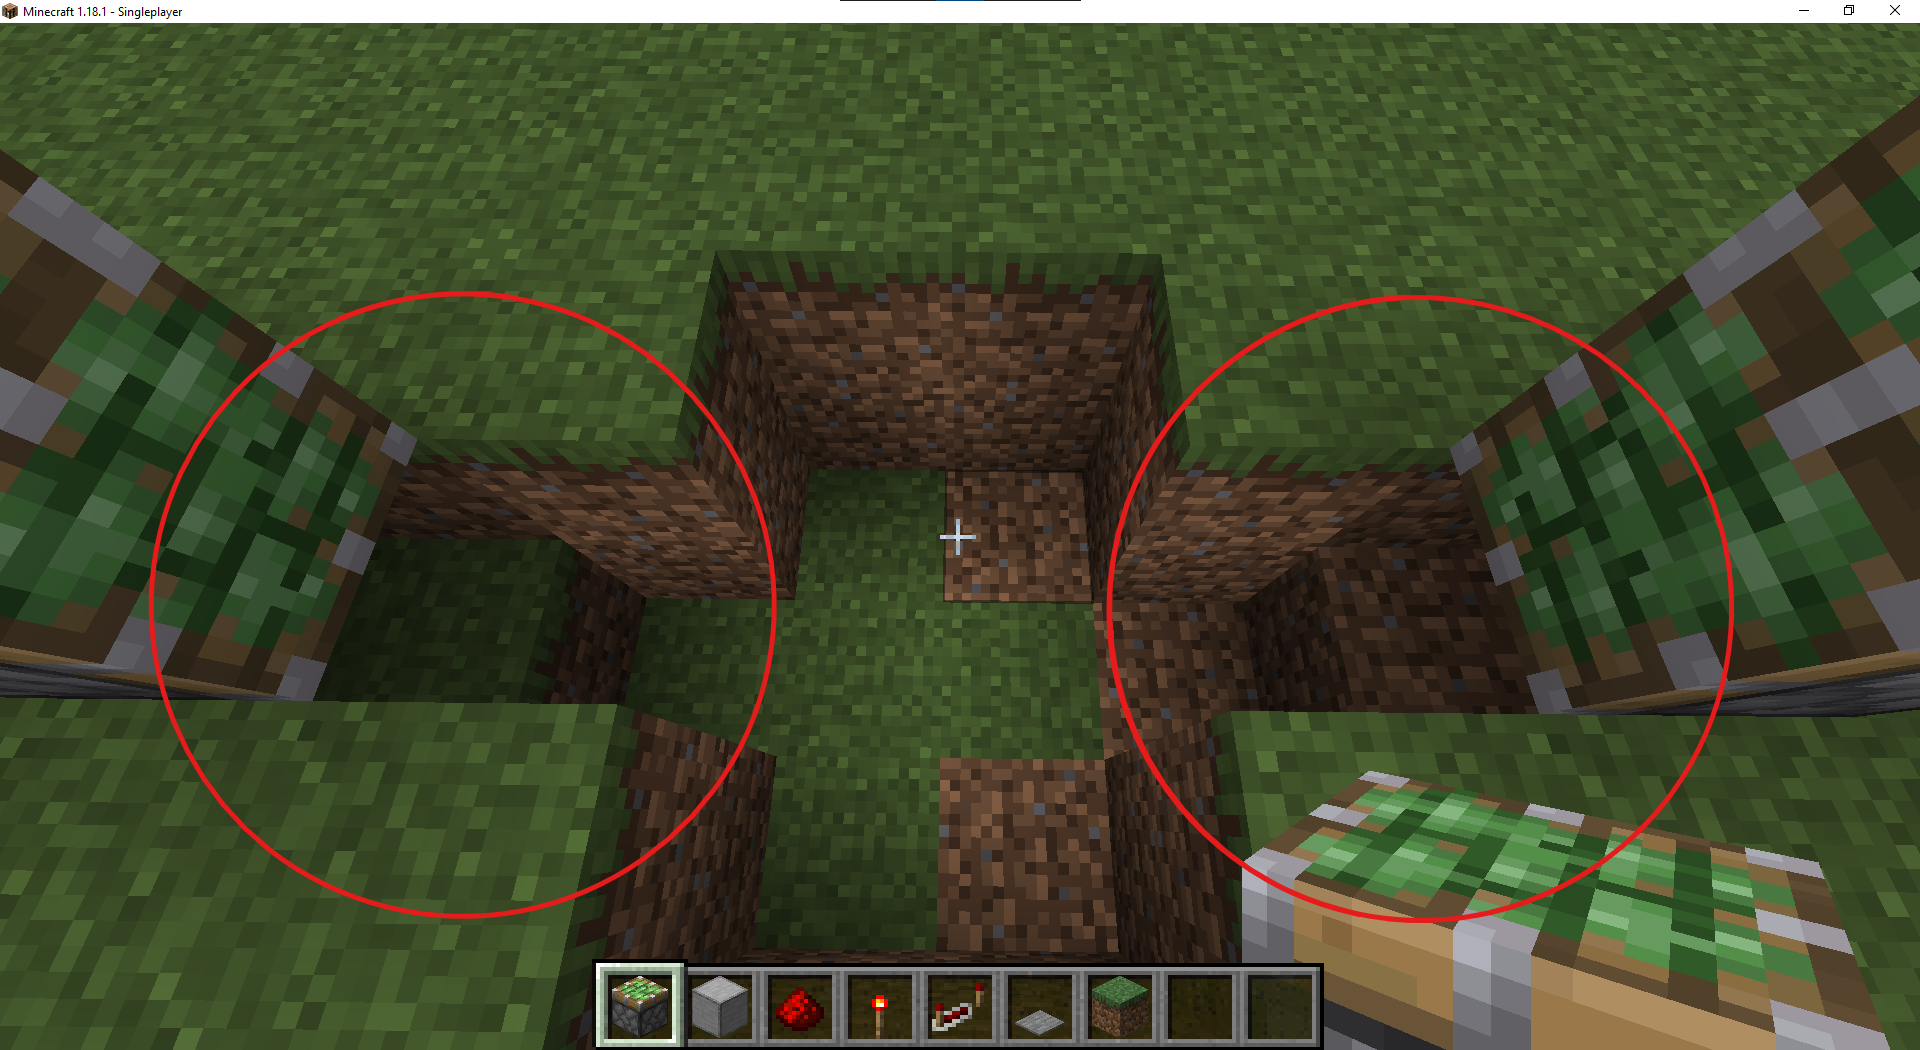
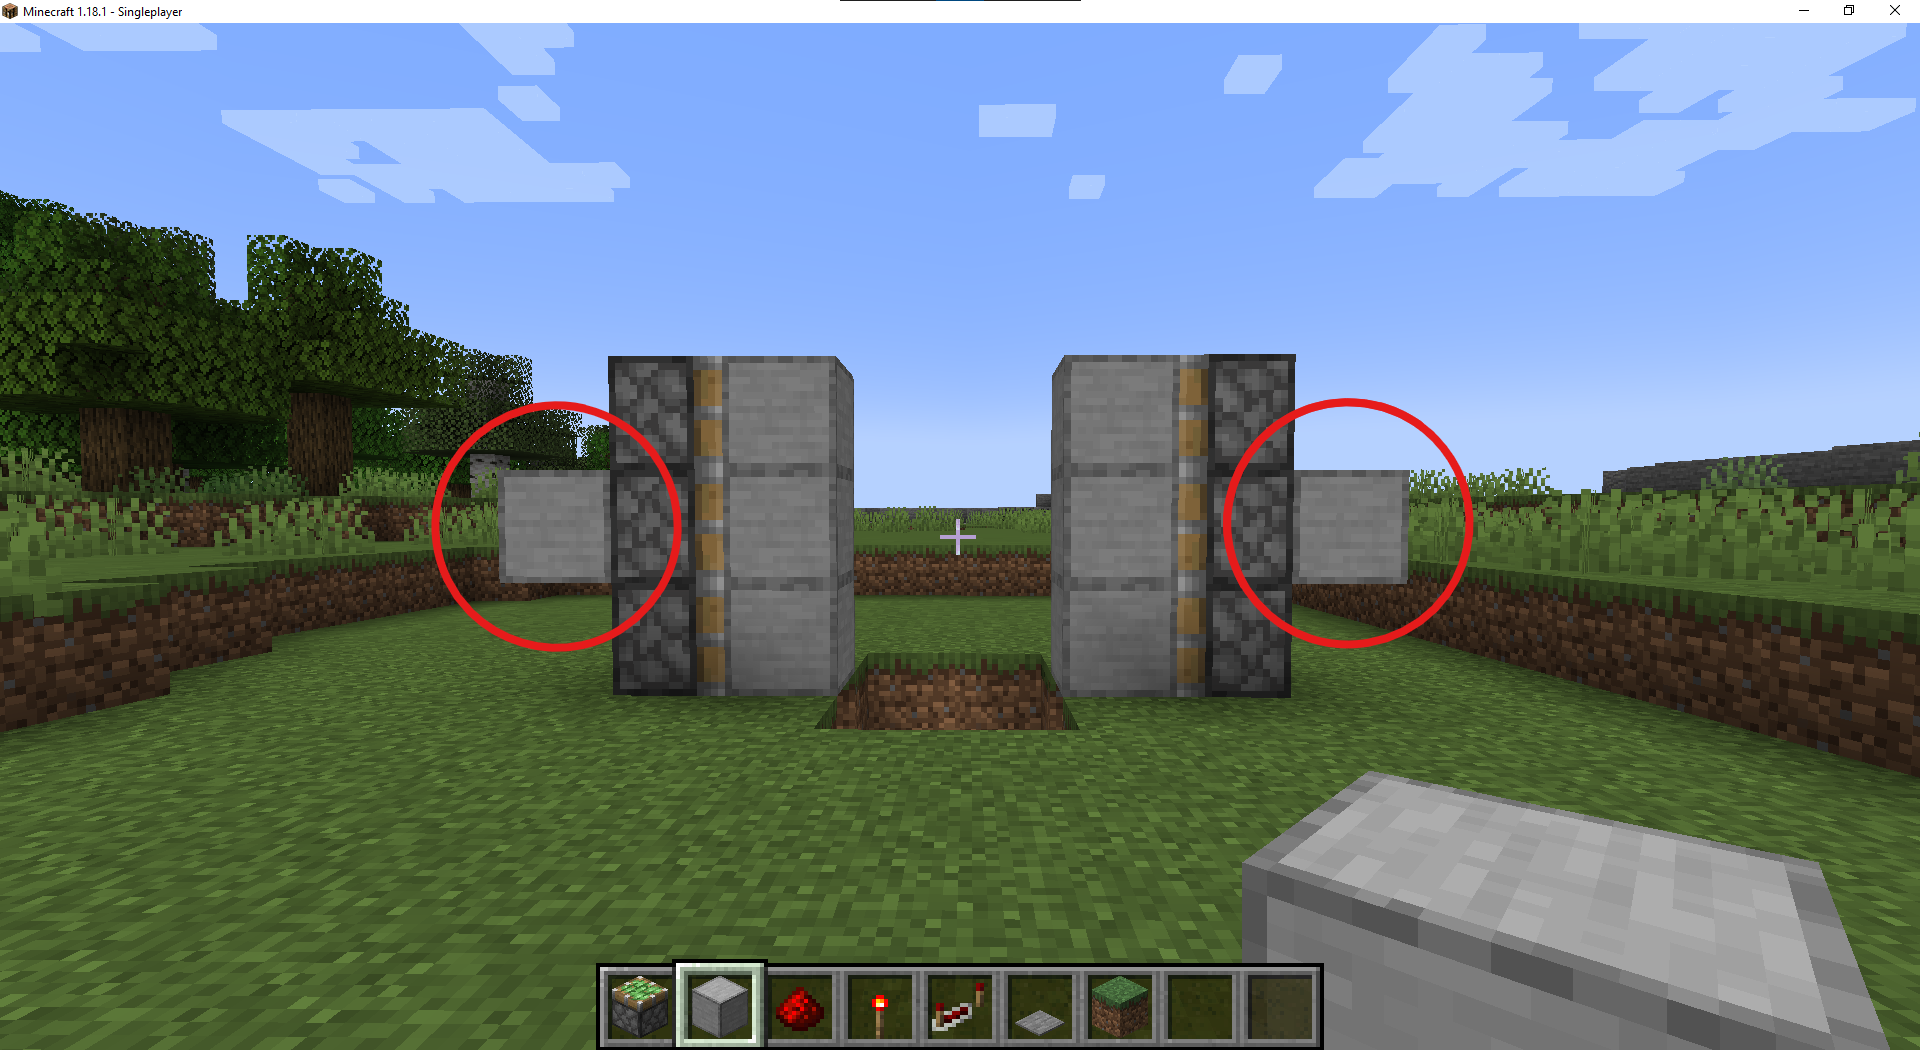
- Now that we’ve done all of the necessary digging, hop out of the hole. We need to place three blocks on the sticky side of the pistons to create a door. You can pick any kind of material you’d like to create a fun door, but we’re going to stick with smooth stone for simplicity.
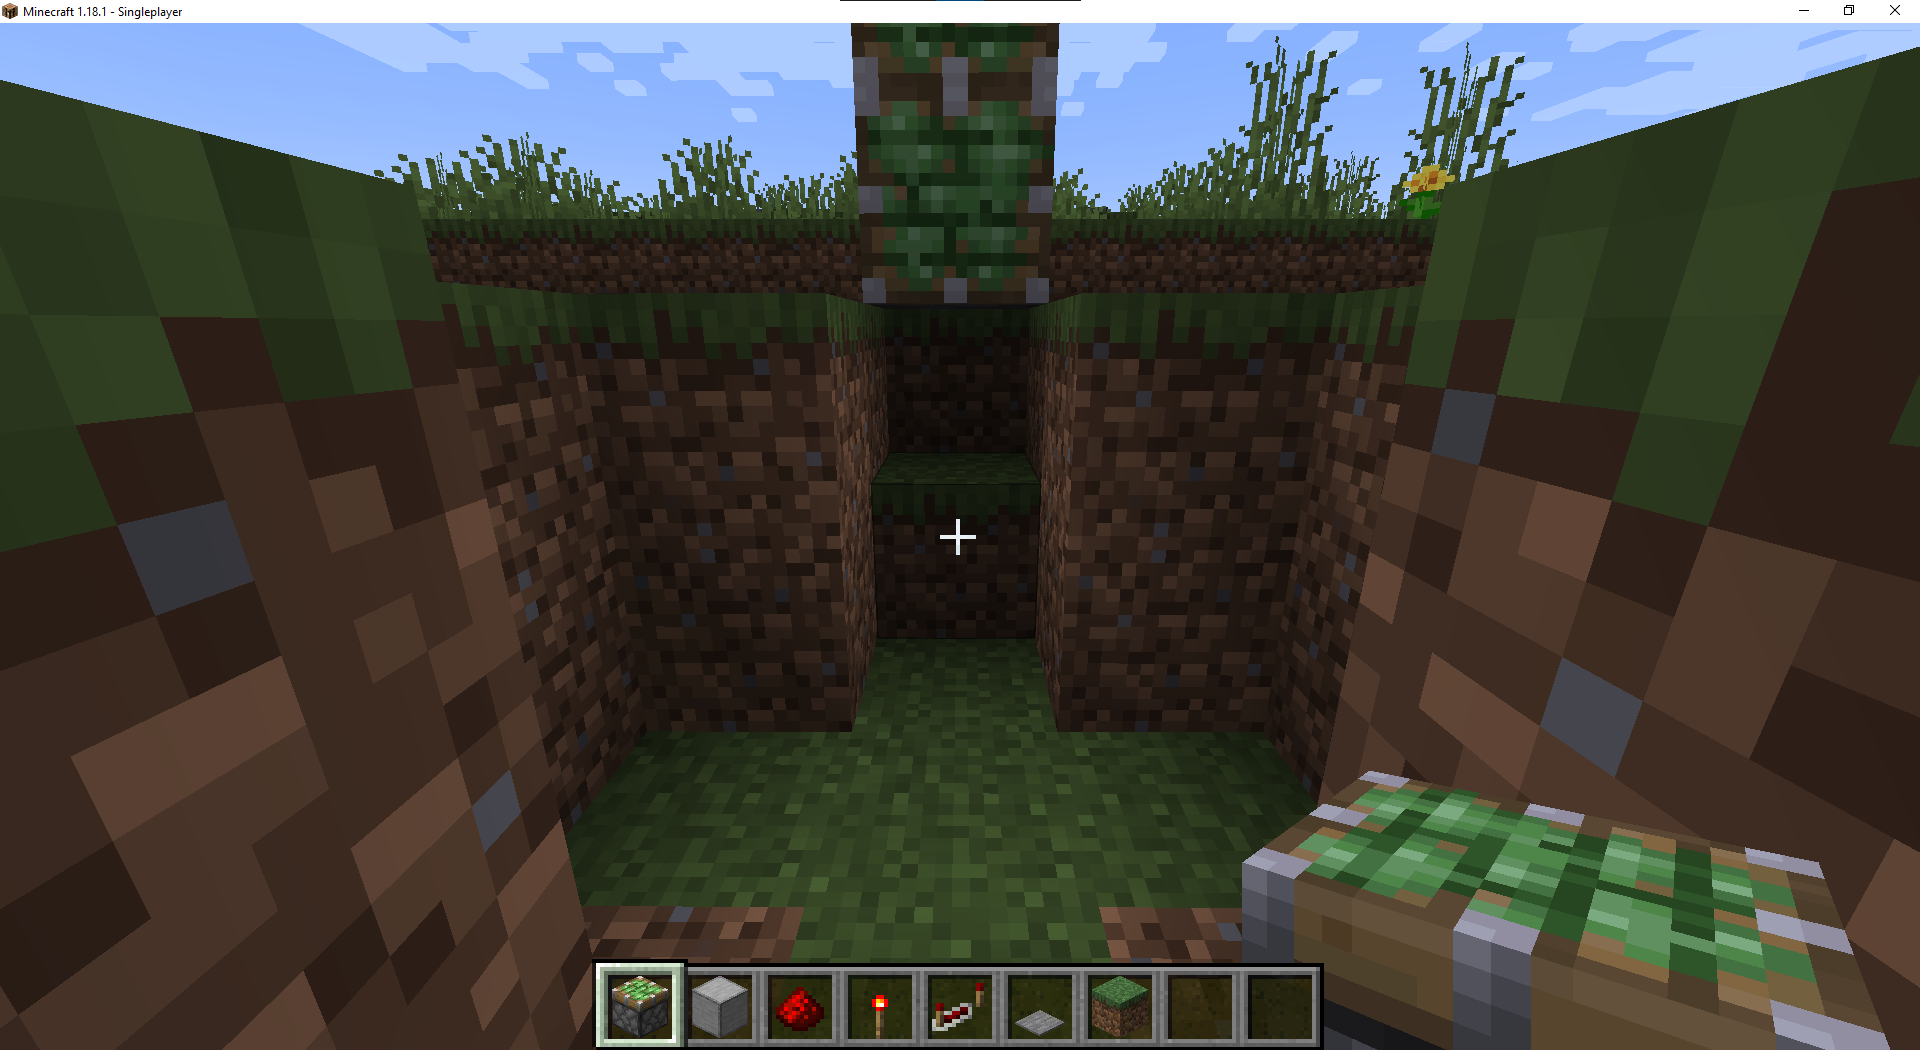
- Add another smooth stone block on the outside of both center pistons. These will act as shelves so we can reach the top pistons with redstone.
- Place a redstone torch under each of these blocks. When you do, the bottom two pistons will expand, closing the bottom ⅔ of the door.
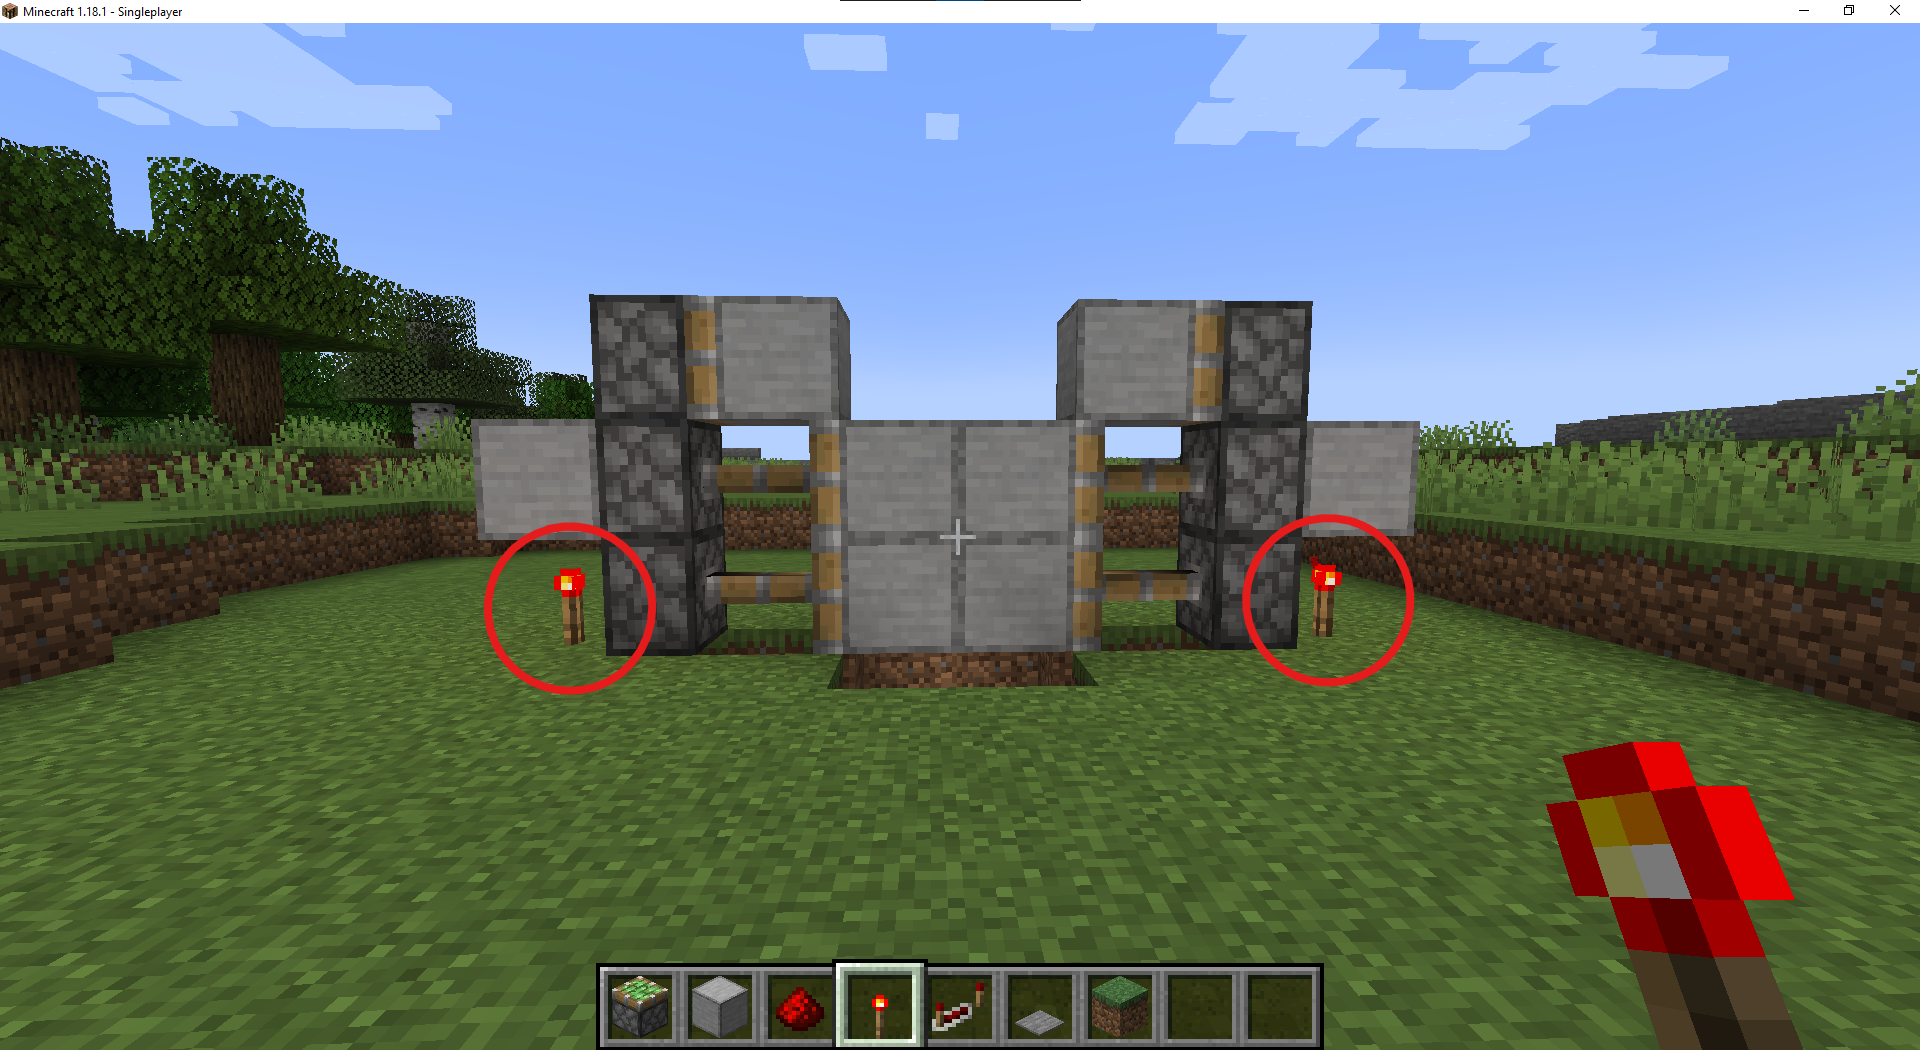
- Place redstone dust on the top of the block we placed. Once you do, the rest of the door will close.

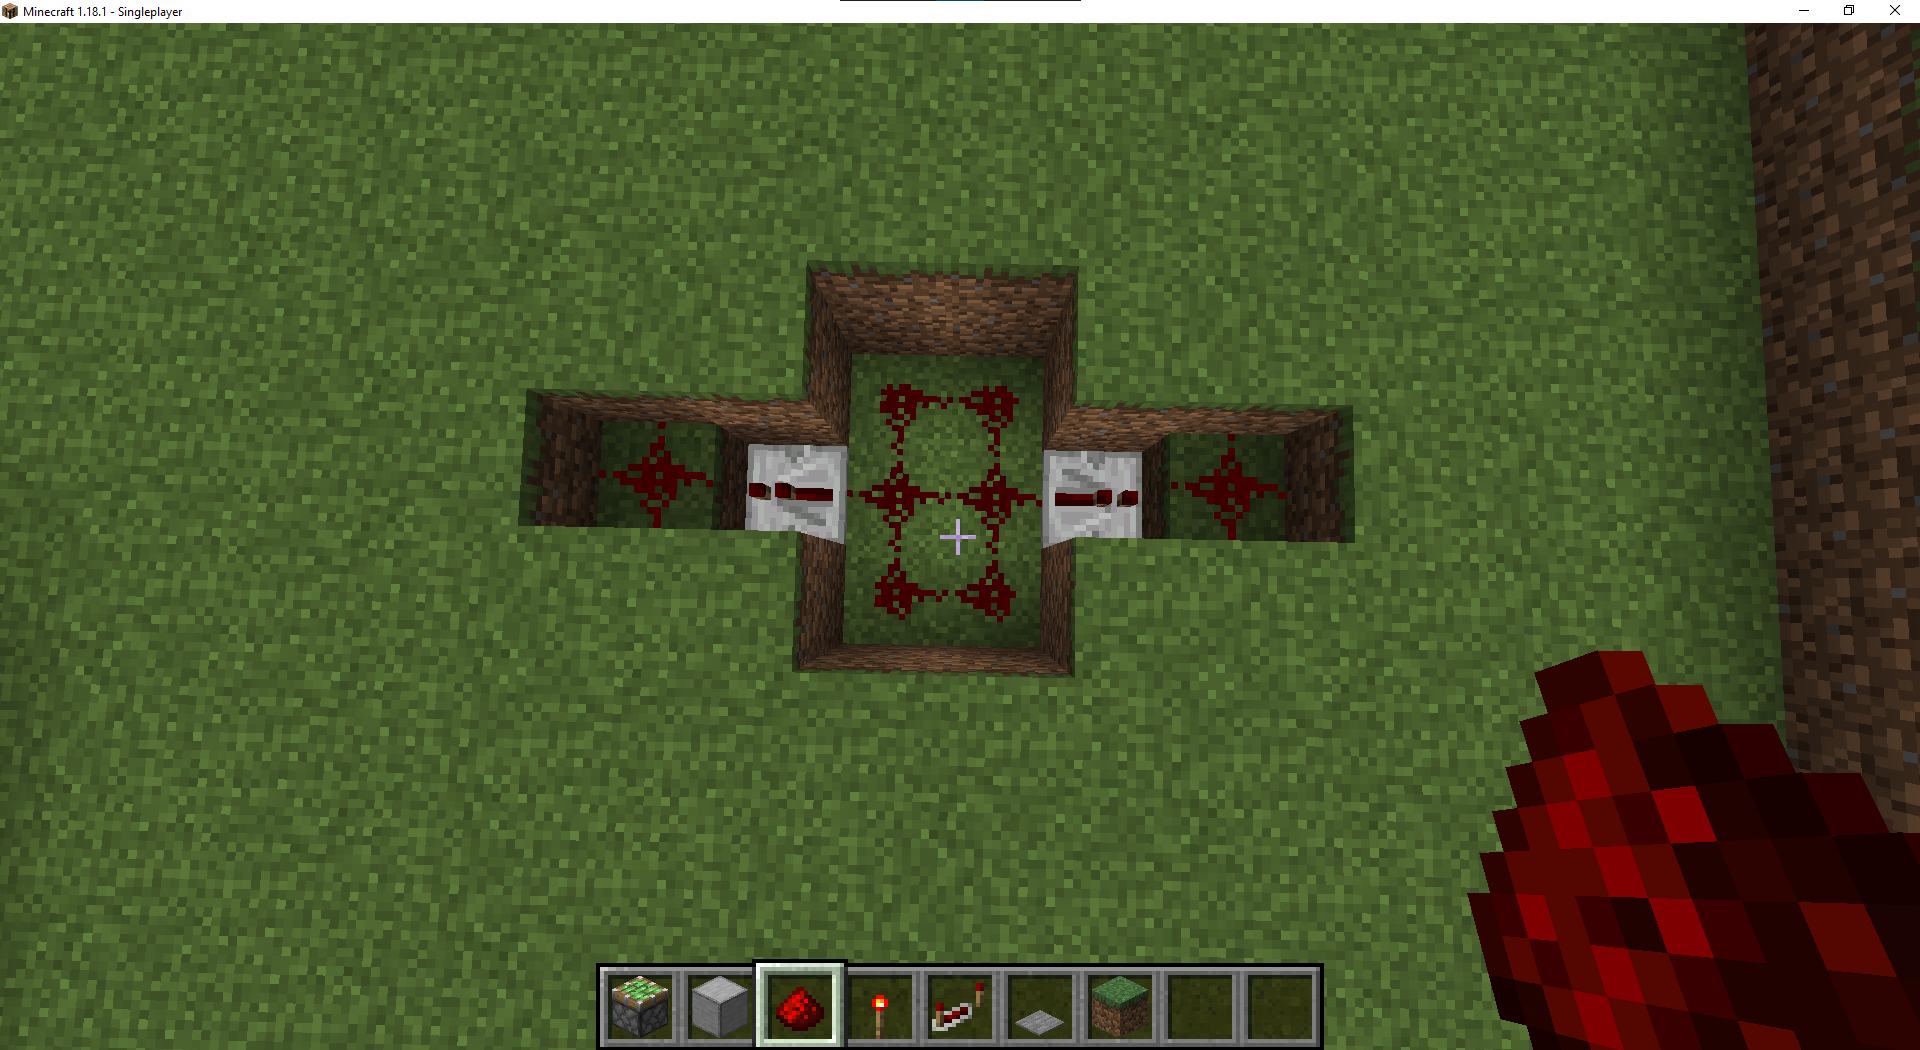
- Perfect! Now we need to create a way for us to open the door. Go ahead and jump back into the hole below your door. Place two redstone repeaters below the spot where your door will sit when it is open. Make sure they are facing away from you!
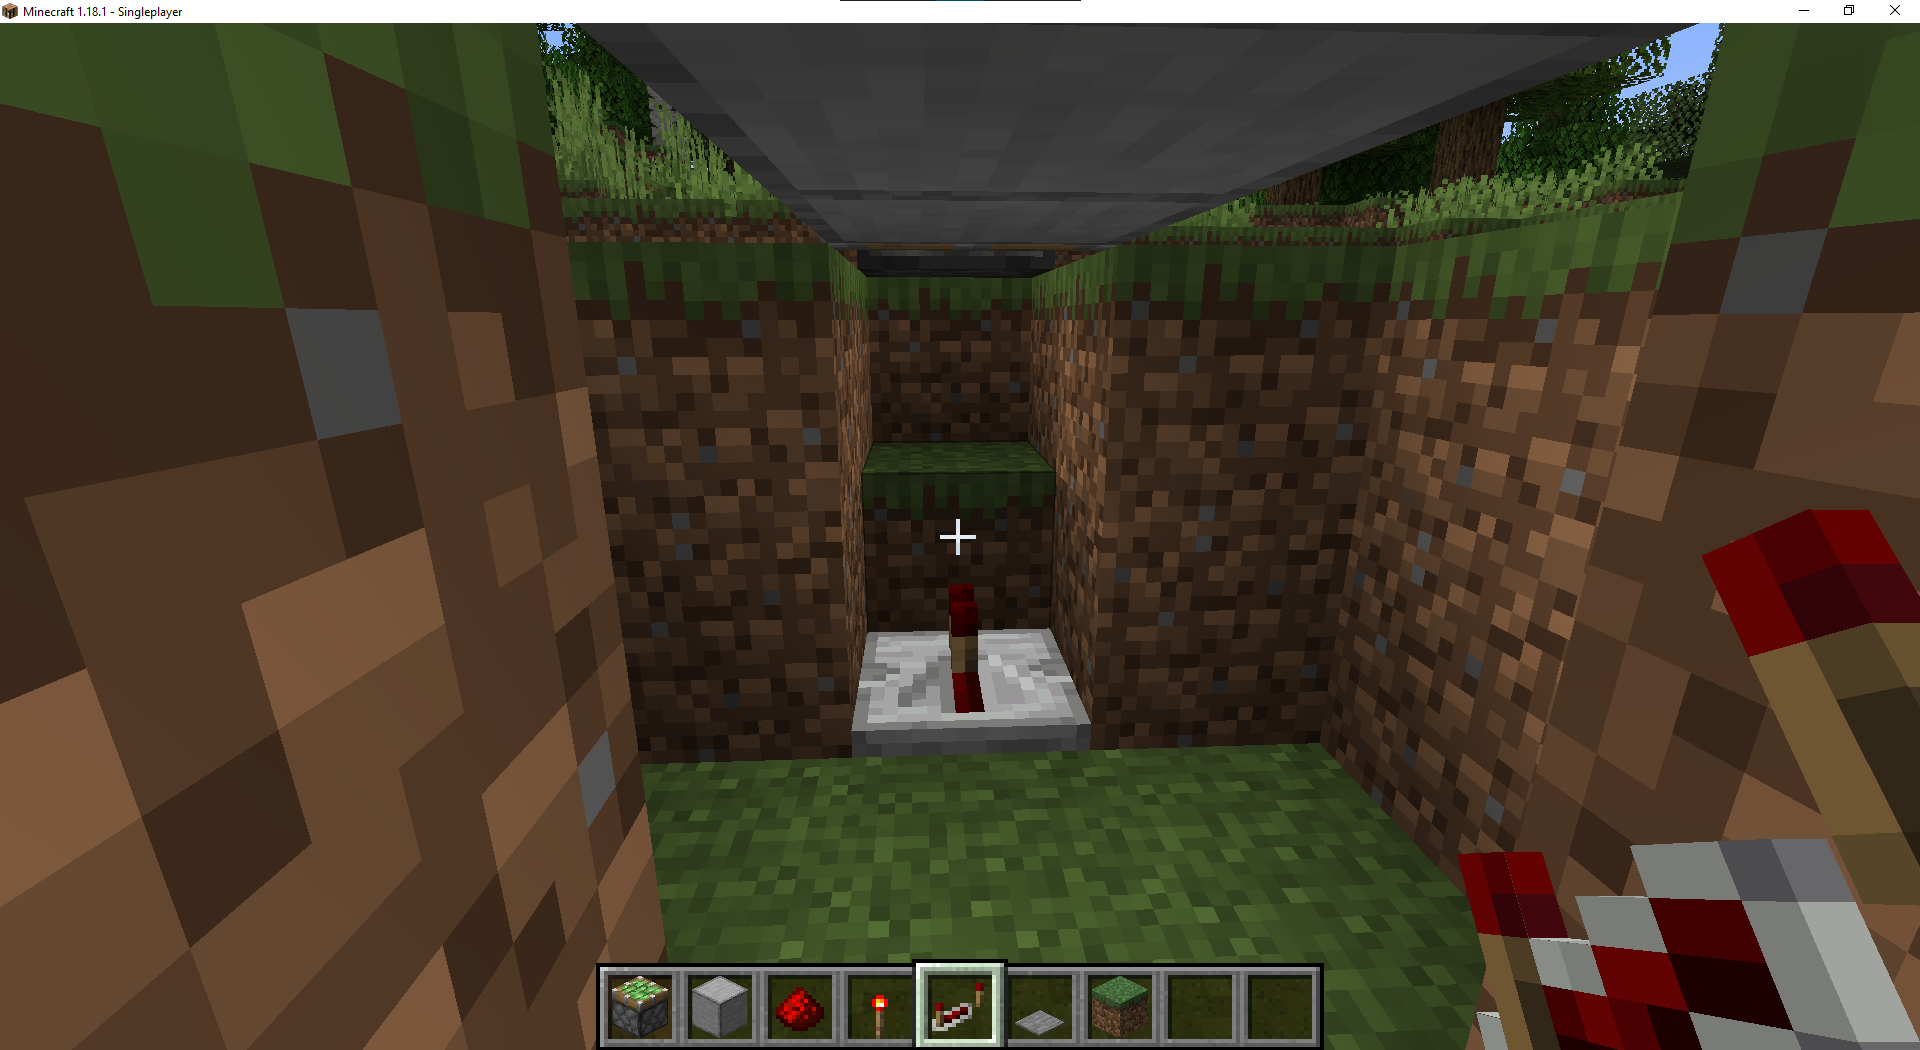
- Fill the rest of your area with redstone dust, including the ledge we made under the pistons!

- Here is what it would look like without the pistons or blocks in place (this is done for show- please do not destroy your other blocks).
- We can now fill in the ground around your door. We used grass blocks to fill it in because we made it in the dirt, but you can use whatever blocks you are using for your ground.
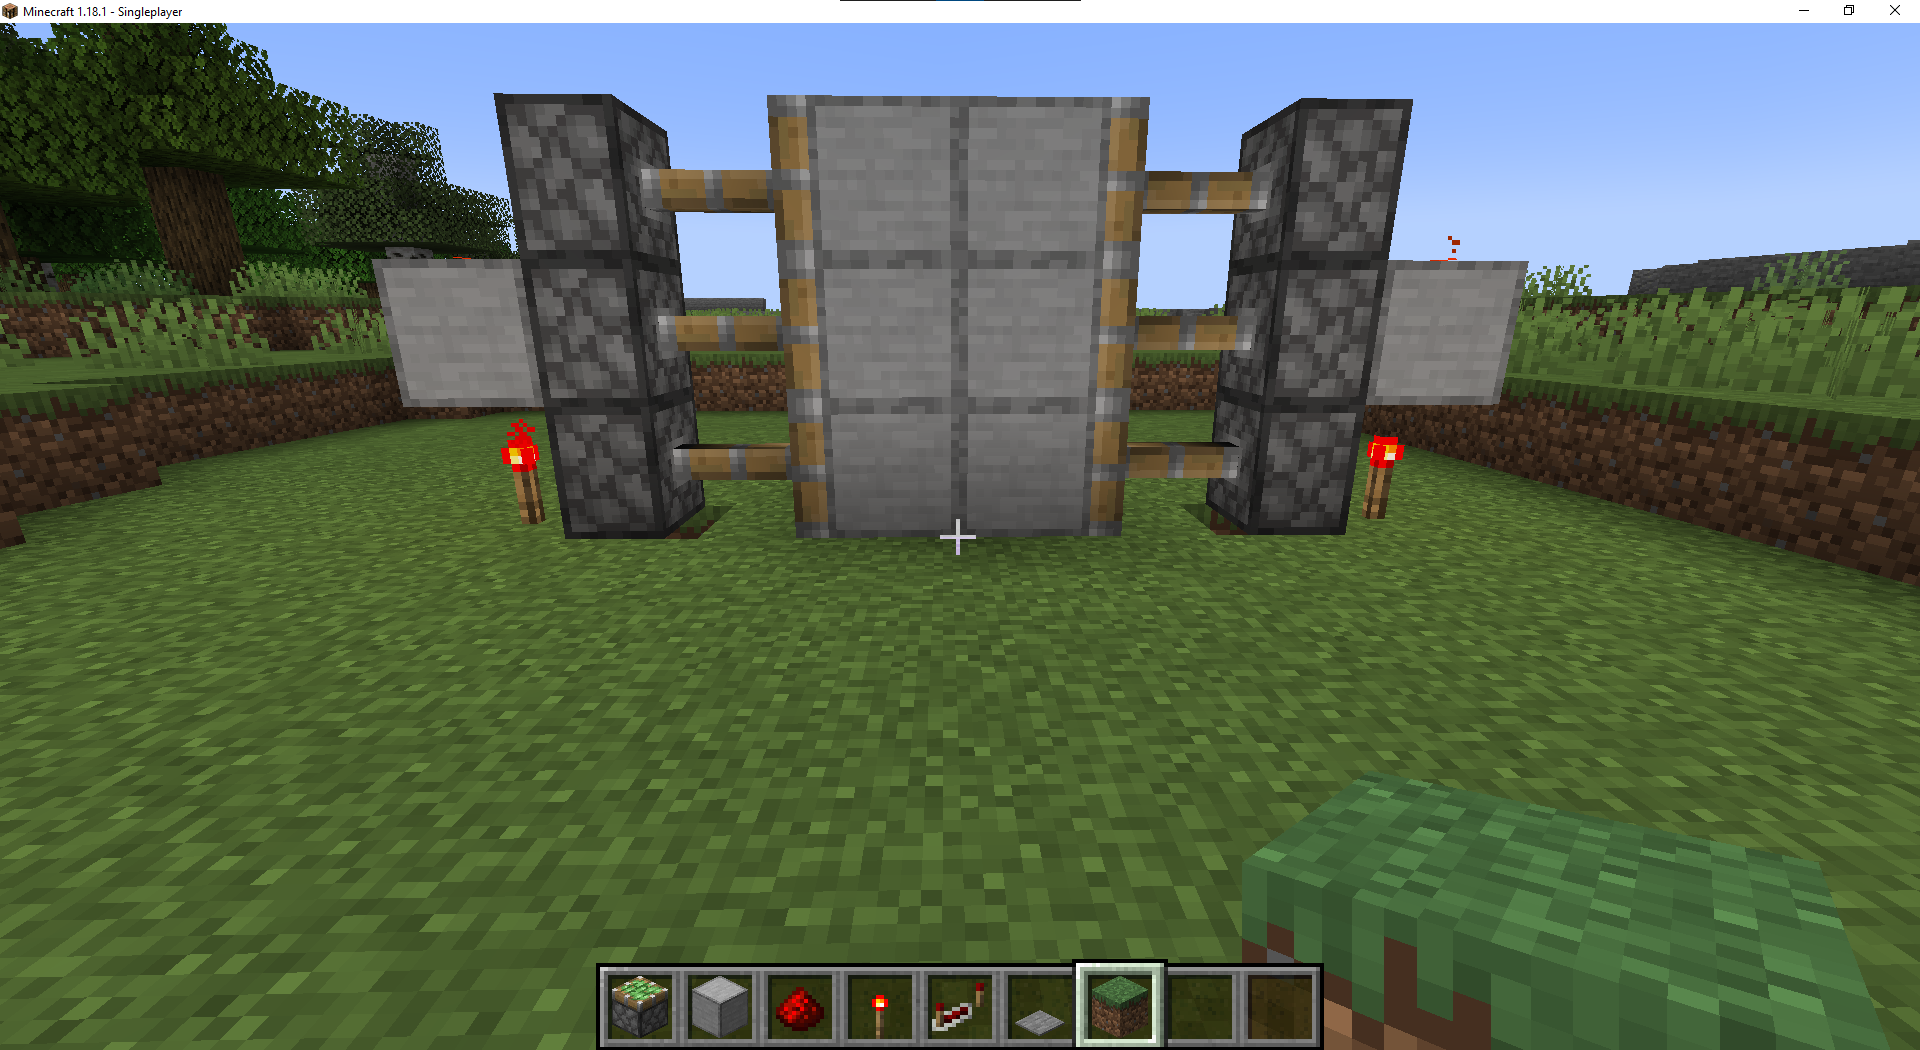
- Now we need something to activate the repeaters below our door. We’ll add two pressure plates on either side of the door to do so!
- Now step on the pressure plates! Make sure to fill in the ground in between the doors too! When you’re done, it should look like this:
- All that’s left to do is create an awesome building around it!
XP Bank
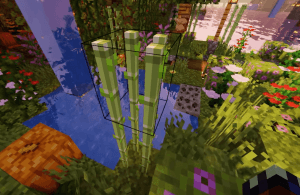
Bamboo has been a game-changer. Some incredibly creative Minecraft players realized that combining bamboo’s unique properties with redstone’s capabilities would allow them to farm XP (experience points) two to three times faster than before—again, with little to no intervention needed on their part. No more fighting mobs or grinding through dozens of dungeons a day. All you need is some redstone, some cacti, and some bamboo. Check out Avomance’s video here for step-by-step instructions!
Elevators
The concept of elevators in Minecraft seemed near-impossible—until some players realized redstone could be fully utilized to move a player up and down with relative ease. Now, it’s just one of those things where almost everyone can remember how to build it after doing so successfully two or three times. Eagle MCraft and BBlocks on YouTube have great tutorials you can follow!
Minecraft Redstone Uses
We’ve talked a lot about how redstone can be likened to electricity or a power source. But we forgot to mention that it can also be used in potions and other non-charged crafts.
Yes, this material is incredibly versatile. People have written books dedicated solely to what one can achieve with enough redstone, and it’s honestly mind-blowing! There are so many possibilities.
For the sake of brevity, we’re going to summarize general redstone dust and redstone ore uses. But just know that there is so much more to redstone than just textbook definitions.
Use: Potions
Redstone dust is a key ingredient in brewing a mundane potion, which can be used to make a Potion of Weakness. It can also be used to extend the effect duration of several potions, like Potion of Regeneration or Potion of Strength.
Related Reading:
Use: Crafting
Aside from creator-generated Minecraft builds, there are some canon Minecraft blocks that actually need redstone dust as a main ingredient. They are:
- Block of Redstone
- Clock
- Compass
- Detector Rail
- Dispenser
- Dropper
- Note Block
- Observer
- Piston
- Powered Rail
- Redstone Lamp
- Redstone Repeater
- Redstone Torch
- Target
Use: Building
We’re certain you’ve come across as insanely useful – or even just downright cool! – Minecraft machines that seem almost impossible, like in-game elevators, block dispensers, and automated farming machines. In the next section, we’re going to go over some cool Minecraft redstone ideas to give you an example of how versatile and powerful redstone can be.
Related Reading:
Conclusion
We hope you enjoyed this rather extensive – but still condensed! – a guide to Minecraft Redstone. Here’s a quick recap:
- What is Redstone?
- Redstone Basics: Breaking it Down
- Redstone Ore
- Redstone Dust
- Block of Redstone
- Powered Blocks
- Devices
- Redstone Signal
- Redstone Wire
- Redstone Repeaters
- Redstone Circuit
- Redstone Comparator
- Minecraft Redstone Uses
- Use: Potions
- Use: Crafting
- Use: Building
- Minecraft Redstone Ideas
- Redstone Flying Machine
- Self-Harvesting Farms
- Dungeon Farm
- X-Ray Machine
- Redstone Piston Door
- XP Bank
- Elevators
- Conclusion
Since a huge part of our curriculum uses Minecraft to teach coding for kids, we’ve long since familiarized ourselves with this element and all its properties. However, we still feel like we haven’t even scratched the surface of what redstone can do. It’s that powerful!
Again, don’t feel intimidated or overwhelmed by redstone. With enough patience and practice, you too will feel confident enough to start exploring and experimenting with it!