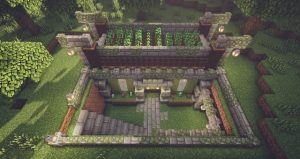
Coding is like an art for your kids to learn and enjoy at the same time. It’s like a form of self-expression to create something new in a fun, interactive, and safe way. And this is why we’ve partnered with Minecraft- to give your kids a memorable kind of learning while encouraging them to solve problems by breaking them down into bite-sized equations.
Minecraft doesn’t just stop with unleashing your kid’s creativity. In fact, Minecraft is more than just building a virtual world where your children can build just about anything.
And because Minecraft allows your kids to be inventive and enthusiastically creative, we’ve listed down the ways to help you know how to customize your Minecraft server for immersive gameplay.
In this article, we’ll tell you everything you need to know about Minecraft server properties for fun, interactive gameplay.
Related reading:
Table of Contents
What is a Minecraft server properties file?
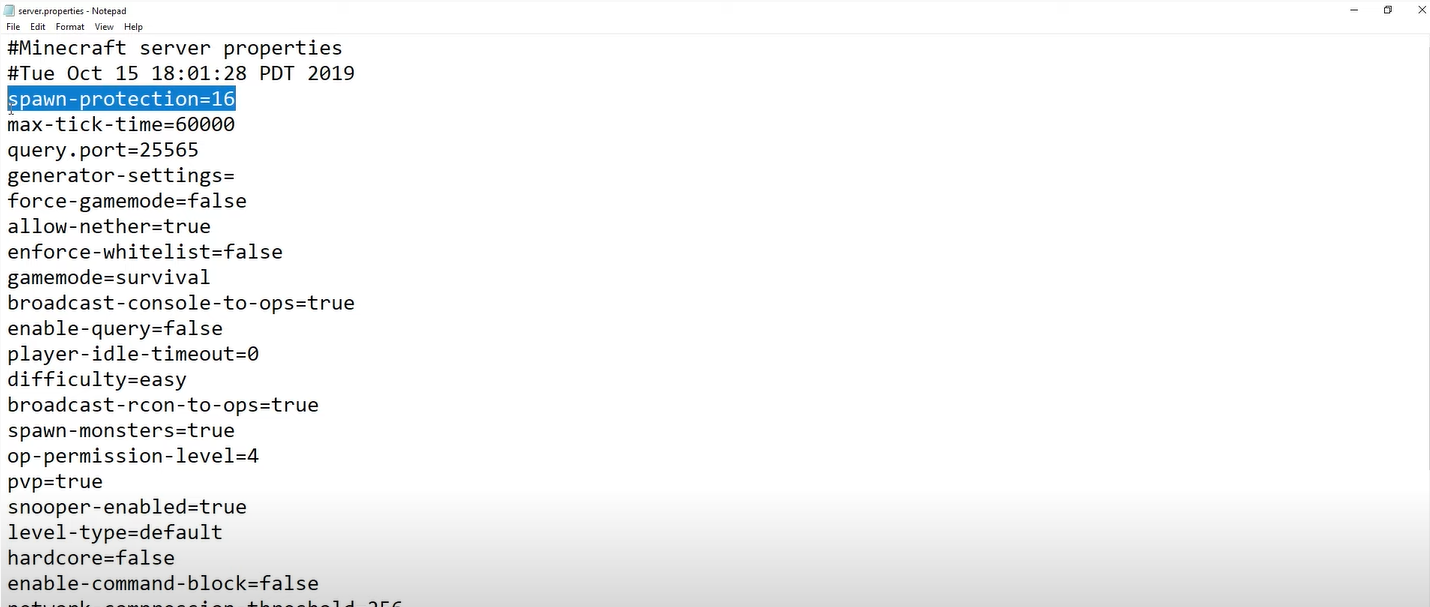
So, to simply put it, server.properties is the exact file that stores all of the settings for a multiplayer mode on Minecraft or Minecraft Classic server.
If you’re thinking about editing these properties, keep in mind that you should use the same structure as the original. But, the order of the lines could be arbitrary.
The text that you could find before the equal sign serves as the key, so be careful not to touch it. The text that comes after the equal sign is the property’s value, which you can edit.
Meanwhile, lines that begin with # are the comments. If you think you should remove or edit it, it will have no effect on the game.
After you’ve made changes on the server.properties file, be sure to restart the server for the changes to take effect.
You may also use the /reload option command within the server console or tap it in-game. All these options will allow changes to be reloaded.
How Can I Get To The Minecraft Server Properties Folder?
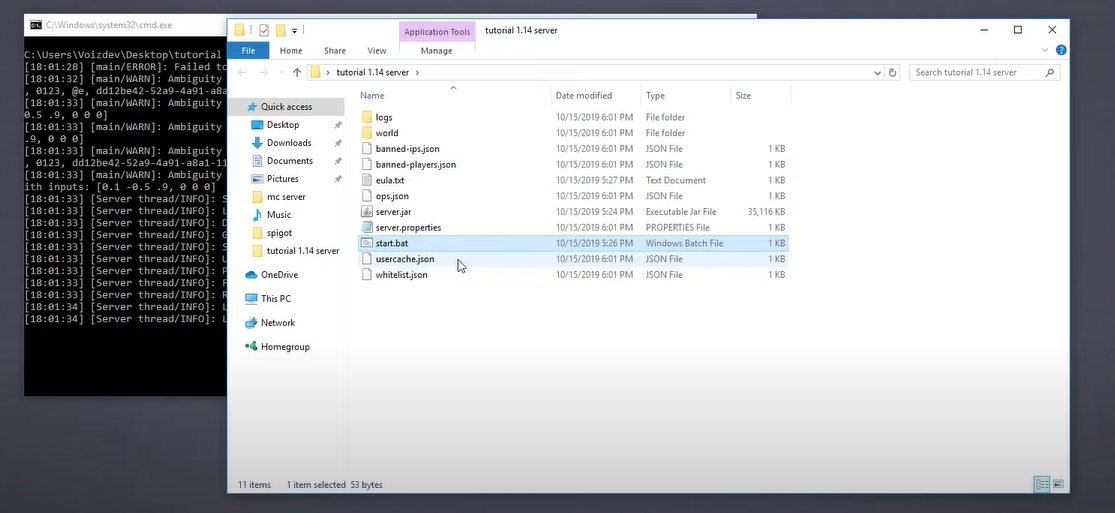
Look for a file named server.properties. You can usually find it in the same directory as the server (minecraft_server. jar).
This can easily be edited by the operator (Admin) with a normal text editor.
Don’t look for it in the Client folder. server.properties can only be found in the Server folder.
What If I Can’t Find All Properties Within the server.properties list?
This usually happens if a new version of the server updates itself and adds new properties. It can also occur if the file entirely does not exist.
On startup, the server rewrites the server.properties file on its own, together with the new properties listed, and set them their default values.
Server.properties file is just a regular text file with UTF-8 encoding. You can easily edit wit with Notepad, TextEdit, nano, and vim.
How Can I Optimize A Minecraft Server?

Optimizing your server is basically knowing how to remove annoying server lag. But, it’s more than just removing lags, in this section, we will tell you how you can prevent server lags.
Truth is, there are a lot of tools made available for you to use to get boost your server’s performance and even push it past its normal performing capacity.
Removing Lag/ Ticks
In our previous article, you’ve learned about Redstones. While Redstones can be a wonderful mechanic to create any kind of machine, it may cause your server performance to slow down in its efficiency. Too many Redstones can decrease your TPS, which can cause lags for players.
Limiting the machines and installing anti-Redstone-lag plugins will help your server perform in its optimal condition.
Or, you may want to decrease your mob grinders, automated farms, or anything that would require complex mechanics from your Redstones.
You might want to include a method to turn off your machines and farms when you do not need them so it won’t eat up your server resources.
Use Plugins
There are many plugins available for you to reduce lag times. If you happen to find plugins that actually work, you can conclude that lags can be reduced dramatically on your server after you’ve included a plugin to work on its backend.
Pregenerating your gameplay
To effectively remove lags, it’s a great idea to pregenerate your world. It’s like a refresh for your game and should be done really before anything else. Go ahead and install the Chunky plugin, then run the commands: /chunky radius 5000 followed by /chunky start.
Entering this command will prompt the game to pre-generate a 5,000 block radius around the world spawn.
If you think the server lags quite heavily during the command, don’t worry, it’s normal. Once it’s done, your server performance will be boosted.
Although you may increase the radius much as you want, we recommend keeping it under 20,000 blocks to avoid lagging. Anything larger than that could possibly create even more lags that even plugins can’t fix.
Another option that can help you reduce lags on any type of Minecraft server is to view distance from its very own server.properties file.
If you can see numbers between 6-8, it should help optimize and boost your server capacity without affecting the speed of the gameplay.
Thinking about changing the view distance? You may change the “Net Compression Threshold” to 64 and alter the “Max Tick Time” to -1 to optimize your server.
Oh, and by the way, if you are running via Spigot or Vanilla, you might want to switch to Paper. Paper has an extensive array of server optimization shortcuts and anti-cheat features to give you a much more enjoyable gameplay.
How Do I Optimize My Configuration Files?
Bukkit.yml, Paper.yml, and Spigot.yml are some of the main files you might want to optimize from your server. We’ve included some settings you might want to change to get the most speed from your server with very minimal effect from your gameplay’s bandwidth.
For you to use these settings, simply hover over to your control panel to stop your server, then click on the tabs below to show you the optimized settings for each of the files.
These files can be located in the FTP File Access tab of your control panel. You can easily open them in the online web editor. Just click the “edit” button you can find on the far right of each file.
Once you’re done editing, don’t forget to click the green “Save” button. Restart your server to see the effects.
Bukkit.yml
spawn-limits:
monsters: 50
animals: 8
water-animals: 7
water-ambient: 10
water-underground-creature: 5
ambient: 1
chunk-gc:
period-in-ticks: 400
ticks-per:
animal-spawns: 400
monster-spawns: 5
water-spawns: 11
water-ambient-spawns: 21
water-underground-creature-spawns: 11
ambient-spawns: 31
autosave: 6000
Spigot.yml
save-user-cache-on-stop-only: true
max-tick-time:
tile: 1000
entity: 1000
mob-spawn-range: 6
entity-activation-range:
animals: 16
monsters: 24
raiders: 48
misc: 8
water: 16
villagers: 24
flying-monsters: 24
merge-radius:
exp: 4.0
item: 6.0
tick-inactive-villagers: false
nerf-spawner-mobs: true
arrow-despawn-rate: 300
trident-despawn-rate: 300
Paper.yml
max-auto-save-chunks-per-tick: 6
optimize-explosions: true
mob-spawner-tick-rate: 3
disable-chest-cat-detection: true
container-update-tick-rate: 3
max-entity-collisions: 2
grass-spread-tick-rate: 4
despawn-ranges (in 1.18+, use this setting for all despawn ranges.)
soft: 28
hard: 96
hopper:
cooldown-when-full: true
disable-move-event: true
non-player-arrow-despawn-rate: 60
creative-arrow-despawn-rate: 60
prevent-moving-into-unloaded-chunks: true
use-faster-eigencraft-redstone: true
armor-stands-tick: false
per-player-mob-spawns: true
alt-item-despawn-rate:
enabled: true
items:
COBBLESTONE: 300
NETHERRACK: 300
SAND: 300
DIRT: 300
GRAVEL: 300
anti-xray:
enabled: false
engine-mode: 2
Related reading:
How can I Check A Minecraft Server’s Difficulty?
You can change Minecraft’s difficulty without the need to restart.

Keep in mind that you need to be the operator on your server to use this command. If not, you won’t have permission on the actual server to use commands.
To change game difficulty through commands, here’s what you need to do:
- Get into your Minecraft Server
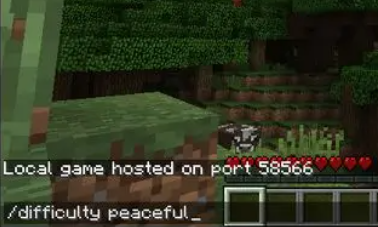
- Open the chat, and type in the /difficulty command. DO NOT press enter or send the command yet.
- After keying in /difficulty, type the difficulty that suits you. It ranges from Peaceful, Easy, Normal or Hard. For example, you think you’re up for the extreme challenges, so you might want to type in /difficulty hard.
- Check if your server’s difficulty matches the difficulty you prefer.
If you are thinking of changing your game’s difficulty without the need to enter through the server (cause this will likely cause lags), you can do so with the help of the server’s control panel.
You can 1) open the difficulty command using the server’s console, 2) change the difficulty using the configuration file.
Changing your game difficulty using the console
- Open the server’s control panel.
- At the top left part, click console to open the server’s console.
- Using the text entry box you can find below the console, issue the difficulty command and the level of difficulty that you want. Press Enter to issue the command.
- Double-check. Make sure you don’t add a/ to the beginning of the command, as the console cannot read that text.
Changing your game difficulty using the configuration file
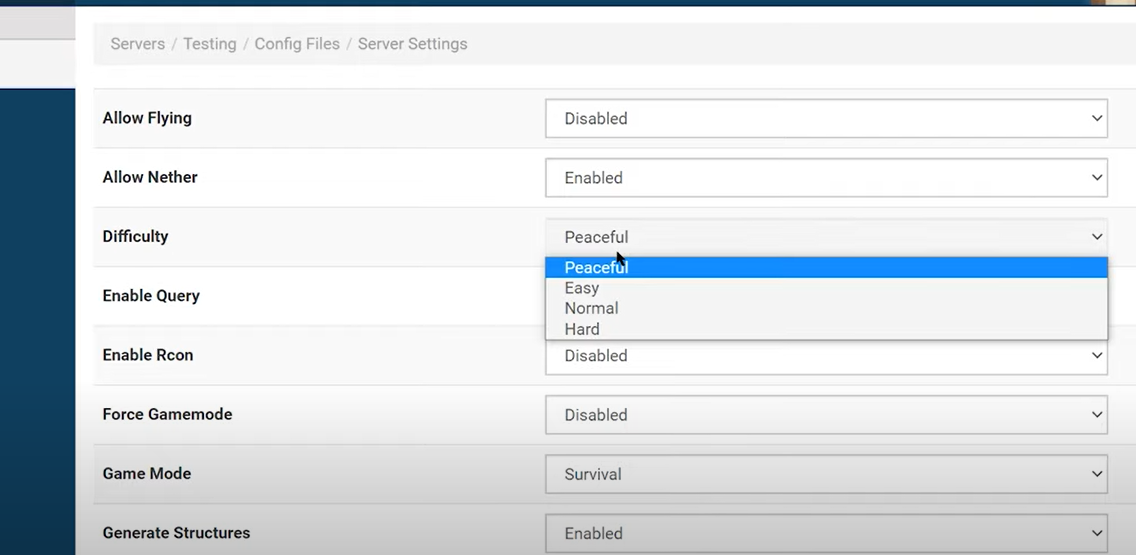
- Open up your server control panel.
- Click Config Files on the top left corner.
- Hit Server Settings.
- Look for the Difficulty field, which ranks third from the top. Set the difficulty to how you want your gameplay to be.
- Scroll down and hit Save.
- Be sure to restart the server when it prompts you so you can save the difficulty level you’ve set.
- Enjoy your new level of difficulty!
So, Which Minecraft Server Jar Should I Use?
When running a Minecraft server, you can actually choose from a huge amount of server jars to use for your server.
You can choose from one of these:
Paper
The go-to running server for beginners. Paper is a fork of Spigot that gives you better stability and in-game performance. Because Paper is built on the Bukkit API, you can easily use the same plugins as you may with Spigot.
Paper is highly recommended for running your server as it helps you eliminate lags, fixes exploits and get rid of bugs while boosting the efficiency of your Minecraft server.
Fabric
Although still in its experimental stage, Fabric is a lightweight and compact modding jar for your Minecraft Server. Apart from being extra light and modular, Fabric also targets the snapshots of Minecraft Updates.
When compared to Forge, Fabric is regarded as its better version since Fabric boasts faster updates and even higher, dependable stability. If you’re playing with older versions of the game, Fabric only has fewer mods for the previous versions. If you’re using the new one, then this Minecraft server jar is for you.
Forge
This is the most well-known and quite the most versatile modding API there is built for Minecraft. Forge allows zero limits for mods and lets you have limitless possibilities for whichever mods you may want to run on.
The bad side? Forge mods are laggy, slowly updated, and are mostly only used for new versions of the game.
Purpur
Purpur is like the elite fork of Paper and Tuinity that gives you new, fresh, interesting configuration options. Purpur allows you to create a unique, personalized gameplay experience that you have not experienced anywhere else. But, if you’re used to the Vanilla game, Purpur might not be for you as it does have some changes in a few game mechanics.
Spigot
Spigot is basically a fork of the Bukkit project, that enables an API for plugins to merge into Minecraft. Spigot is like the mother jar of all jars, where most other jars are built on. Spigot is the most used jar there is, but it offers less performance and game stability compared to Paper and other jar counterparts.
Vanilla
Just a disclaimer, if you have more than ten players within a server, running Vanilla jar is a not-so-good idea. Vanilla Jar is provided by Mojang. With Vanilla, you don’t have the option to use the plugin API. Vanilla is also not filly optimized and is only recommended for very small servers, which can be your circle of friends.
Vanilla is the laggiest and slowest jar there is.
Airplane
Relatively the youngest jar out there is still in its beta testing stages. The Lite version of Airplane lets you run large player servers or networks which don’t come congested or laggy. Airplane is also a highly-optimized jar for larger playing groups. Plus, it can take advantage of modern CPUs and multiple cores, which makes it a top favorite for large servers of players.
Would you like your kids to learn how to code?
We’re giving you a 14-Day trial, for free! Try CodaKid now.
Also, if you’re still having troubles exploring your Minecraft server properties, don’t forget to leave any questions or comments below.
If your adjustments are not working, be sure to follow this article again and try to double-check your work. You’re most welcome to write us and ask us questions- we’ll keep in touch as soon as we can.
We hope you enjoyed this Minecraft Server Properties article.