Minecraft may look all fun, block-y, and pixelated, but don’t be fooled! This seemingly simple game – graphics-wise, at least – is actually pretty intensive! From different game modes (like Creative Mode or Minecraft Adventure mode), constant updates, new expansion packs, and mods (especially mods), Minecraft has a lot going on in the background.
So if your game is lagging – whether it’s a simple split-second delay or full-on consistent crashes – it could be due to limited RAM. You can fix this by either downgrading your game (i.e., uninstalling mods, fiddling with graphic settings, etc.) or increasing the amount RAM allocated to it.
Most Minecraft players prefer the latter.
Want to learn a valuable skill while creating games? Enroll in CodaKid classes which use games like Minecraft to teach coding for kids!

Table of Contents
How Much RAM Does Minecraft Need?
It definitely depends on your application. Vanilla gameplay with general plugins but no mods (or minimal mods) requires roughly 2GB of memory.
4GB of RAM is recommended for moderate- to heavily-modded gameplay.
(Hey Parents! Still not sure what Minecraft mods are? Check out our updated 2020 guide: “What are Minecraft Mods?”)
Moderate- to heavily-modded gameplay on newer versions of Minecraft – particularly 1.13+ packs – are more demanding, and could easily require upwards of 6GB.
It doesn’t matter if your device has more than enough RAM for Minecraft to run smoothly several times over. If the amount of RAM allocated for Minecraft specifically isn’t enough to support gameplay, the lag won’t go away.
Thankfully, you can dictate how much RAM goes to Minecraft. And you even have several ways to do it.
Pre-Allocation: Checking Your RAM
Before you start doling RAM out, you need to know how much you have to work with. You can’t go telling your device to put 6GB of RAM towards Minecraft when you only have 4GB total.
Checking your RAM is pretty easy:
- Step 1. Go to your device’s Settings – usually found under the Start Menu, and usually marked by a gear icon.
- Step 2. Click About (or type “about” in the Search Bar) and navigate to Device Specifications.
- Step 3. Look for Installed RAM. Next to that should be a number that tells you how much RAM you have to spare. In the example below, you can see that the device has a total of 4GB of RAM, with roughly 3.88GB usable:
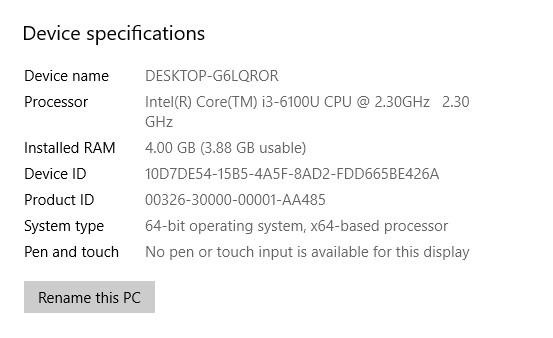
Now that you know how much you’ve got in your source pool, you can start allocating.
Option 1: Default Launcher
The default Minecraft Launcher allows users to allocate more RAM to the game itself. Here’s how to use it:
- Step 1. Open the Minecraft Launcher and choose whichever version you play (Bedrock or Java).
- Step 2. Go to the tabs at the very top and select Installations. This should open a list of releases.
- Step 3. Hover over the release version you want to play. You might only see one option (which would be the most recent version) if you haven’t set up any other specific versions. Regardless, three white dots should appear on the right side.
- Step 4. Click on the three white dots, and then select Edit from the drop-down menu. A new screen should pop up containing a few other settings, as well as the name and installation of the version.
- Step 5. Select More Options. Scroll down until you see the field titled JVM Arguments.
- Step 6. In the JVM Arguments field, change the code:
-Xmx1G
To:
-Xmx#G
Wherein the # sign will be the amount of RAM you’d like to allocate to Minecraft (in GB).
Example:
-Xmx4G means you are allocating 4GB of RAM to Minecraft.
- Step 7. Click on the green Save button and exit. You’re done! If you launch the game immediately after, you should see an improvement in performance.
Note: Do not modify any other text fields in the modal.
(Related Reading: Check out our 2020 Guide to Minecraft Modding with Java)
Option 2: ATLauncher
If you download a lot of mods, then you’re probably intimately familiar with ATLauncher for Minecraft.
Although it isn’t the default game launcher, ATLauncher actually makes it easier for players to distribute RAM to Minecraft by removing the Minecraft Java coding element.
Here’s what to do:
- Step 1. Launch the ATLauncher and click on the Settings tab (on the right-side menu pane).
- Step 2. Click on the Java/Minecraft tab on the top navigation bar. This should bring up drop-down menus regarding the available memory on your device. The one you want is the Maximum Memory/RAM drop-down menu.
- Step 3. Select the Maximum Memory/RAM drop-down selection and adjust it to your desired memory allocation using the arrows. You can also type in the amount you want.
Note: Remember that you need at least 4096MB.
- Step 4: Hit the Save button once you’re done and exit the launcher.
Link: https://atlauncher.com/
Option 3: Technic Launcher
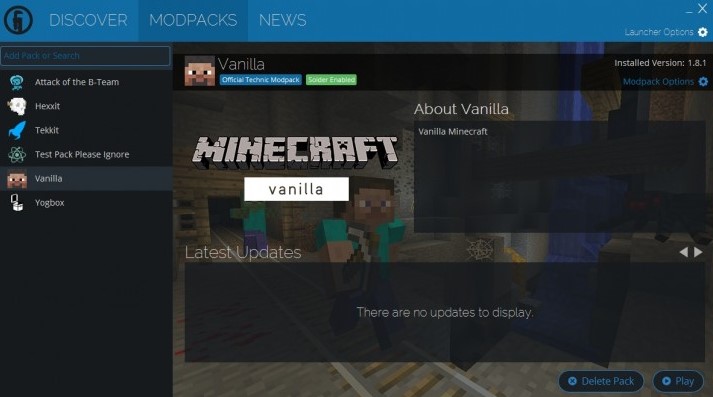
The Technic Launcher, much like the ATLauncher, is a popular launcher used to install heavy modpacks for Minecraft.
(Find out how Minecraft modpacks and Minecraft mods can actually jumpstart your child’s future in coding!)
If you use Technic, you should be fairly familiar with the user interface. Here’s how you can use its intuitive capabilities to portion more RAM for Minecraft.
- Step 1. Launch your Technic Launcher and look for the little gear icon (Settings) in the top-right corner.
- Step 2. Click on the gear icon and then click on the Java Settings tab.
- Step 3. You should see a drop-down menu labeled Memory. Click on it and select your desired memory allocation. Again; remember that you need at least 4GB of RAM for modded gameplay.
- Step 4. Your changes will be saved automatically! Just to be on the safe side, wait a few seconds before closing the Technic Launcher.
Link: https://www.technicpack.net/
Option 4: Twitch Launcher or Curse Launcher
The Twitch Launcher is yet another launcher that’s good for installing heavy to moderate modpacks for Minecraft. Just like Technic and ATLauncher, this launcher uses sliders rather than coding elements to adjust the RAM. So it’s still fairly easy. It is, however, a little more long-winded than Technic and ATLauncher.
Here are the steps:
- Step 1. Open the Twitch Launcher and select the three lines in the upper right-hand corner.
- Step 2. This should lead you to Files, where you can then access the Settings menu (marked by the gear icon).
- Step 3. Click on the Minecraft tab in the Settings menu, and then scroll down. You should see a section titled Java Settings.
- Step 4. Search for the Allocated Memory slider in the Java Settings section. It should be set to a default number (like 3228MB) to signify the default RAM allocated to Minecraft.
- Step 5. Use the Allocated Memory slider to set your desired RAM allocation amount.
Note: The slider allows you to increase or decrease the memory allocation in increments of 0.25GB.
- Step 6. Your changes will be saved automatically! Wait a few seconds before navigating back to the launcher’s main interface.
Option 5. Legacy FeedTheBeast (FTB) Launcher
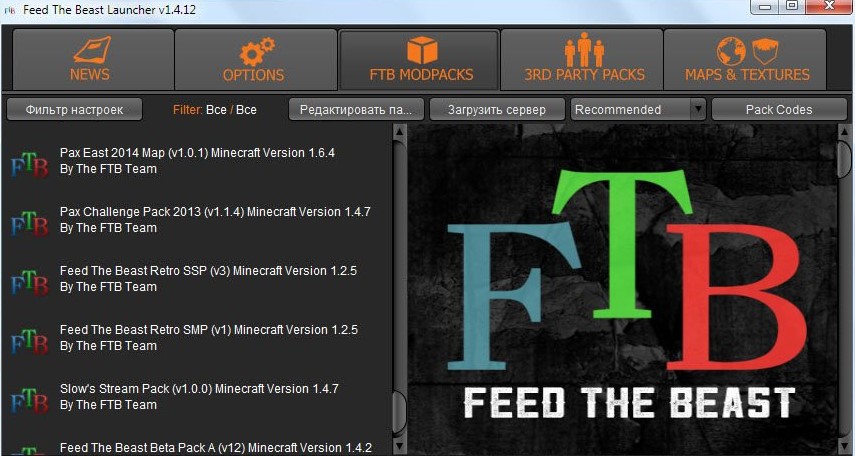
This one is perhaps the simplest launcher to navigate in terms of Minecraft memory allocation. All it takes is two steps.
- Step 1. Launch the FTB Launcher and go to Options.
- Step 2. Look for the RAM Maximum slider. Use the slider to set your desired RAM allocation for Minecraft.
That’s it!
Link: https://www.feed-the-beast.com/
Conclusion
Despite its graphical appearance, Minecraft is truly an extensive and highly-detailed game. Why else do you think it’s remained as popular as it has ever since its launch? The combination of the open-world aspect, the different game modes, and the seemingly endless modding possibilities is what keeps players coming back for more.
Let’s recap our guide on how to add more ram to Minecraft:
- How Much RAM Does Minecraft Need?
- Pre-Allocation: Checking Your RAM
- Option 1: Default Minecraft Launcher
- Option 2: ATLauncher
- Option 3: Technic Launcher
- Option 4: Twitch Launcher
- Option 5: Legacy FeedTheBeast (FTB) Launcher
- Conclusion
So if you want to fully enjoy the Minecraft experience – without any frustrations, limitations, or constant crashes – make sure you allocate RAM as needed! Once you start adding multiple mods to your gameplay, you’ll be happy you did.
(Want to learn more about Minecraft? We’ve got a full Minecraft Survival Guide just for parents!)
Want the perfect idea for a gift? Enroll your child into CodaKid today!