Table of Contents
Debugging Basics for Kids Learning App Development
Debugging is like solving a mystery in your code. When apps don’t work as expected – whether it’s a button that doesn’t respond, a game that crashes, or unexpected results – debugging basics help you figure out what went wrong and fix it. For kids learning app development, it’s an important skill that builds patience, problem-solving, and logical thinking.
Here’s what you’ll learn:
- What debugging is: Finding and fixing errors (or “bugs”) in your code.
- Why it matters: To make apps work smoothly and improve coding skills.
- Common bugs: Syntax errors (like typos), user interface issues (e.g., broken buttons), and logic errors (e.g., wrong calculations).
- 5-step debugging process: Identify the problem, reproduce the bug, examine the code, test fixes, and ask for help if needed.
- Beginner-friendly tools: Platforms like Scratch and MIT App Inventor simplify debugging with visual blocks, error hints, and simulators.
Debugging basics isn’t just about fixing mistakes – it’s a chance to learn and grow as a programmer. Start small, stay curious, and practice often. Each bug you solve makes you a better developer!
What Are Debugging Basics and Why Do They Matter?
What Debugging Basics Mean
Debugging is the process of finding and fixing problems in your code – essentially playing detective for your app. These problems, commonly called bugs, can cause your app to misbehave in all sorts of ways. Maybe it freezes, shows the wrong information, or doesn’t respond to user actions. Sometimes, everything runs fine on one device but fails on another. Debugging is all about figuring out why these issues happen and fixing them.
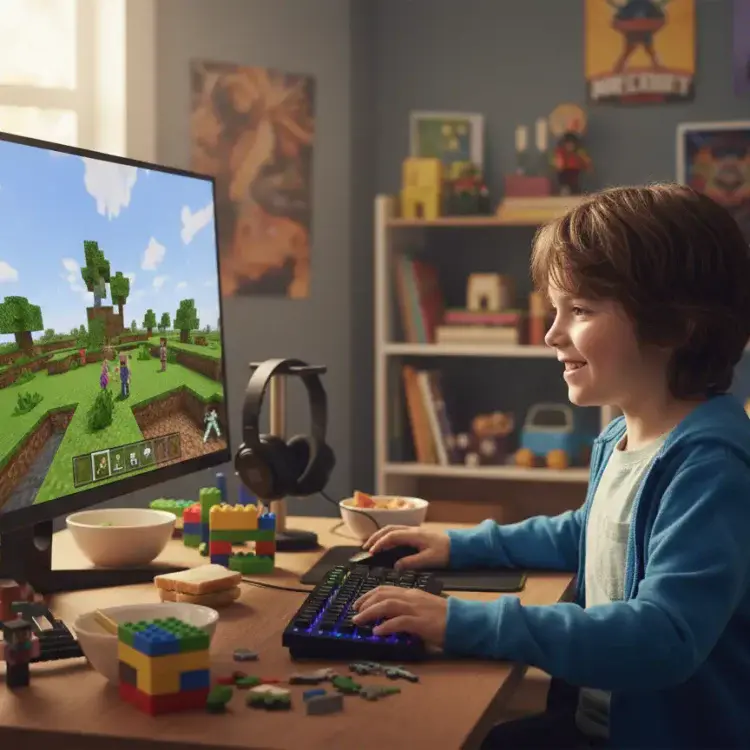
Think of it like building a LEGO castle. If the tower keeps collapsing, you’d inspect each brick to find the weak spot. Debugging works the same way: you go through different parts of your code to identify what’s causing the trouble.
Fun fact: The term “bug” actually comes from a real-life incident. Early computer pioneer Grace Hopper discovered a moth stuck in a computer, causing it to malfunction. She taped the insect into her logbook, and the term “debugging” stuck.
Now that we’ve covered what debugging is, let’s dive into why it’s such an important skill.
Why Debugging Basics Matter
Debugging isn’t just about fixing mistakes – it’s about creating apps that work smoothly and deliver a great experience for users. Nobody wants to deal with an app that crashes or behaves unpredictably. A well-debugged app means fewer headaches for users and more trust in your work.
Beyond that, debugging basics sharpen your coding skills. Every bug you solve teaches you something new about how code works and helps you avoid similar mistakes in the future. Over time, you’ll start to recognize patterns and write cleaner, more reliable code from the beginning. Debugging also strengthens your logical thinking and patience – both essential for tackling complex problems.
Even seasoned developers spend a lot of time debugging. Bugs are a normal part of coding, no matter how experienced you are. The key difference is that skilled programmers know how to pinpoint and resolve issues quickly. Some bugs are simple and can be fixed in minutes, while others might take hours – or even days – to untangle. The persistence you develop during debugging can benefit you in all areas of life.
Most importantly, debugging basics turn mistakes into opportunities to learn. Instead of getting frustrated when something doesn’t work, you can approach it as a challenge to solve. This mindset not only makes you a better programmer but also builds resilience for tackling all kinds of problems.
Mod Minecraft, Build Roblox Games, Make Apps, Create Websites – Try for Free!
Common Bugs Kids Find in App Development
When creating apps, bugs can throw a wrench into the process. Here are three common types of bugs to watch out for – and how to address them.
syntax-errors
Think of syntax errors as the coding equivalent of typos. They happen when you don’t follow the exact rules of a programming language, much like writing a sentence with poor grammar. Luckily, most development tools will flag these errors with red underlines or clear error messages, stopping your app from running until you fix them.
Some frequent syntax mistakes include missing semicolons in languages that require them, misspelling function names, or forgetting to close brackets or parentheses. For instance, writing prnit("Hello") instead of print("Hello") will cause the code to fail because the system doesn’t recognize the misspelled command.
“The compiler or interpreter usually detects syntax errors and will prevent the code from executing until the error is fixed.”
When a syntax error occurs, your console will often display an error message, like “SyntaxError: invalid syntax”, pointing to the problematic line of code. These are typically straightforward to identify and fix, but they’re just one piece of the puzzle – bugs can also arise from how your app interacts with users.
UI/UX Problems (Debugging Basics)
User interface (UI) and user experience (UX) issues don’t always crash your app, but they can make it clunky or confusing to use. These bugs affect how people interact with your app and can leave users frustrated.
For example, a button might look great but fail to work because it isn’t linked to the right code. In other cases, a button might trigger the wrong action or send users to an unexpected screen.
Screen transitions can also be problematic. Your app might freeze on one screen or unexpectedly jump to another. Animation glitches – like a character freezing mid-action or a loading spinner getting stuck – can also disrupt the experience.
Touch and gesture recognition errors are another common issue. If your app doesn’t respond properly to swipes, zooms, or scrolls, users may feel like the app is broken, even if the underlying code is fine.
Data or Logic Errors
While design bugs affect how your app looks and feels, logic errors mess with its core functionality. These errors occur when the code is syntactically correct but doesn’t behave as intended, leading to incorrect results.
A classic example in game development is score tracking. A player might defeat an enemy worth 100 points, but their score only goes up by 10 – or doesn’t change at all. This often happens because of a mistake in the math operation or the wrong variable being updated.
Apps that rely on calculations can also stumble. A calculator app might add 2 + 2 and display 5, or a tip calculator might suggest an outrageous tip due to a flawed formula.
Conditional logic bugs can cause even more confusion. Imagine a weather app advising shorts and sandals during a snowstorm or a quiz app marking correct answers as wrong because an if-then statement wasn’t set up properly.
Data storage issues can lead to logic errors, too. If your app saves data in the wrong place or tries to load information that no longer exists, you might lose user preferences, game progress, or even display outdated data. These kinds of bugs can be especially tricky to track down but are crucial to fix for a smooth user experience.
5-Step Debugging Basics Process for Beginners
When bugs creep into your app, having a structured plan can make tackling them far less overwhelming. With a clear approach, debugging can shift from being a headache to an organized and even satisfying process. Here’s a five-step guide to help you troubleshoot effectively.
Step 1: Identify the Problem
Start by clearly defining the issue. For example, is the “Start Game” button unresponsive? Pinpoint the difference between what should happen and what’s actually happening.
Pay attention to when and how often the issue occurs. These details can offer valuable clues about the root cause and will also make it easier to explain the problem if you need to ask for help later.
Step 2: Reproduce the Bug
Once you’ve identified the problem, work on recreating it consistently. This step is critical because understanding the exact conditions that trigger the bug gives you a clear starting point for fixing it. Without this, resolving the issue becomes much harder.
Test the bug in different scenarios to confirm it’s reproducible. Then, document the steps required to make the problem happen. Having this list not only helps you test fixes but also ensures you can verify when the bug is truly resolved.
Step 3: Examine the Code
Dive into the code that controls the problematic feature. If a button isn’t working, for instance, review the code that executes when it’s clicked or tapped.
Start by looking for obvious mistakes. In block-based editors, check for missing or misplaced blocks. In text-based code, scan for typos, missing punctuation, or commands that seem out of place. Error messages can be especially helpful here – they often provide clues about what went wrong and where to focus your attention.
Step 4: Test Your Fixes
After making changes to your code, retest to see if the issue is resolved. Use the same steps you documented in Step 2 to confirm whether the bug is gone.
Make only one change at a time and test right away. This method ensures you can pinpoint which specific adjustment fixed the problem. If you alter multiple things at once and the issue disappears, it’s harder to determine which change was effective. Keep in mind that sometimes the actual problem might be in a different part of the code than you initially suspected.
Step 5: Seek Help When Needed
If you’re stuck, don’t hesitate to ask for help – but do so strategically. Use the “Ask Three, Then Me” method: consult a peer, ask another student, or search online for solutions to similar issues.
When seeking assistance, come prepared with answers to key questions: What’s going wrong? What error messages are you seeing? What have you tried so far? Who else have you asked for help, and what advice did they give? As teacher Mr. Tower suggests, being clear about these points helps others understand your problem quickly and offer more effective guidance.
Before reaching out, try “rubber duck debugging.” This quirky but effective technique involves explaining your code line by line to a toy or object. As Reddit user sarahrohldotcom explains, “When I break it down so he can understand, I find the problem almost every time.”
Debugging Basics Tools for Kids’ App Platforms
The right debugging basics tools can turn coding challenges into an engaging problem-solving adventure. Many app development platforms designed for young programmers are packed with features that make finding and fixing bugs not only easier but also enjoyable. Here’s a closer look at how these tools help kids debug effectively.
Block-Based Editors
Visual programming tools like Scratch, MIT App Inventor, and Blockly transform debugging into something like solving a puzzle. Instead of combing through lines of text to find a missing semicolon or typo, kids work with visual blocks that snap together, much like LEGO pieces.
These editors eliminate syntax errors almost entirely by design. Blocks only connect in ways that make logical sense, and if a block doesn’t fit, the editor won’t allow it. This instant feedback helps kids spot issues right away, removing the trial-and-error frustration that often comes with traditional coding.
When bugs do appear, they’re typically logic errors, not syntax mistakes. Kids can follow the flow of their code visually, tracing the path of connected blocks to find where their thought process might have gone astray. Rearranging blocks and testing new ideas is as simple as dragging and dropping, making experimentation quick and fun.
Error Messages and Tips
Modern kid-friendly platforms have reimagined error messages to be helpful and easy to understand. Instead of overwhelming beginners with technical jargon like “NullPointerException at line 47”, these tools offer clear, actionable feedback. For example, an error message might say, “It looks like you’re trying to use a variable that doesn’t have a value yet. Try setting an initial value for your score counter.”
Some platforms go a step further by including suggestion boxes that pop up when common mistakes are detected. These provide specific steps to fix the issue, making the debugging process feel more like a guided learning experience.
Many tools also provide real-time hints as kids work. For instance, if a student creates a button but forgets to assign it an action, the platform might display a friendly reminder: “Don’t forget to tell your button what to do when someone taps it!” These intelligent prompts not only help fix errors but also teach kids how to avoid them in the future.
Testing and Simulation Features
Testing tools take debugging to the next level, giving young developers the ability to see their apps in action before they’re fully published. Preview modes and built-in simulators allow kids to test their apps instantly, right within the platform, without needing to install anything on a device.
Many platforms feature instant preview capabilities that update in real time as kids tweak their code. This immediate feedback helps them identify and fix bugs while their ideas are still fresh. Additionally, students can test how their apps look and behave on different screen sizes and device types, all from their browser.
For more detailed debugging, step-through tools let kids watch their code execute one command at a time. They can see how variables change and follow the app’s decision-making process, making it much easier to pinpoint where things go wrong.
Some platforms even include automated testing scenarios that check for common issues, like whether buttons respond correctly, animations run smoothly, or the app handles unexpected user actions. Getting a green checkmark from these tests gives kids the confidence that their app is ready to share with others.
How to Build Better Debugging Skills (Debugging Basics)
With the right tools and habits, improving your debugging skills can make coding challenges less intimidating and more rewarding. Here are some practical approaches to help you debug with confidence.
Test Often While You Code
The most effective debuggers don’t wait until their app is complete to start testing. Instead, they test small pieces of code as they go.
Test in small increments. For example, if you’ve just added a button, test it immediately. If you’ve programmed a character to move across the screen, run the app right away to see if it works. Catching bugs early, when the code is fresh in your mind, makes them much easier to fix.
Frequent testing also builds confidence. Each time a feature works as expected, you know that part of your app is solid. And if something goes wrong, you’ll have a clear idea of what you just changed, making it easier to pinpoint the issue.
Keep Your Code Organized
Good organization is a lifesaver when debugging. Use clear names and group related code logically to make errors easier to spot.
Start with descriptive names. Instead of using generic names like “x” or “y”, opt for something like “playerScore” or “enemySpeed.” This way, when you revisit your code weeks later, you’ll immediately understand its purpose.
Visual organization matters too. In block-based editors, arrange code blocks into logical sections. For instance, keep all the blocks controlling your main character in one area and group scoring-related blocks in another. Think of it like organizing a workspace – knowing where everything is saves time and effort.
Take advantage of tools like color coding and comments. Use different colors for various block types and add notes to explain tricky sections. These small steps can make a huge difference when you’re debugging later.
Break Problems into Small Parts
When faced with a big bug, don’t try to fix everything at once. Debugging works best when tackled step by step.
Start by isolating the issue. For example, if your game crashes when a player collects a power-up, focus solely on that part of the code. Temporarily disable unrelated features to zero in on the problem without distractions.
Ask specific questions about the issue. Instead of wondering, “Why doesn’t my app work?” try something more focused, like, “Why doesn’t the score increase when I tap the coin?” This approach not only speeds up the process but also deepens your understanding of how your code functions.
If a section of code continues to stump you, consider rebuilding it from scratch. A fresh perspective often reveals mistakes you might have missed.
Stay Patient and Keep Trying
Debugging takes persistence, but every solved bug is a step forward.
Every bug is a chance to learn. Once you fix an issue, you gain insights that can help you avoid similar problems in the future.
Take breaks when needed. Sometimes the best way to solve a problem is to step away for a bit. A short break can give your brain the reset it needs to approach the issue with fresh ideas.
Celebrate small victories. Each fix, no matter how minor, builds your confidence and prepares you for larger challenges.
Your debugging skills will grow with every project. What feels overwhelming today will become manageable as you gain more experience. Keep practicing these habits, and over time, debugging will become second nature.
If you’re eager for more hands-on practice, check out the interactive lessons and project-based challenges at CodaKid. Their engaging, game-based approach can help you sharpen your debugging skills even further.

Next Steps in Your Debugging Basics Journey
You’ve explored essential debugging techniques and strategies that turn errors into opportunities to solve problems. Now it’s time to build on that foundation. Stick to a systematic approach when isolating and fixing bugs – it’s your roadmap to resolving issues effectively. Whether you’re tackling syntax errors that stop your app from running or logic bugs that make your game behave oddly, having a structured plan can make all the difference. And remember, even the most experienced developers face bugs daily – it’s just part of the process. Let’s look at how you can put these skills to work in future projects.
The more you practice, the easier debugging becomes. Start small. Work on simple projects and gradually move on to more complex apps. Each bug you encounter and fix strengthens your problem-solving skills and boosts your confidence. As your projects grow in complexity, the habits you’re building now will prove invaluable. Modern development platforms, especially beginner-friendly block-based editors, make this learning curve more manageable than ever.
CodaKid
For parents looking to support their kids, platforms like CodaKid offer structured courses that teach coding with real-world tools like Python and JavaScript. These courses not only introduce coding but also immerse kids in debugging environments they’ll use as they advance.
Stay persistent and curious – it’s the key to mastering debugging. Every bug you solve sharpens your analytical thinking and helps you recognize patterns. Over time, you’ll develop an instinct for pinpointing issues and troubleshooting effectively. Beyond coding, debugging hones valuable skills like logical thinking, attention to detail, and patience – essential for tackling complex challenges in any field. As mentioned earlier, persistence transforms every coding obstacle into a chance to grow.
Your debugging journey is just getting started. Each new project brings fresh challenges and opportunities to learn. Embrace the bugs – they’re not roadblocks but stepping stones to becoming a more skilled and confident developer.
FAQs (Debugging Basics)
How can I help my child stay patient and persistent while debugging their app projects?
Debugging might seem tough at first, but it’s an essential and rewarding part of learning to code. Encourage your child to view mistakes as chances to improve and grow. Let them know that even seasoned developers encounter errors – and learn from them every day.
Celebrate the small wins, no matter how tiny they may seem, and acknowledge their effort and determination. To make debugging less intimidating, try introducing playful techniques like visual aids or breaking down problems into smaller, manageable steps. With regular practice and plenty of positive encouragement, they’ll build resilience and a mindset that embraces challenges as part of the coding adventure.
How can I help kids view debugging as a fun and valuable learning experience instead of something frustrating?
Encouraging kids to see debugging as a normal and necessary part of coding starts with shifting how they view mistakes. Let them know that even seasoned developers deal with bugs daily! Celebrate their determination, and present debugging as a fun, brain-teasing puzzle. This approach helps nurture a growth mindset and builds resilience.
You can make debugging even more engaging by turning it into an interactive experience or weaving it into a story. For instance, tackle a bug together and explain the steps you’re taking along the way. This not only teaches problem-solving but also shows how rewarding the process can be. By emphasizing the journey over the result, kids can start to view debugging as an exciting challenge rather than an obstacle.
How do tools like Scratch and MIT App Inventor make debugging easier for kids learning to code?
Tools like Scratch and MIT App Inventor simplify debugging with visual, block-based coding, allowing kids to identify errors faster. Instead of wrestling with lines of complex code, young programmers can drag and drop blocks. This approach minimizes syntax mistakes and makes the logic much easier to follow.
Scratch encourages kids to debug by reading their code out loud or breaking it into smaller, manageable steps. This method helps them figure out exactly where things went wrong. Similarly, MIT App Inventor lets users test individual parts of their program step by step, making it simple to locate and fix issues. These features not only make debugging less intimidating but also teach valuable problem-solving skills in a way that’s both fun and interactive.


