Table of Contents
Ultimate Guide to ScratchJr for Kids Ages 6-10
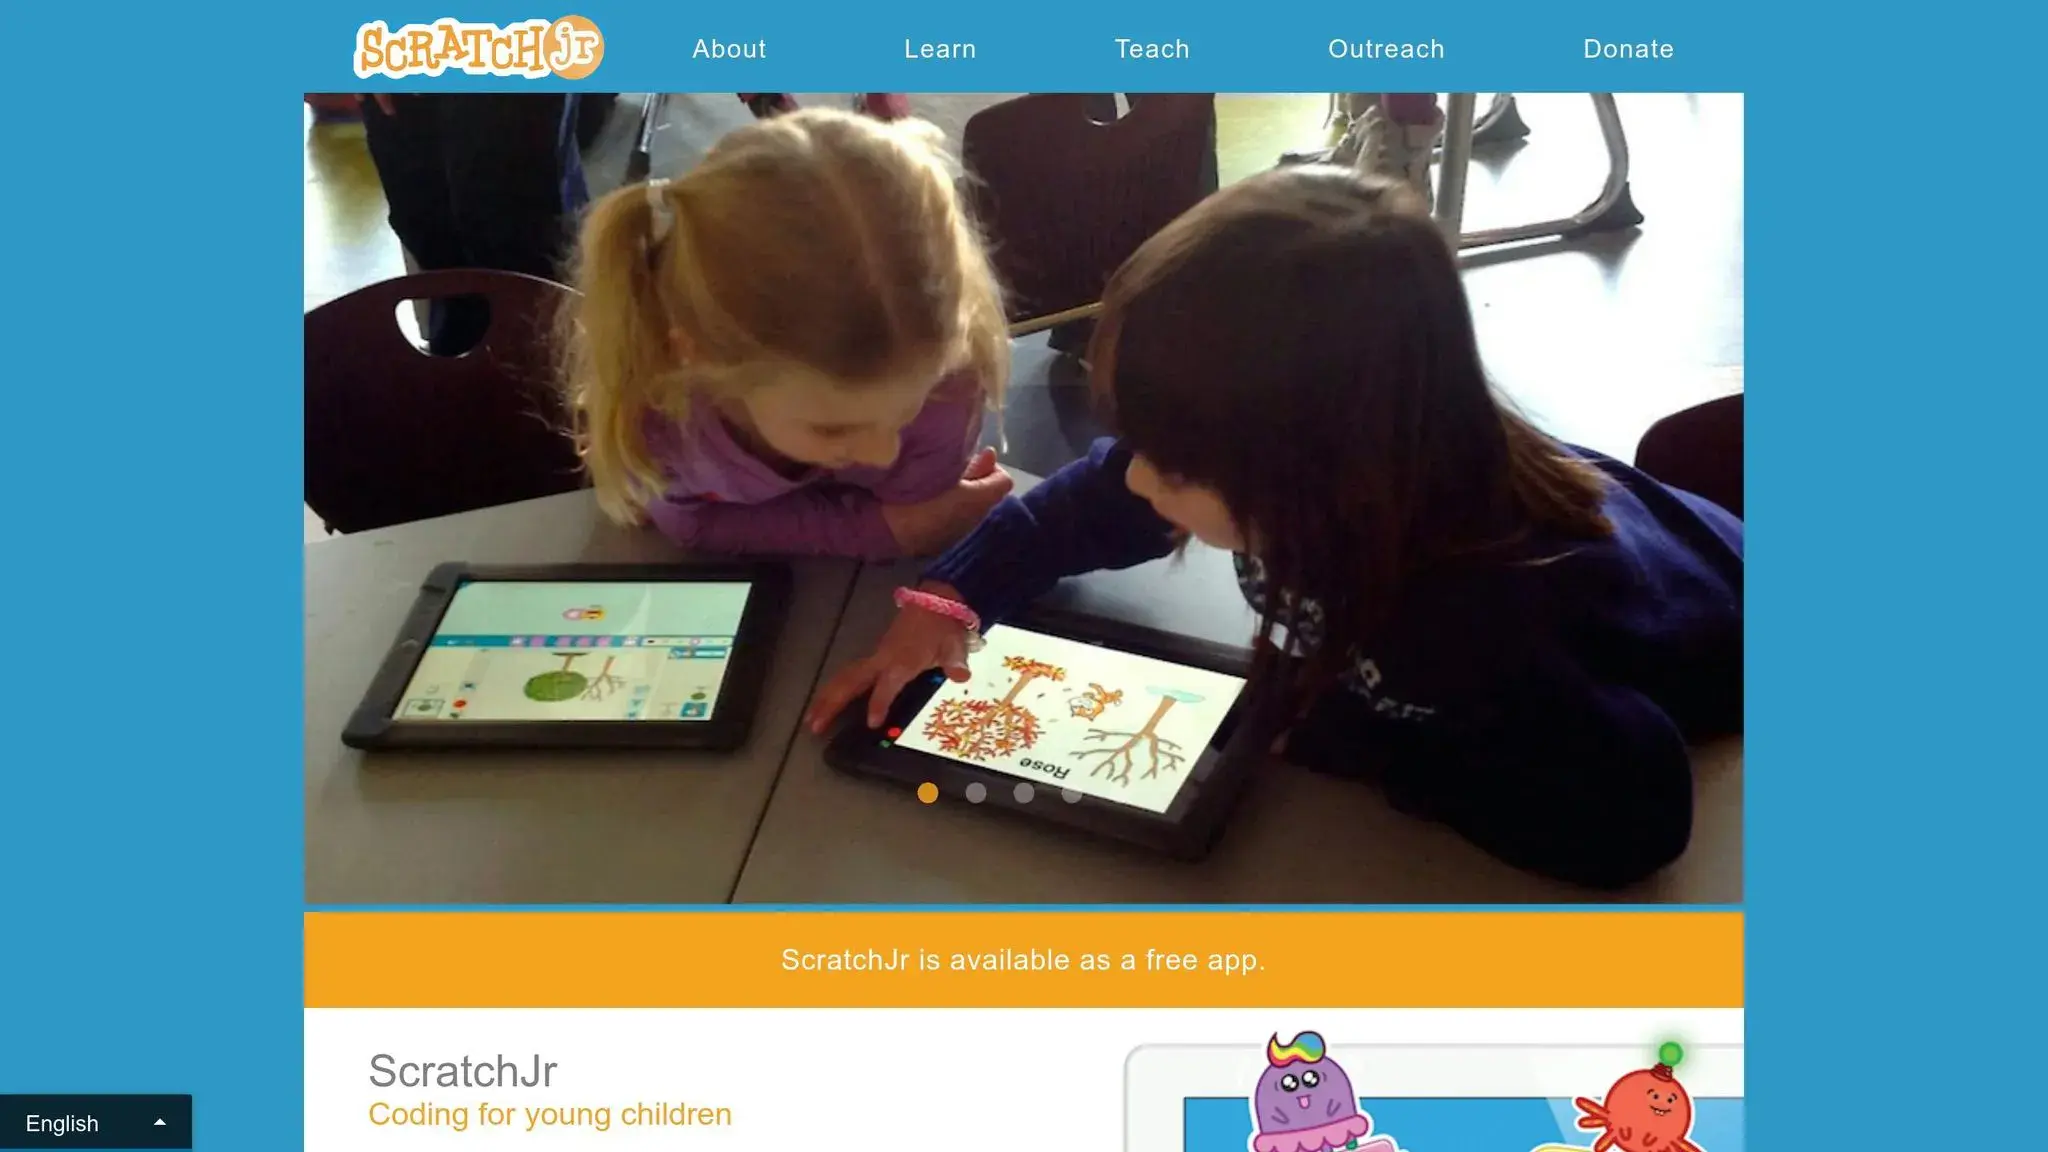
ScratchJr is a free app designed for kids aged 6–10 to create interactive stories, animations, and games using simple, block coding. Developed by Tufts University and MIT Media Lab, it offers an intuitive, icon-based interface that doesn’t require reading skills, making it perfect for young learners. Here’s the ultimate guide to why ScratchJr is a great starting point for kids:
- No reading required: The app uses symbols instead of text.
- Hands-on coding: Drag-and-drop blocks to build programs.
- Offline-friendly: Projects are saved locally with no internet needed.
- Platform support: Available on iPads, Android tablets, Chromebooks, and Kindle Fire.
ScratchJr introduces kids to essential coding concepts like sequencing, loops, and debugging while also supporting skills like math, storytelling, and problem-solving. It’s free, ad-free, and offers built-in tutorials to guide beginners. For kids ready to advance, Scratch 3.0 and other platforms like Python or Roblox are natural next steps.
This ultimate guide covers everything from system requirements to creating your first project, helping parents and kids navigate ScratchJr with ease.
System Requirements and Setup (Ultimate Guide to ScratchJr)
Supported Devices and Platforms
ScratchJr is available for free on iPads, Android tablets (running Android 10 or newer), Chromebooks, and Kindle Fire devices. You can download it from the Apple App Store, Google Play Store, or Amazon Appstore. Prefer using a browser? There’s a web version at scratchjr.org that works without the need for downloading anything.
To run ScratchJr smoothly, your device should have at least 4GB of RAM and 1GB of storage. Since the app is designed with touchscreens in mind, tablets offer the best experience. Using keyboards or mice can be tricky for younger users, so touch navigation is ideal. Chromebook users can either install the Android app via the Google Play Store or try an unofficial web version through Chrome.
One key feature of ScratchJr is its focus on privacy. All projects are saved directly to the device, with no cloud storage required.
Initial Setup and Navigation
Starting with ScratchJr is straightforward. There’s no need for registration or sign-in, so kids can dive into coding right away. Once you’ve downloaded and opened the app, tap the “Home” icon to reach the “My Projects” page, then hit the “+” icon to create a new project.
For beginners, the app includes built-in tutorials and sample projects. Tap the “Question Mark” icon to explore these resources and get familiar with the interface and block functions. If you choose the app version instead of the web platform, your child can enjoy coding entirely offline, making it even more accessible.
Once the setup is done, you’re ready to explore the interface and help your child build their first ScratchJr creations with our guide to coding for elementary students.
Understanding the Main Interface (Ultimate Guide to ScratchJr)
Main Interface Elements
ScratchJr’s interface is divided into five key areas, each playing a role in building and controlling projects. At the center of the screen is the Stage, where all the action happens – characters move, backgrounds change, and animations come to life.
To the left, you’ll find the Sprite List, which displays all the characters in your project. Kids can tap the “+” button to add new sprites or select an existing one to program it. On the right side is the Scene List, which works like a digital storybook, letting kids manage different “pages” of their project.
At the bottom, two essential sections await. The Block Palette on the bottom-left contains color-coded programming blocks, each grouped by type – blue for Motion, purple for Looks, green for Sound, and more. Each block includes a simple icon, making it easy for kids to understand their purpose without needing to read. On the bottom-right is the Coding Area (also called the Scripting Area), where kids drag and snap these blocks together to create sequences of instructions for their sprites.
The toolbar at the top provides tools for changing backgrounds (via the landscape icon), adding text, and resetting sprites to their starting positions. To ensure you’re working on the correct sprite, check the Coding Area – the active sprite is always highlighted. Once you’re familiar with these tools, you can start combining blocks to create interactive sequences.
How Blocks Work in ScratchJr
In ScratchJr, blocks are arranged horizontally, breaking away from the vertical stacking seen in many coding tools. Kids simply drag blocks from the palette and snap them together to build sequences.
To test their code, they can click the Green Flag icon at the top of the screen, which runs all the scripts at once. Alternatively, they can use “Start on Tap” blocks (yellow triggering blocks) to make sprites respond when tapped directly on the Stage. This setup gives young coders instant feedback, helping them understand how their instructions work and make quick adjustments as needed.
Best Coding Curriculum for Kids & Teens (2026 Roadmap): Roblox, Minecraft, Python, AI
Programming Blocks Overview (Ultimate Guide to ScratchJr)
ScratchJr Programming Blocks Guide: 6 Color-Coded Categories and Their Functions
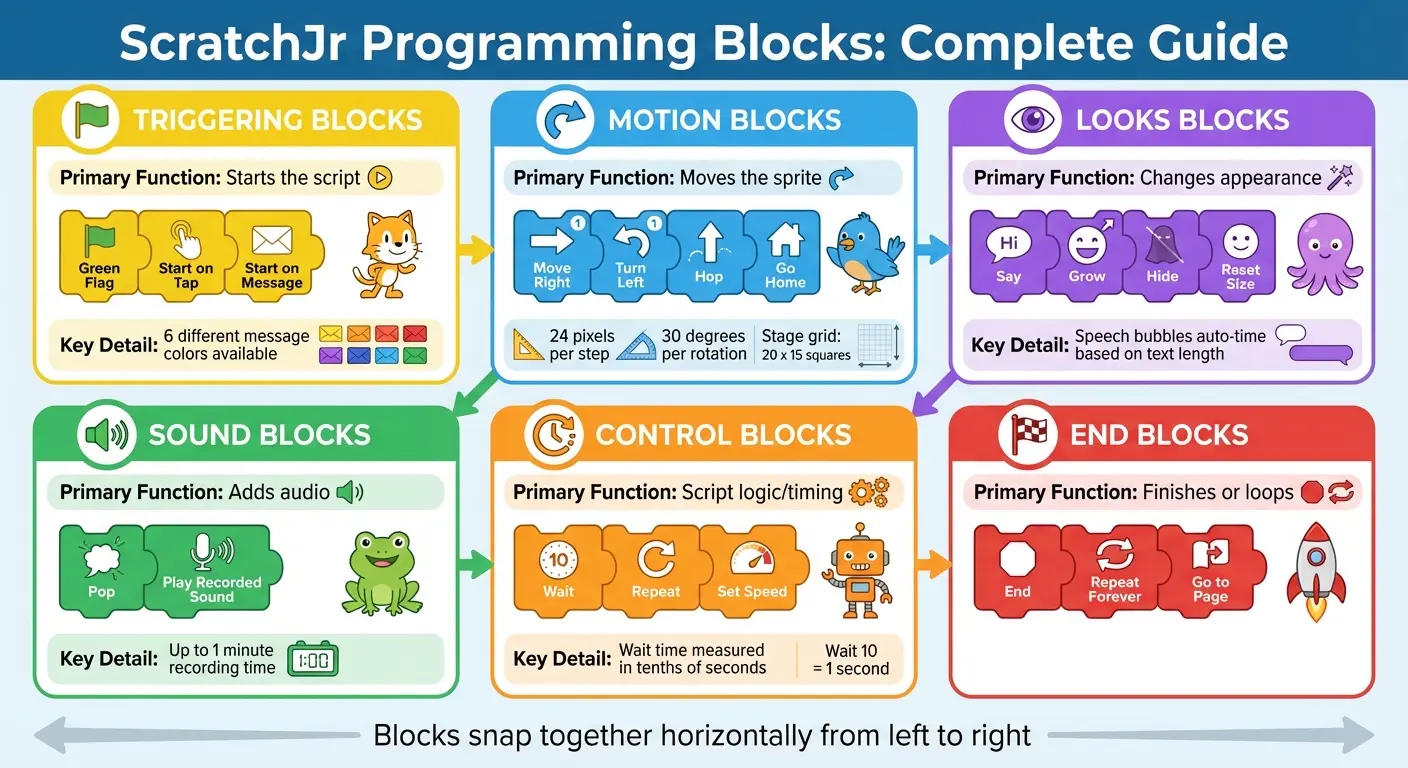
ScratchJr organizes its programming blocks into six distinct, color-coded categories. These blocks connect horizontally, snapping together from left to right.
The Yellow (Triggering) blocks kick off every script. They set the conditions for when a script begins, whether it’s triggered by the Green Flag (which starts all scripts at once), a sprite being tapped, two sprites colliding, or a message being sent. ScratchJr allows up to 6 different colors for these message-sending and receiving actions.
Blue (Motion) blocks control sprite movement. Characters can move up, down, left, or right, rotate clockwise or counter-clockwise, hop, or return to their starting position using the “Go Home” block. Each movement block shifts sprites by 24 pixels per step, and rotation blocks turn them by 30 degrees. The stage itself is divided into a grid of 20 x 15 squares.
Purple (Looks) blocks focus on sprite appearance. For example, the “Say” block creates speech bubbles, automatically timing their display based on text length. Other blocks let kids resize sprites, hide or show them, or reset their size to the original dimensions.
Green (Sound) blocks add audio elements. These include the built-in “Pop” sound or custom recordings made with the device’s microphone, which can last up to one minute.
Orange (Control) blocks manage timing and loops. For instance, the “Wait” block pauses actions for a set duration (measured in tenths of seconds), while the “Repeat” block creates loops to run actions multiple times. The “Set Speed” block adjusts sprite movement speed to slow, normal, or fast.
Finally, Red (End) blocks wrap up scripts. Options include stopping actions, looping them indefinitely, or transitioning to a new scene using the “Go to Page” block.
Programming Blocks Guide:
| Category | Color | Primary Function | Example Blocks |
|---|---|---|---|
| Triggering | Yellow | Starts the script | Green Flag, Start on Tap, Start on Message |
| Motion | Blue | Moves the sprite | Move Right, Turn Left, Hop, Go Home |
| Looks | Purple | Changes appearance | Say, Grow, Hide, Reset Size |
| Sound | Green | Adds audio | Pop, Play Recorded Sound |
| Control | Orange | Script logic/timing | Wait, Repeat, Set Speed |
| End | Red | Finishes or loops | End, Repeat Forever, Go to Page |
Let’s dive deeper into how these blocks work.
Motion and Looks Blocks
Motion blocks offer precise control over sprite movement. The four directional blocks (Right, Left, Up, Down) move sprites in straight lines, while the Turn blocks rotate them in place. The Hop block creates a jumping effect by briefly lifting the sprite and returning it to its original position. The “Go Home” block ensures sprites return to their starting points whenever the project begins.
Looks blocks handle all visual changes. The “Say” block displays text in a speech bubble above the sprite, while the Grow and Shrink blocks adjust size incrementally. This makes it easy to create effects like making a character appear closer or farther away. Hide and Show blocks control visibility, and the “Reset Size” block restores sprites to their original dimensions.
When combined, Motion and Looks blocks can create dynamic scenes. For example, a sprite might move across the stage while growing larger, then display a speech bubble saying, “I’m here!” upon reaching its destination.
Sound and Control Blocks
Sound blocks make projects more engaging with audio. The “Pop” sound is a quick, built-in option, while the “Play Recorded Sound” block lets kids record custom audio using their device’s microphone (up to one minute of recording time).
Control blocks ensure scripts run smoothly. The “Wait” block pauses actions for a specific duration, measured in tenths of seconds. This is especially helpful for coordinating animations or avoiding overlapping speech bubbles during conversations. Meanwhile, the “Repeat” block creates loops, allowing actions like hopping or spinning to repeat multiple times.
Events and Triggers
Event blocks, part of the Yellow category, serve as the starting point for scripts. The “Start on Green Flag” block is a common choice, launching all scripts simultaneously when the flag icon is clicked. This is perfect for initializing actions like positioning sprites on the stage.
For interactive projects, the “Start on Tap” block triggers a sprite’s actions when it’s touched. Similarly, the “Start on Touch” block activates scripts when two sprites collide, making it ideal for games or interactive stories.
The “Send Message” and “Start on Message” blocks allow for more advanced coordination. These blocks are color-coded, making it easy to match messages. For example, one sprite might send a blue message upon reaching the screen’s edge, prompting another sprite to start moving.
Using the Paint Editor (Ultimate Guide to ScratchJr)
The Paint Editor is where kids can let their creativity shine, customizing characters and scenes to make their projects truly their own. To start fresh with a new character, tap the blue plus (+) button in the character area, then pick the paintbrush icon. Want to create your own background? Tap the landscape icon at the top of the stage and select the paintbrush.
The editor is divided into two toolbars: drawing tools on the left and editing tools on the right. On the left, you’ll find tools like the Curved Line for freehand drawing, as well as Circle, Rectangle, and Triangle tools for geometric shapes. A Line Thickness selector allows kids to control how bold or fine their lines appear. On the right, the focus shifts to editing. The Paint Bucket fills enclosed areas with color, the Scissors tool removes unwanted parts, and the Stamp tool duplicates sections of a drawing. There are also Move and Rotate tools for repositioning or turning elements.
One feature that stands out is the Camera tool, which lets kids take a photo and add it directly to a character or scene. This makes projects feel personal – imagine putting your own face on a character or using a picture of your pet as a sprite! To use this tool, draw a basic character shape, tap the Camera tool, and then tap the character’s face area. The device’s camera will activate, allowing kids to snap a photo that fills the selected section. When they’re happy with their creation, tapping the checkmark (✔) saves it to the project. These tools work seamlessly with ScratchJr, helping kids turn their ideas into reality.
Drawing and Editing Tools
The drawing tools are perfect for building custom characters and settings. For example, kids can use the Curved Line tool to create organic shapes like clouds or trees and switch to the Rectangle tool for structures like houses or furniture. The Line Thickness selector ensures small details, like whiskers or eyebrows, are clear and visible.
Editing tools add the finishing touches. The Paint Bucket, for instance, quickly fills shapes with color, making it easy to change a character’s shirt from green to yellow in just a tap. The Stamp tool is handy for duplicating parts of a drawing, like creating multiple windows on a building. And if a mistake happens, the Undo button at the top left lets kids reverse their last action without starting over.
Modifying Pre-Made Characters
ScratchJr also offers a library of pre-made sprites that kids can customize. To tweak an existing character, tap the “+” button, choose a sprite, and then tap the paintbrush icon at the top of the screen. This opens the Paint Editor with the selected character ready to edit.
The Paint Bucket is great for quick color changes – kids can, for example, turn a cat’s fur purple with just a tap. The Scissors tool removes unnecessary elements, like erasing a hat from a character who doesn’t need one. The Move and Rotate tools allow for adjustments, so kids can reposition an arm or tilt a character’s head without redrawing.
For even more variety, the Stamp tool duplicates parts of a character. For instance, a child could copy one leg and reposition it to create a walking pose. The grid view, which can be toggled on in the editor, helps with precise alignment. To stay organized, kids can rename their modified characters at the top of the Paint Editor – especially helpful for projects with lots of sprites.
| Tool | Primary Use |
|---|---|
| Paint Bucket | Fills areas with selected colors from the palette |
| Scissors | Deletes specific parts of the drawing |
| Camera | Inserts live photos into character faces or backgrounds |
| Stamp | Duplicates selected portions of the design |
| Move/Rotate | Repositions or turns individual elements |
| Undo | Reverses the most recent action |
Creating Your First Project (Ultimate Guide to ScratchJr)
Now that you’ve had a chance to explore the Paint Editor, it’s time to put all the pieces together and create your first ScratchJr project. Open the app, tap Home, and then hit the “+” icon to start a new project. If you’d like to swap out the default cat character, simply press and hold it until an “x” appears, then delete it.
To add a new sprite, tap the blue circled “+” icon on the left side of the screen. This opens up the character library, where you can choose from pre-made characters or tap the paintbrush icon to design your own in the Paint Editor. Once you’ve selected or created a sprite, tap the checkmark icon to place it on the stage. Drag the sprite to its starting position so your animation begins exactly where you want it. Now, let’s dive into animating your sprites to bring your project to life.
Adding and Animating Sprites
To program your sprite, tap on it and begin by attaching a yellow Trigger block, like the Green Flag, in the script area. Then, connect blue Motion blocks, such as “Move Right” or “Jump”, to create animations. For example, combining a “Move Right” block with a “Jump” block can make your sprite hop across the stage.
Want the sprite to repeat an action? Add an orange “Control” block, like “Repeat”, to loop the movement. You can test your animation at any time by clicking the Green Flag at the top of the screen. Need to tweak it? Adjust the number values in the Motion blocks or use a “Go To Start” block to reset the sprite’s position during testing. Once you’re happy with the movement, you can add sounds and scenes to make your project even more exciting.
Adding Scenes and Sounds
You can include up to four scenes in a single project. To add a new scene, tap the “+” on the right-hand side, pick a background using the landscape icon, and use a red “Go to Page” block to transition between scenes.
Sounds can take your project to the next level. The green “Sound” blocks allow you to use built-in effects like a “pop” sound or record your own audio by tapping the microphone icon. Custom recordings can be up to one minute long, which is perfect for character voices or sound effects.
Advanced Features for Ages 6-10 (Ultimate Guide to ScratchJr)
Once kids grasp the basics of the interface and block functions, they can dive into more complex features. These tools allow them to create projects with richer interactivity and storytelling, using multiple sprites and scenes.
Multi-Sprite Interactions
ScratchJr introduces color-coded message blocks that let sprites “talk” to each other, opening up possibilities for engaging interactions. For example, in a quiz game, tapping the correct answer sprite might send a green message that triggers a celebration animation. Meanwhile, selecting the wrong answer could send a red message, making the sprite shake in response. The “When Bumped” block adds even more depth – if a sprite collides with an obstacle, it can instantly reverse direction.
“Conditional communication… is like a conversation where one sprite gives a cue, and the other responds, creating a dynamic exchange.”
Kids can take this further by chaining interactions. For instance, one sprite’s action can immediately trigger another message, setting off a chain reaction of events. This kind of layering helps build more complex and exciting sequences.
Using Multiple Scenes
With ScratchJr, kids can use up to four scenes in a single project, making it possible to create stories with clear beginnings, middles, and ends. Once they’re comfortable with sprite interactions, they can experiment with scene transitions to structure longer narratives or games.
Each scene is self-contained, with its own unique sprites, backdrops, and scripts. To move between scenes, kids use the red “Go to Scene” block. Since scripts don’t carry over from one scene to another, they’ll need to set a Green Flag trigger at the start of each new scene to kick off the action. Naming scenes descriptively also helps keep everything organized and easy to follow.
Project Ideas for Kids (Ultimate Guide to ScratchJr)
Once kids have a good grasp of multi-sprite interactions and scene transitions, they’re ready to tackle creating full projects from scratch. ScratchJr’s block functions and scene transitions make it easy to bring these ideas to life.
Interactive Story with Dialogue
In this project, kids can craft a short story where characters interact through speech bubbles. Start by choosing a backdrop using the landscape icon, then add characters from the sprite library. Use the “Say” block to create dialogue for each character. To sequence the conversation, connect the dialogue to a yellow trigger block. For instance, if a cat bumps into a dog, the dog could say, “Hello, friend!”
Since ScratchJr has limited built-in sounds, kids can use the green “Record” block to add their own voices, making the story more engaging and personal. To add depth, use the red “Go to Scene” block to transition between up to four pages, with each page representing a new part of the story. This project builds on earlier lessons, encouraging kids to combine creativity with technical skills.
Simple Maze Game
Creating a maze game is a fun way to practice spatial reasoning and logical thinking. Kids can draw the maze walls using the Paint Editor and plan their maze layout using the 20 x 15 grid. Choose a small sprite, like a bee or a ball, and use the purple “Shrink” block to ensure it fits through narrow paths.
Program the sprite’s movements with blue motion blocks, triggered by “Start on Tap” blocks for directional control. Place a goal sprite, like a star, at the maze’s exit. Then, use the “Start on Bump” block to trigger a victory message or transition to a “You Win” screen when the character reaches the goal. This project builds on earlier skills while introducing kids to game design basics.
Animated Background Scene
This project focuses on creating a lively scene with multiple moving elements. Add characters like clouds, birds, or cars, and use the orange “Speed” block to make each sprite move at a different pace across the screen. To create a natural rhythm, use the “Wait” block to stagger when each sprite starts moving.
Incorporate the orange “Repeat” block to keep elements moving continuously. For added complexity, use the red “Change Page” block to automatically switch to a new background when a character reaches a specific point. This allows kids to create a multi-scene animation – imagine a car driving from the city to the countryside, with each scene displaying a new landscape. This project reinforces ScratchJr fundamentals while encouraging imaginative storytelling and animation skills.
Benefits of ScratchJr and Next Steps
Educational Benefits of ScratchJr
ScratchJr lays the groundwork for essential skills like sequencing, problem-solving, and logical thinking. For example, linking a “Start on Tap” block with motion blocks teaches kids to break larger tasks into smaller, manageable steps – this is the heart of computational thinking.
The platform also supports early literacy and numeracy development. According to Mitchel Resnick from MIT Media Lab:
“Coding for kids is just like writing; it can help people express their ideas and organize their thoughts.”
With ScratchJr, kids visually organize their thoughts, explore cause-and-effect relationships using trigger blocks, and grasp basic spatial math through its 20 x 15 grid system. Its accessibility across different communities highlights its value as a learning tool.
ScratchJr doesn’t just teach technical skills – it encourages creativity and personal expression. The Paint Editor allows kids to design their own characters, while the Voice Recorder lets them add custom dialogue and sound effects. Marina Bers from Tufts University emphasizes this aspect:
“We believe that learning how to code is a way to express yourself.”
This mix of logic and creativity not only strengthens problem-solving skills but also boosts confidence. These foundational abilities prepare young learners for more advanced coding platforms down the road.
Moving to Advanced Coding Tools
Once kids have a solid grasp of ScratchJr’s block-based logic – usually by age 8 – they’re ready to explore more advanced tools. A natural progression is Scratch 3.0, which introduces concepts like variables, coordinate planes for X and Y positioning, and access to a global community of over 92 million users. This step also enhances reading skills, as Scratch replaces icons with text-based blocks.
For those eager to dive deeper, platforms like CodaKid offer project-based courses that use professional programming languages. Options include Python with Pygame for creating 2D games, Lua in Roblox Studio for 3D game development, and Java for Minecraft Modding. These courses build on the sequencing, loops, and event-handling concepts learned in ScratchJr, providing young coders with the tools to transition from visual blocks to text-based coding environments.

Conclusion (Ultimate Guide to ScratchJr)
ScratchJr offers kids ages 6–10 an excellent starting point for learning to code. Its icon-based interface eliminates the need for reading, making it accessible even for younger children. By arranging blocks in a sequence, kids build skills like logical thinking, sequencing, and problem-solving.
This platform transforms screen time into an active, creative experience. With tools like the Paint Editor and Voice Recorder, kids can bring their ideas to life visually and verbally, all while grasping key computational concepts and developing persistence.
ScratchJr also sets the stage for the next step in coding. The foundational concepts they learn – like events, loops, and motion – prepare them to transition to more advanced platforms. Around ages 8 or 9, as reading skills improve, children can move on to Scratch 3.0 or even explore text-based coding languages through structured programs. This progression naturally leads to more complex, project-based coding opportunities.
For kids ready to dive deeper, CodaKid provides a smooth transition from visual blocks to real programming languages. With over 85 courses covering Python, Lua for Roblox, Java for Minecraft modding, and more, CodaKid uses project-based learning to keep kids engaged. Courses start at $29/month for self-paced learning or $249/month for personalized one-on-one sessions.
The problem-solving, creativity, and logical thinking skills your child develops with ScratchJr serve as a foundation for future success – not just in coding, but in any field that values innovation and critical thinking. Whether they continue with visual programming or advance to text-based languages, they’re learning how to think, create, and solve like true innovators.
FAQs (Ultimate Guide to ScratchJr)
How do I share or export a ScratchJr project?
To share or export a ScratchJr project, first open the project you want to share. Tap the yellow tab in the top-right corner and choose the “For Parents” option. You’ll need to complete a quick math question to proceed.
From there, you can share the project via email or AirDrop if you’re using an iPad. To export the project, use the “Share” option to save it as a file in the .sb3 format or upload it to cloud storage services like Google Drive. If you need to re-import a project later, just use the “Import” option available in the project gallery.
Why won’t my sprite move when I press the Green Flag?
If your sprite doesn’t respond when you press the Green Flag, start by checking the connections between your programming blocks. Make sure a move or action block is directly attached to the Green Flag block in the proper order. Also, confirm that the sprite isn’t locked or hidden. Look closely for any missing or misplaced blocks that might disrupt the flow of your program.
What should my child learn next after ScratchJr?
After getting comfortable with ScratchJr, kids can move on to Scratch, which offers more advanced programming blocks. With Scratch, they can create intricate stories, animations, and games, all while sharpening their problem-solving and logical thinking abilities.
For kids aged 8 and up, diving into real programming languages like Python or JavaScript can take their skills to the next level. Platforms like CodaKid provide options such as self-paced courses, virtual camps, or private lessons, helping young learners deepen their knowledge and get ready for more advanced coding challenges.


