Table of Contents
Roblox Lua Scripting Basics for Beginners
Roblox Studio is your gateway to creating interactive games, and Roblox Lua scripting basics is the key to making them come alive. This guide introduces you to Luau, Roblox‘s custom version of Lua, and walks you through scripting essentials like variables, loops, functions, and events. Whether you’re adjusting game object properties, creating dynamic gameplay, or debugging scripts, this article covers the basics to help you start building.
Key Takeaways (Roblox Lua Scripting Basics):
- Roblox Studio Setup: Free to download for PC/Mac; includes tools like the Explorer, Properties, and Output panels.
- Luau Basics: Learn about data types (numbers, strings, booleans), variables (
localfor better performance), and conditionals (if,while,for). - Functions: Create reusable code blocks for tasks, and use Roblox’s built-in methods for game mechanics.
- Object Properties: Modify attributes like color, size, and transparency with dot notation.
- Events: Use
:Connect()to trigger actions like changing colors or responding to player interactions.
Getting Started with Roblox Studio
Installing and Setting Up Roblox Studio (Roblox Lua Scripting Basics)
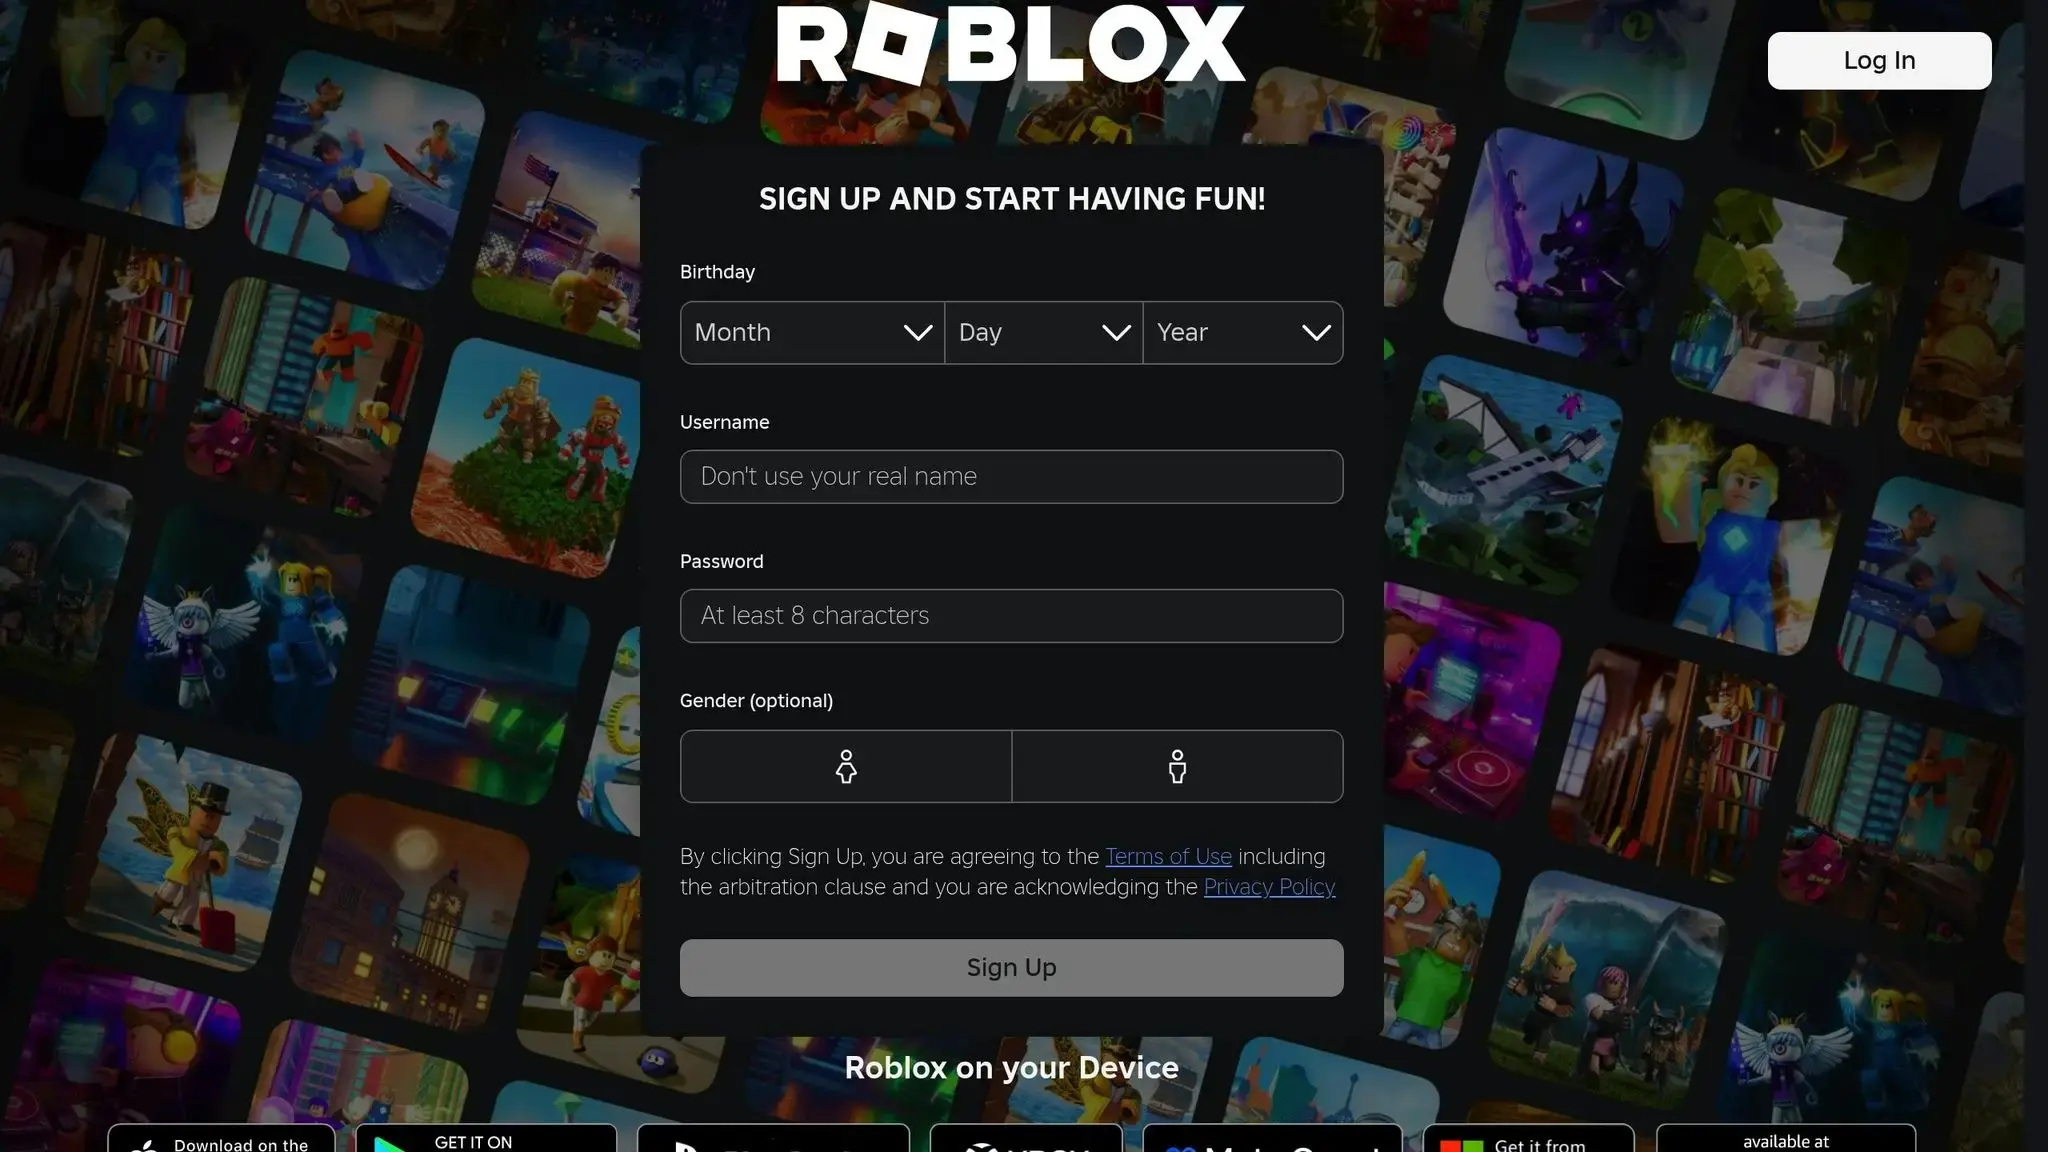
Roblox Studio is completely free and can be downloaded directly from the official Roblox website or the Roblox Creator Hub. To get started, you’ll need to create a Roblox account, which also allows you to publish your games once they’re ready.
While the Roblox app works on phones, tablets, and gaming consoles, Roblox Studio is specifically designed for desktop use – available for both PC and Mac. After downloading the installer, simply follow the on-screen instructions to set everything up and start creating.
Understanding the Roblox Studio Interface
When you open Roblox Studio for the first time, you’ll notice several key panels that work together to help you build and script your game. Here’s a quick rundown of the essentials:
- Explorer Panel: Think of this as your game’s directory. It lists every object, model, and script in your project, so you can easily organize and manage everything – from adding new scripts to tweaking parts in your Workspace.
- Properties Window: This shows the specific attributes of any selected object. For example, you can adjust an object’s color, transparency, or even anchor it to prevent gravity from affecting it.
- Output Window: This is your go-to for debugging. It displays messages and error reports (highlighted in red), making it essential to keep open while scripting.
If any of these windows are missing, you can bring them back by clicking their icons under the View tab. Another handy tool in the View tab is the Command Bar, which allows you to run Luau code instantly without needing a full playtest.
Once you’re familiar with these tools, you can personalize your workspace further through Studio Settings. For instance, you can enable dark mode or adjust the font size in the Script Editor to make coding more comfortable. With the interface under your belt, you’ll be ready to dive into learning Lua and start bringing your game ideas to life.
3D Game Programming with Roblox
Roblox Lua Scripting Basics for Beginners
Lua Operators and Loop Types Quick Reference Guide for Roblox
Data Types and Variables in Lua
Luau, a specialized version of Lua 5.1, is optimized for game scripting, offering better performance and type checking. According to the Roblox Creator Documentation:
“Luau is the scripting language creators use in Roblox Studio. It is a fast, small, safe, gradually typed embeddable scripting language derived from Lua 5.1.”
At its core, variables are used to store data in a game. Declaring variables as local, such as local playerScore = 0, helps improve performance and keeps your codebase organized by avoiding unnecessary global variables.
Luau offers several key data types you’ll frequently encounter:
- Numbers: These are double-precision (64-bit) floating-point values. For example,
local health = 100stores a numeric value. - Strings: Text enclosed in quotes, like
local playerName = "Alex". Strings can be combined using the concatenation operator... For instance,print("Welcome, " .. playerName)would output “Welcome, Alex” in the Output window. - Booleans: These store
trueorfalsevalues, often used to track game states. For example,local doorIsOpen = false.
It’s important to note that in Luau, both 0 and "" are treated as true. Only false and nil (which represents a lack of value) evaluate as false.
To make your code more readable and maintainable, always use descriptive variable names. For example, currentGoblinCount is far clearer than a vague name like myVariable.
Mastering these basics lays the groundwork for implementing conditionals and loops to create dynamic gameplay.
Conditionals and Loops
Once you’re comfortable with variables and data types, you can start using conditionals and loops to control game logic.
Conditionals enable your game to make decisions based on certain conditions. The simplest example is an if statement, which executes code if a specified condition is true. For instance, if playerHealth < 20 then could trigger a warning when the player’s health drops too low. Remember, you use == for equality checks, not =.
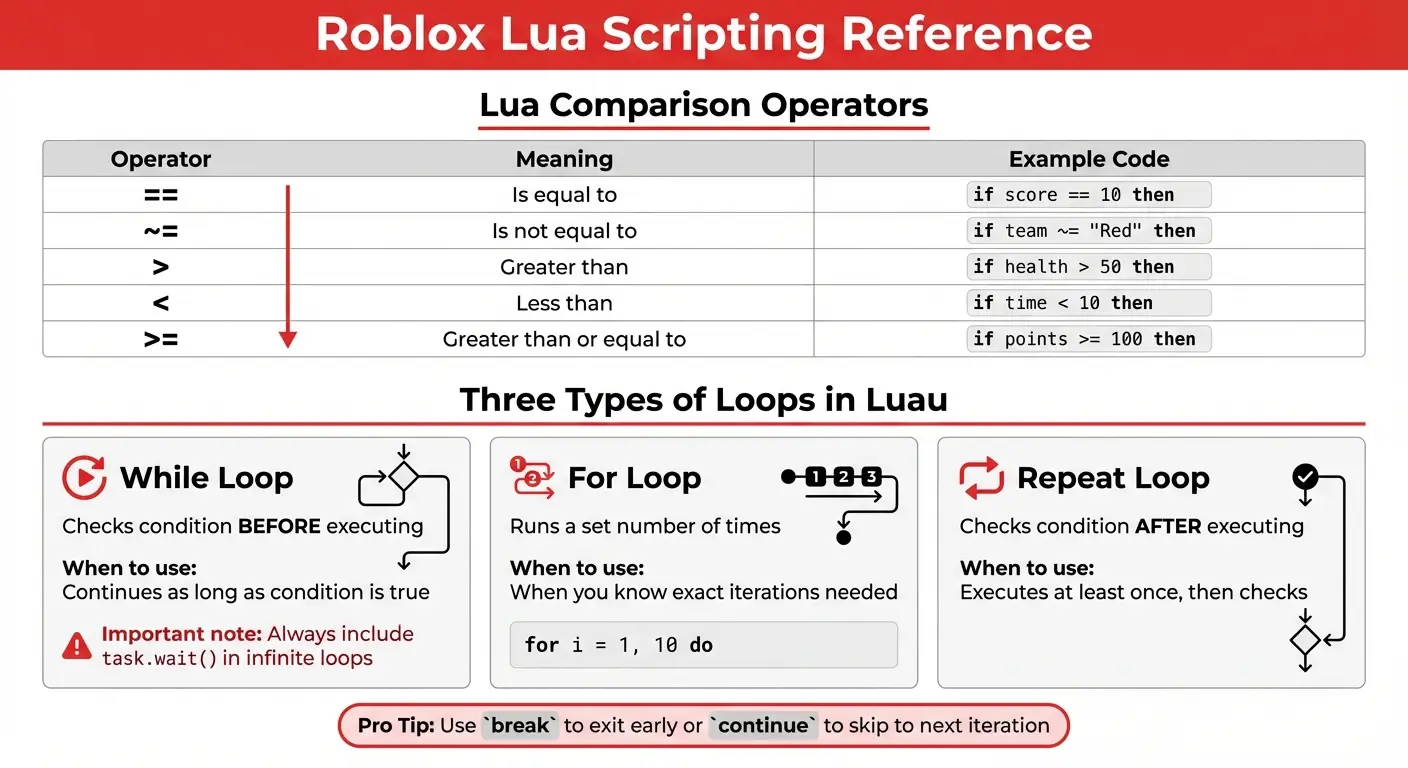
Here’s a quick reference for common operators:
| Operator | Meaning | Example |
|---|---|---|
== | Is equal to | if score == 10 then |
~= | Is not equal to | if team ~= "Red" then |
> | Greater than | if health > 50 then |
< | Less than | if time < 10 then |
>= | Greater than or equal to | if points >= 100 then |
Loops allow you to repeat actions multiple times. There are three main types of loops in Luau:
- While loops: These check the condition before executing the code and continue as long as the condition remains true.
- For loops: These run a set number of times, using a counter. For example,
for i = 1, 10 doruns the code block exactly 10 times. - Repeat loops: These are slightly different – they execute the code at least once and then check the condition afterward.
One critical tip: If you’re using infinite loops like while true do, always include a task.wait() inside the loop. This small delay prevents Roblox Studio from freezing or crashing. Additionally, you can use break to exit a loop early or continue to skip the rest of the current iteration and move to the next.
How to Create and Use Functions (Roblox Lua Scripting Basics)
Writing and Calling Functions
Functions are a way to organize code into reusable blocks that perform specific tasks. As the Roblox Creator Documentation puts it:
“Functions are sets of instructions that can be used many times in a script.”
To define a function, start with the local keyword, followed by function, then give it a name (typically in camelCase), and finish it off with the end keyword. For example:
local function greetPlayer()
    print("Welcome to the game!")
end
Here, the function greetPlayer displays a welcome message. Notice how the code inside the function is indented – this keeps things organized and easier to read.
Functions can also accept inputs, known as parameters. When you call the function, you pass arguments that correspond to these parameters. For example:
local function addNumbers(num1, num2)
    return num1 + num2
end
In this case, num1 and num2 are parameters. If you call the function like this: addNumbers(5, 10), it will return the sum, 15. If you don’t provide enough arguments, the missing ones default to nil. Extra arguments, on the other hand, are simply ignored.
The return keyword is used to send data back to wherever the function was called. Keep in mind, as soon as return executes, the function stops running. Also, make sure your function is fully defined and closed with end before calling it in your script – this avoids errors.
Custom functions work seamlessly alongside Roblox’s built-in methods, making them a key tool for creating interactive and dynamic gameplay.
Using Built-In Roblox Functions
Roblox offers a variety of built-in functions to handle common tasks. For instance:
print()displays messages in the Output window, which is useful for testing and debugging.task.wait()pauses script execution for a specified amount of time, helping to prevent issues like infinite loops from crashing your game.
You can combine these built-in functions with your own custom functions to create complex game mechanics. For example, you might write a function that uses part:Destroy() to remove an object after a delay or part:Clone() to duplicate an item. When working with object-specific methods like these, you’ll use colon notation (e.g., part:Destroy()), which automatically passes the object as the first argument.
As the Roblox Creator Documentation notes:
“Coders can also create their own custom functions for code they want to use more than once, but don’t feel like writing over and over.”
Custom functions not only save time but also make your code cleaner and easier to maintain. They can also be linked to Roblox events using the :Connect() method. For example, you can create a function that triggers whenever a player clicks a button or enters a specific area. This flexibility allows you to build responsive and engaging experiences for players.
Working with Objects and Events in Roblox (Lua Scripting Basics)
Changing Object Properties
In Roblox Lua scripting basics, every object comes with properties that define how it looks and behaves. These properties include attributes like color, size, transparency, and whether it’s affected by physics. To modify these, you’ll need to locate the object in the Explorer (found under workspace or accessed via script.Parent).
You can access and change properties using dot notation. For instance, if you have a part named myPart, you can access its color with myPart.Color. To update it, assign a new value using the = operator. Keep in mind that properties require specific data types. For example:
- Use
Color3.fromRGB(r, g, b)for colors. - Use
Vector3for size and position. - Use a number between 0 and 1 for transparency.
- Use
trueorfalsefor boolean flags likeAnchored.
Here’s a quick example of how to adjust several properties for a part:
local part = script.Parent
part.Color = Color3.fromRGB(255, 0, 0)  -- Changes the color to red
part.Size = Vector3.new(10, 1, 10)      -- Sets the size
part.Transparency = 0.5                 -- Makes it semi-transparent
part.Anchored = true                    -- Stops it from falling
To avoid mistakes, double-check property names and their types in the Properties window in Roblox Studio. If you need to detect changes to a specific property, use Instance:GetPropertyChangedSignal("PropertyName"). This is more efficient than relying on the general .Changed event.
Once you’ve modified an object’s properties, you can make these changes dynamic by tying them to game events.
Using Events in Roblox
Events in Roblox act as triggers for specific actions within the game. They’re designed to execute code only when something happens, such as a player touching a part or clicking a button. As described in the Roblox Creator Documentation:
“All connections to an object’s non-deferred events are automatically disconnected if an object is destroyed.”
To make objects interactive, you can use the :Connect() method. This ensures that your function runs every time the event is triggered.
Some events provide arguments to the connected function. For example, the Touched event passes the object that made contact, enabling you to identify what interacted with the part. Here’s an example:
local part = script.Parent

local function onTouch(objectTouched)
    print("Something touched the part!")
    part.Color = Color3.fromRGB(0, 255, 0)  -- Changes the color to green
end

part.Touched:Connect(onTouch)
For one-time events, use :Once(). This disconnects the function automatically after it runs once. While Roblox automatically disconnects events when objects are destroyed, it’s still a good habit to manually call :Disconnect() for unused connections. If you store the connection in a variable (e.g., local connection = part.Touched:Connect(onTouch)), you can easily disconnect it later when needed.
Practice Roblox Lua Scripting Projects for Beginners
Think about how loops, functions, and property changes work – now’s the time to put them into action with these hands-on projects. These exercises are a great way to dive into interactive Roblox Lua scripting basics projects while reinforcing core concepts.
Making a Color-Changing Brick
This project uses a while loop to create a part that cycles through different colors nonstop. Start by adding a Part to the workspace and renaming it LoopingPart. Next, insert a Script into the ServerScriptService and name it LoopingScript.
Inside the script, reference the part with this code:
local loopingPart = workspace.LoopingPart
Then, set up a while true do loop to assign new colors using Color3.fromRGB(). The full code looks like this:
local loopingPart = workspace.LoopingPart

while true do
    loopingPart.Color = Color3.fromRGB(255, 0, 0) -- Red
    task.wait(2)
    loopingPart.Color = Color3.fromRGB(0, 0, 255) -- Blue
    task.wait(2)
end
The task.wait(2) line pauses the loop for two seconds between color changes. Without this pause, the game would freeze as Studio wouldn’t have time to process anything else. As the Roblox Creator Hub advises:
“Whatever you do, never make a while true loop without including a task.wait() – and don’t test your code before you’ve put one in! If you don’t wait, your game will freeze because Studio will never have a chance to leave the loop and do anything else.”
Creating a Disappearing Platform
This project focuses on toggling properties to create an interactive obstacle. Start by adding a Part, renaming it DisappearingPlatform, and checking the Anchored box in the Properties window to keep it suspended in mid-air. Then, insert a Script directly into the part and name it Disappear.
To make the platform disappear, you’ll adjust two key properties:
- Set Transparency to
1to make it invisible. - Set CanCollide to
falseso players fall through it.
Here’s how these properties work together:
| Property | Value for Visible | Value for Disappeared | Effect |
|---|---|---|---|
| Transparency | 0 | 1 | Controls visibility of the platform. |
| CanCollide | true | false | Determines if players can stand on it. |
| Anchored | true | true | Keeps the platform in place. |
In the script, define two functions:
disappear()sets Transparency to 1 and CanCollide to false.appear()restores Transparency to 0 and CanCollide to true.
Use a while true do loop to alternate between these functions with delays using task.wait().
Adding Visual Effects with Loops
Building on the earlier projects, this exercise uses loops to create dynamic visual effects. For example, for loops are perfect for timed sequences. A simple for count = 1, 10 do loop runs the code 10 times, ideal for countdowns or animations. You can also reverse the loop using a negative increment, like for count = 10, 0, -1 do, which counts down from 10 to 0.
To make a flashing light effect, combine a while true do loop with short task.wait(0.1) intervals. This method toggles the light’s Brightness property or cycles through colors, creating a strobe-like effect. For a pulsing effect triggered by a player pressing a button, you can use a for loop with an increment of 2, such as for count = 0, 10, 2 do. This approach executes the loop on even numbers only, creating a steady rhythm.
Next Steps in Your Roblox Lua Scripting Journey
By now, you’ve got the hang of variables, functions, conditionals, loops, and events – essential building blocks for creating everything from player interactions to NPC behaviors in Roblox. The next step? Take these basics and start crafting more intricate projects. The more you build, the more you’ll refine your skills.
To push your scripting abilities further, dive into advanced topics that can elevate your games. The Roblox Creator Documentation offers a free “Coding Fundamentals” series that introduces concepts like dictionaries and arrays, which are key to managing complex data. For a deeper technical understanding, the Luau Reference Manual is a must-read. It covers features like type checking, performance optimizations, and string interpolation – tools that go beyond standard Lua. Also, don’t overlook the power of ModuleScripts. These allow you to organize and reuse code across different parts of your game, making your workflow smoother and more efficient.

If you’re looking for structured guidance, platforms like CodaKid offer excellent resources. Their Roblox-focused courses are self-paced ($29/month) and include a 14-day free trial. For a more personalized experience, they also provide private 1:1 lessons starting at $249/month. What sets CodaKid apart is its use of real programming languages and professional tools, combined with unlimited help desk support from certified teachers. As David Dodge, the CEO and founder of CodaKid, puts it:
“Roblox scripts are a great, beginner-friendly way to ease into the world of coding”.
To solidify your learning, focus on project-based exercises. Move beyond simple setups and explore guided tutorials like the “Basic gameplay tutorial”, which demonstrates how scripts work together in a complete game environment. As you code, follow best practices: use camelCase for local variables and PascalCase for Roblox APIs. Gradually, you’ll find yourself tackling advanced concepts like variadic functions, callbacks, and sophisticated logic systems. The key is consistent practice and a willingness to take on increasingly challenging features.
FAQs (Roblox Lua Scripting Basics)
What are common mistakes beginners make when using loops in Roblox Lua scripting basics?
When working with loops in Roblox Lua scripting basics, beginners often stumble upon a few typical errors. Let’s break them down and see how to avoid them:
- Infinite loops: This happens when you forget to include a condition that eventually becomes false or skip using a
breakstatement. The result? Your loop keeps running endlessly, which can freeze your game. Always double-check that your loop has a clear stopping point. - Incorrect
forloop setup: Aforloop needs three key parts: a control variable, an end value, and an increment. If your increment is set to0or your end value is unreachable, the loop might never terminate. Pay close attention to these details to ensure smooth execution. - Overusing nested loops: Nested loops can help with complex tasks, but piling on too many layers can make your script harder to read and significantly slow down performance. Keep them to a minimum and use them only when absolutely necessary.
If you’re looking for a practical way to master loops and avoid these pitfalls, CodaKid offers beginner-friendly courses that walk you through Roblox Lua scripting basics step by step.
What’s the best way to debug scripts in Roblox Studio?
Debugging scripts in Roblox Studio is straightforward thanks to its built-in tools. To get started, add breakpoints by clicking next to the lines of code you want to examine in the editor. Then, test your game by selecting either Play or Run. When the code execution hits a breakpoint, the session will pause, allowing you to dig deeper using the Watch, Call Stack, and Output windows.
The Watch window is great for keeping an eye on specific variables, while the Call Stack helps you trace the chain of function calls that led to the breakpoint. The Output window, on the other hand, is useful for spotting error messages or reviewing custom print statements. You can also set conditional breakpoints, which will pause the code only when certain conditions are met, giving you even more control.
By practicing these debugging techniques, you’ll get better at spotting issues like logic errors or unexpected event behaviors. If you’re looking for extra help, CodaKid’s Roblox Lua scripting basics courses provide hands-on lessons to sharpen your skills and ensure your games run smoothly.
Why should I use local variables in Luau scripting?
Using local variables in Luau scripting brings a number of practical benefits. For starters, they improve performance by restricting the variable’s scope to the block where it’s defined. In simpler terms, the variable is only available within that specific section of the script, which helps prevent accidental overwrites or conflicts with global variables.
On top of that, local variables help keep your code tidy by avoiding unnecessary additions to the global namespace. This makes your scripts easier to debug and maintain – especially as they become more complex over time.