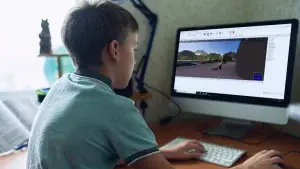
Minecraft is a fairly magical sandbox game that, to this day, has yet to run out of popularity. Some may attribute its longevity and replay value to its open-world setting and simple design. And while those two factors definitely play a role, it must be said that the existence of Minecraft mods heavily contributes to its undying success.
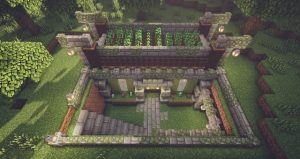
Minecraft mods are basically pieces of community-created content that add new items, upgrades, variations, expansions, and other modifications (hence the name) to the game. They can be a lot of fun to play around with and, for long-time players, they can breathe new life into what could either be a repetitive game.
If you’ve always wanted to try out Minecraft mods but weren’t sure where to begin, don’t worry. Our full guide on how to install Minecraft mods will make the process easy to understand and relatively painless to follow.
Once you’re done learning how to install Minecraft mods be sure to check out CodaKids’ online classes. Enroll in a 14-day free trial.

Table of Contents
Install Minecraft Mods: A Pre-Installation Checklist
Before you begin looking for mods to download and install, we recommend going over this checklist. This will make sure you’re in the most optimized situation to install and play around with mods.
- Assess Your Control Over Your PC. Downloading and Installing mods will require to do a decent amount of digital grunt work like moving files, changing file names (and sometimes extensions), and downloading extra programs. You might even need to change your Minecraft version or purchase an update (we’ll explain why in the next point).
Make sure you’re comfortable doing all that on your PC. If you’re sharing the PC with someone else, maybe get their permission first. If you’re unsure or uncomfortable with this, you’ll find it difficult to install most Minecraft mods.
- What’s Your Minecraft Version? Unfortunately, full mods won’t work with Minecraft Bedrock. In order for you to download, install, and enjoy all the Minecraft mods that you want, you’ll need to have Minecraft: Java Edition on your PC. It’s available for $27 on Mojang, and you’ll need a Mojang account for it.
- Check Your Storage Space. Just like any download, mods are going to take up storage space. They can range anywhere from a couple hundred to a couple thousand MB. The recommended storage requirement for Minecraft Java Edition is at least 4GB, and SSD over the classic HDD.
If your computer doesn’t have more than 4GB of storage to spare, you might need to do a little spring cleaning (or else get a full-on storage upgrade).
- Can Your Computer Handle It? A quick Google search should tell you all the recommended device specs for Minecraft, but here are some of the basics:
- GPU: any graphics card that supports OpenGL 1.3 API and VBOs
- OS: Windows 7 or higher, OS X 10.9 Maverick, or any Linux distribution from 2014 onwards
- RAM: 4GB, at least DDR3 1600 MHz
If your PC’s specs are lower than their recommended minimum specs, you, unfortunately, won’t be able to install and enjoy Minecraft mods.
Pre-Installation Precautions
As with anything online, it’s best to exercise caution when searing for Minecraft mods to download. There will be a lot of seemingly innocent download links and websites hiding viruses and Trojans.
Usually, search engines will return the safest results they can (especially if you have certain filters and parameters in place to protect you). However, it’s not impossible for shady pages to slip through your firewall. Always be on guard when running searches.
Stay on websites that are well-known, have a lot of traffic, and are highly recommended by the Minecraft or gaming community as safe, trustworthy mod sources. For example:
- minecraftforum.net
- minecraftmods.com
- curseforge.com/minecraft/mc-mods
- pcgamesn.com
Take note that many mods will have shortened links via AdFly as a way to monetize their creations. AdFly is a reasonably safe third-party URL shrinker, but still.
Always be cautious.
There are still ways for viruses to creep in during that 5- to 10-second period between AdFly running its ads and AdFly finally leading you to the download page.
Here are some rules to remember when clicking AdFly links:
- never click on “obvious-looking” download buttons while you’re still on the Ad page
- never click “Allow” when a dialog box pops up while you’re on the Ad page; always choose “Block”
- always click the big yellow Skip Ad button once it lets you; never click on anything else
- never click on any links on the Ad page, even if you genuinely want to see what they’re offering or where they say they’ll take you
Always use your best judgment when downloading. When in doubt, call for an adult or search for verified reviews.
PHASE I: Install Minecraft Forge
Before you begin downloading mods, you’ll need to have Minecraft Forge installed.
Minecraft Forge is a free, open-source server that allows players to install and run Minecraft mods. It’s designed to optimize simplicity and ease-of-use. It’s also designed to maximize compatibility between community-created content and the game itself. With Forge, you can completely customize your Minecraft experience.
Step 1. Download Forge.
We recommend downloading the most recent version. Forge has been around almost as long as Minecraft (it was introduced during Minecraft 1.13.2), so there’ll be a lot of versions to choose from. Unless you’re interested in playing with older mods that are no longer supported or have been discontinued, you’ll have better results downloading the latest version.
Important: remember to click on the button that corresponds to your operating system; “Windows Installer” for Windows users, “Installer” for Mac and Linux users.
Step 2. Run the Forge Program.
Once you’ve got the Forge Program safely nestled in your Downloads folder, you’ll have to run it. Simply double-click the .jar file (or right-click it and select “Run as Administrator” if that option pops up for you) and let it run.
What if my Antivirus Program warns me about Forge?
It’s not uncommon for antivirus programs like Windows Defender to identify Forge as a “malicious” software. This isn’t true (as long as you downloaded it from the recommended link). Forge has been downloaded – and continues to be downloaded – by millions of people worldwide.
Simply close the warning, add the .jar file to your exceptions list, or basically do whatever you need to do to make sure your system takes no action against Forge. Trust us; it’s 100% safe.
Step 3. Install Forge into Minecraft
Once you’ve selected the .jar file and opened it, you can get Forge installed into Minecraft in just two clicks.

At the top of the Forge window, you’ll see three options (next to radio buttons): Install Client, Install Server, Extract. Make sure you select Install Client. Scroll down to the bottom and click the OK button.
Remember; your Forge version must match your Minecraft version. If you’re running the vanilla Minecraft 1.13 version, you must download and install the 1.13 version. If you update Minecraft on the regular, then your Minecraft version will most likely match the latest Forge version.
Step 4. Verify Successful Installation
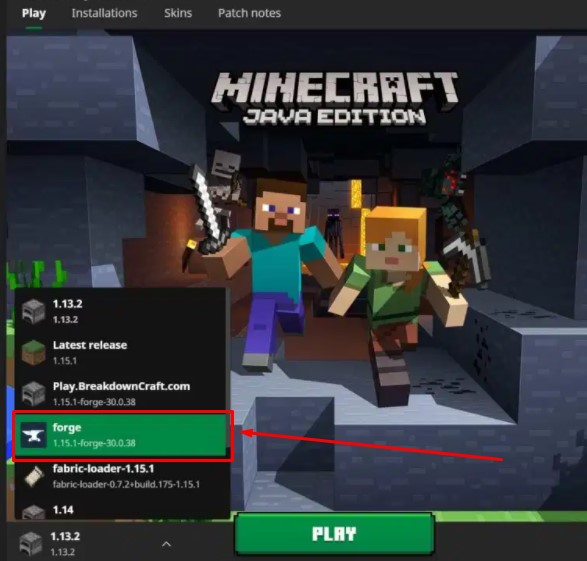
Once you get the verification that Forge has been installed, open your Minecraft Launcher. Hover on the arrow next to the big green Play button and click to expand the menu. You should see “Forge” on the list of installed programs and updates. Select it and hit the Play button. This will launch Minecraft with Forge fully installed, ready for some modded content.
PHASE II: Install Minecraft Mods
Now that you have Forge installed for Minecraft: Java Edition, a wonderful new world awaits you.
Step 1. Find mods to download.
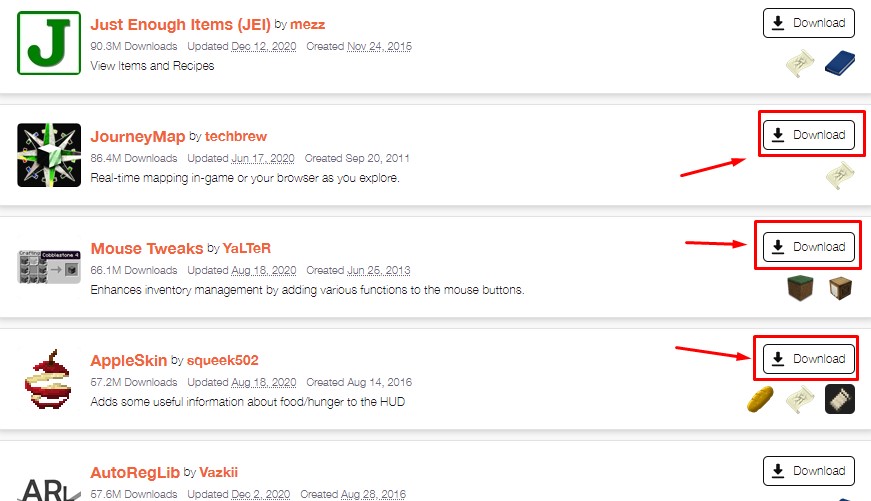
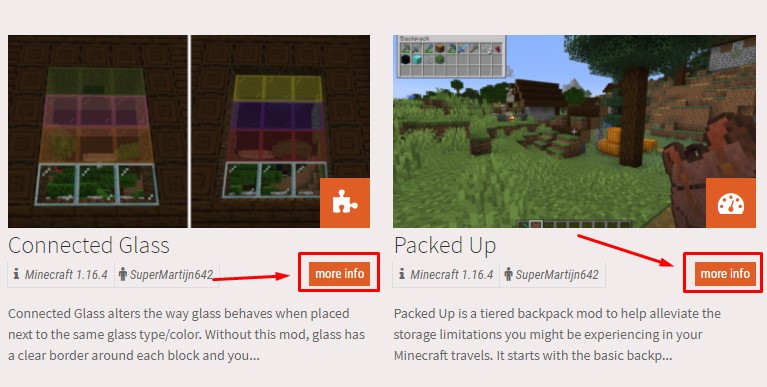
Now, to install Minecraft mods, we first need to find some. So go ahead and navigate to those safe Minecraft mod source websites we recommended, like minecraftmods.com or Curse Forge. Downloading the mods will depend on the website you visit, but they should all follow a pretty clear format that tells you the name of the mod and what it does. All items should also have a fairly obvious Download button.
This is the setup for Curse Forge:
And this is the setup for Minecraft Mods:
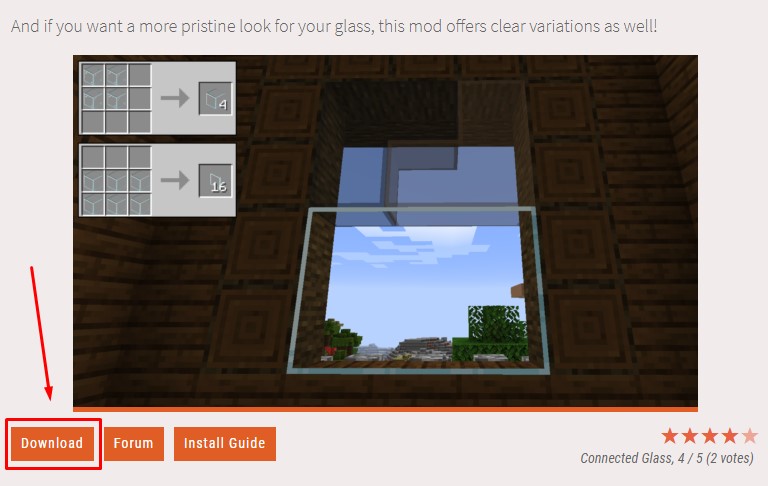
Once you find a mod that you want, download it to either your default Downloads folder or have it downloaded to your mods folder immediately. If you choose the first option, you can always manually move the download to your Minecraft mods folder.
Step 2. Locate your Minecraft mods folder.
Your mods folder can typically be found inside your .minecraft folder, which is usually in you C: drive. So go to Local Disk (C:) > Users > yourname > AppData > Roaming > .minecraft, where “yourname” is the name you entered as the main user of the PC.
Alternatively, simply type C:UsersyournameAppDataRoaming.minecraft into your File Explorer’s address bar. It should bring up the correct location. You’ll most likely see a couple of folders alongside your mods folder (i.e., logs folder, saves folder, assets folder, etc.).
Step 2.1. On the off-chance that you don’t see a mods folder inside the .minecraft folder, you can always make one. Simply right-click anywhere inside the .minecraft folder, select new > folder, and then rename the New Folder to Mods.
Step 3. Make sure your downloaded mods are in your “mods” folder.
In order for you to install your new mods, make sure they’re in your Minecraft Mods folder. You can either move the mods manually (via the classic Cut-and-Paste or Copy-Paste method) to your mods folder (within the .minecraft folder) or you can download the mods directly to your mods folder.
Step 4. Launch Minecraft with Forge installed.
If you did everything according to this guide and no unforeseen complications arrived, your mods should take immediate effect/appear immediately in your game. Enjoy!
PHASE III: Final Considerations
Before we end this article, here are just a few more things to take into consideration regarding downloading, installing, and running Minecraft mod.
- Mods can sometimes have compatibility issues with other mods. This simply means that some mods – especially ones from different creators – might not get along. To figure out which ones are quarreling, we recommend disabling mods one at a time until you find the perpetrators. From there, you’ll have to decide which one you want to keep and which one you can do without.
- Disabling mods is much easier than uninstalling them completely. All you need to do is add the extension “.disabled” to the end of the mod’s filename. This will prevent them from popping up in-game.
- Most mods don’t allow multiplayer, so make sure you’re not downloading any mods with the intent of sharing the experience with your friends. They simply don’t work that way.
Now that you know how to install Minecraft mods, you’re in for a real treat. Community-created content really livens up the game due to the simple fact that players know what their fellow players want. It’s much easier for consumers to create the content they want because they’re privy to other consumers’ preferences, desires, and opinions.
Lets recap what we covered in our Minecraft mods installation guide:
Table of Contents:
- Pre-Installation Checklist
- Pre-Installation Precautions
- Phase 1: Install Minecraft Forge
- Phase 2: Install Minecraft Mods
This means that the mods they create will most likely be something you’ve always wanted in the Minecraft world or something that you didn’t know you wanted in the Minecraft world.
Either way, your Minecraft experience will never be the same.
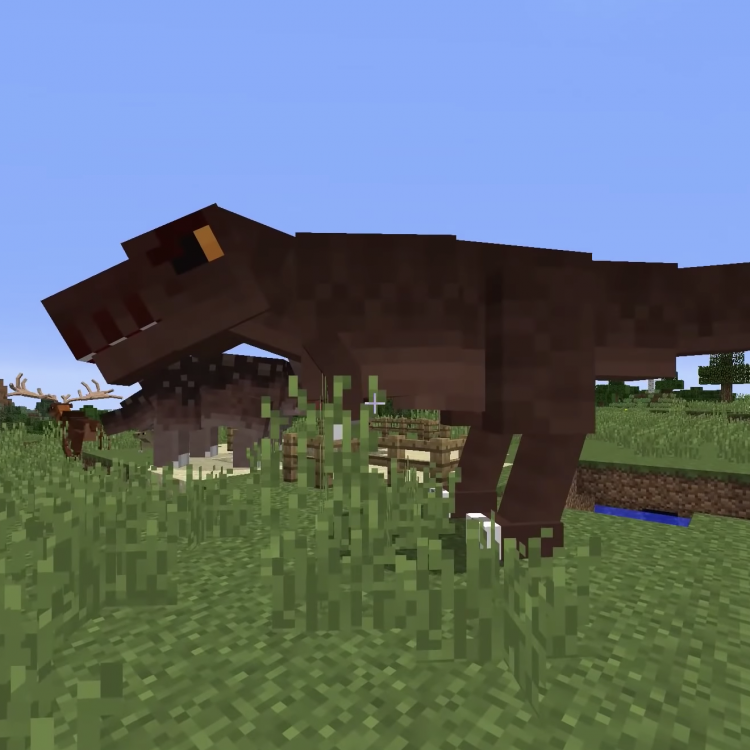
Now that you know how to install Minecraft mods, take a look at the best Minecraft mods for you.
Want to learn how to code and create your own custom Minecraft mods using Forge and Java? Enroll in CodaKid’s 14-day free trial and take your Minecraft experience to the next level while learning an invaluable 21st century skill.